Hello to all, welcome to therichpost.com. In this post, I will tell you, How to upload image with Laravel Angular?
If you are new in Laravel or Angular then you can check my previous posts related to Angular and laravel.
Here is the second part of this post : How to get image from laravel and show in angular?
Angular Installation and Working:
1. Very first, you need to run common below commands to add Angular 7 project on your machine:
$ npm install -g @angular/cli

$ ng new angularlaraveluploadimage //Install fresh Angular setup

$ cd angularlaraveluploadimage //go inside angular fresh setup
2. Now you need to add the below code into your src\app\app.module.ts file:
import { BrowserModule } from '@angular/platform-browser';
import { NgModule } from '@angular/core';
import { HttpClientModule } from '@angular/common/http';
import { AppComponent } from './app.component';
import { FormsModule }   from '@angular/forms';
@NgModule({
  declarations: [
    AppComponent
  ],
  imports: [
    BrowserModule,
    HttpClientModule,
    FormsModule
  ],
  providers: [],
  bootstrap: [AppComponent]
})
export class AppModule { }
3. Now you need to add below code into your Angular 7 src\app\app.component.ts file:
import { Component } from '@angular/core';
import { HttpClient, HttpHeaders } from '@angular/common/http';
import {NgForm} from '@angular/forms';
@Component({
  selector: 'app-root',
  templateUrl: './app.component.html',
  styleUrls: ['./app.component.css']
})
export class AppComponent {
  title = 'angularlaraveluploadimage';
  filedata:any;
    fileEvent(e){
        this.filedata = e.target.files[0];
    }
  constructor(private http: HttpClient) {
  }

   onSubmit(f: NgForm) {

            var myFormData = new FormData();
            const headers = new HttpHeaders();
          headers.append('Content-Type', 'multipart/form-data');
          headers.append('Accept', 'application/json');
    	    myFormData.append('image', this.filedata);
      	this.http.post('http://localhost/blog/public/api/sample-restful-apis', myFormData, {
  headers: headers
}).subscribe(data => {
      		console.log(data);
      });

      }
}
4. Now you need to add into your Angular 7 app.component.html file:
<div style="text-align:center">
  <h1>
    Welcome to {{ title }}!
  </h1>
  <img width="300" alt="Angular Logo" src="data:image/svg+xml;base64,PHN2ZyB4bWxucz0iaHR0cDovL3d3dy53My5vcmcvMjAwMC9zdmciIHZpZXdCb3g9IjAgMCAyNTAgMjUwIj4KICAgIDxwYXRoIGZpbGw9IiNERDAwMzEiIGQ9Ik0xMjUgMzBMMzEuOSA2My4ybDE0LjIgMTIzLjFMMTI1IDIzMGw3OC45LTQzLjcgMTQuMi0xMjMuMXoiIC8+CiAgICA8cGF0aCBmaWxsPSIjQzMwMDJGIiBkPSJNMTI1IDMwdjIyLjItLjFWMjMwbDc4LjktNDMuNyAxNC4yLTEyMy4xTDEyNSAzMHoiIC8+CiAgICA8cGF0aCAgZmlsbD0iI0ZGRkZGRiIgZD0iTTEyNSA1Mi4xTDY2LjggMTgyLjZoMjEuN2wxMS43LTI5LjJoNDkuNGwxMS43IDI5LjJIMTgzTDEyNSA1Mi4xem0xNyA4My4zaC0zNGwxNy00MC45IDE3IDQwLjl6IiAvPgogIDwvc3ZnPg==">
<h2>Here are some links to help you start: </h2>
<form #f="ngForm" (ngSubmit)="onSubmit(f)">
<input type="file"  name="myFile" (change)="fileEvent($event)"/>
<button>Upload Image</button>
</form>
</div>
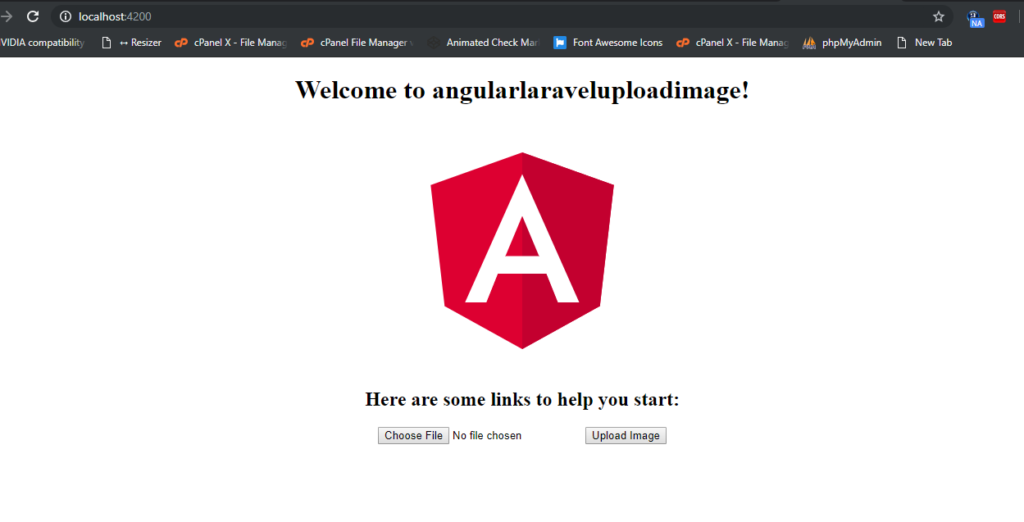
5. Now run ng serve command into your terminal and you will see below output:

Laravel Working:
1. Here is the code for your laravel 5.7 routes/api.php file:
Route::post("/sample-restful-apis" , "Controller@uploadimage");
2. Now you need to all below code into app\Http\Controllers\Controller.php file:
<?php

namespace App\Http\Controllers;

use Illuminate\Foundation\Bus\DispatchesJobs;
use Illuminate\Routing\Controller as BaseController;
use Illuminate\Foundation\Validation\ValidatesRequests;
use Illuminate\Foundation\Auth\Access\AuthorizesRequests;
use Illuminate\Http\Request;

class Controller extends BaseController
{
    use AuthorizesRequests, DispatchesJobs, ValidatesRequests;
    public function uploadimage(Request $request)
    {
      //dd($request->all());
      if ($request->hasFile('image'))
      {
            $file      = $request->file('image');
            $filename  = $file->getClientOriginalName();
            $extension = $file->getClientOriginalExtension();
            $picture   = date('His').'-'.$filename;
            $file->move(public_path('img'), $picture);
            return response()->json(["message" => "Image Uploaded Succesfully"]);
      }
      else
      {
            return response()->json(["message" => "Select image first."]);
      }
    }
}
This is it and also php artisan serve command into your second terminal and check the angular laravel working If you have any query related to this post, then do comment below or ask question.
Thank you,
Ludhiane wala ajay,
TheRichPost

Leave a Reply
You must be logged in to post a comment.