
Hello guys how are you? Welcome back to my blog. Today in this blog post I am Creating a React Admin Dashboard using Bootstrap 5, JavaScript involves setting up a basic React project and integrating Bootstrap for styling, along with some custom CSS and JavaScript for additional functionality. Here’s a simple guide to get you started, along with a basic example of an admin dashboard.
For react js new comers, please check the below links:
Step 1: Set Up the React Project
First, you need to create a new React project. If you have Node.js installed, you can use create-react-app to quickly set up your environment.
npx create-react-app react-admin-dashboard
cd react-admin-dashboard
Step 2: Install Bootstrap
Install Bootstrap 5 via npm and integrate it into your project.
npm install bootstrap
Then, import Bootstrap CSS in the src/index.js or App.js file to use it globally:
import 'bootstrap/dist/css/bootstrap.min.css';
Step 3: Create Basic Dashboard Components
You can start by creating some simple components like a navbar, sidebar, and a main content area. Here’s a simple example of how you might structure these components in React.
Navbar.js
import React from 'react';
import { useNavigate } from 'react-router-dom';

function Navbar() {
    const navigate = useNavigate();

    const handleLoginRedirect = () => {
        navigate('/login');
    };

    return (
        <nav className="navbar navbar-expand-lg navbar-light bg-light">
            <a className="navbar-brand" href="#">Admin Dashboard</a>
            <button className="navbar-toggler" type="button" data-bs-toggle="collapse" data-bs-target="#navbarNav" aria-controls="navbarNav" aria-expanded="false" aria-label="Toggle navigation">
                <span className="navbar-toggler-icon"></span>
            </button>
            <div className="collapse navbar-collapse" id="navbarNav">
                <ul className="navbar-nav ms-auto">
                    <li className="nav-item">
                        <button className="nav-link btn btn-link" onClick={handleLoginRedirect}>Login</button>
                    </li>
                </ul>
            </div>
        </nav>
    );
}

export default Navbar;
Sidebar.js
import React from 'react';
import { Link } from 'react-router-dom';

function Sidebar() {
    return (
        <div className="d-flex flex-column flex-shrink-0 p-3 bg-light" style={{width: "280px"}}>
            <ul className="nav nav-pills flex-column mb-auto">
                <li className="nav-item">
                    <Link to="/" className="nav-link active">
                        Home
                    </Link>
                </li>
                <li>
                    <Link to="/settings" className="nav-link">
                        Settings
                    </Link>
                </li>
            </ul>
        </div>
    );
}

export default Sidebar;
MainContent.js
import React from 'react';

function MainContent() {
    return (
        <div className="p-4">
            <h1>Welcome to the React Admin Dashboard</h1>
            <p>This is a simple example of a React Admin Dashboard using Bootstrap 5.</p>
        </div>
    );
}

export default MainContent;
SettingsPage.js
import React from 'react';

function SettingsPage() {
    return (
        <div className="p-4">
            <h1>Settings</h1>
            <div>
                <h2>User Management</h2>
                {/* Add form or table */}
            </div>
            <div>
                <h2>System Settings</h2>
                {/* Add settings controls like sliders, checkboxes */}
            </div>
        </div>
    );
}

export default SettingsPage;
LoginPage.js
import React, { useState } from 'react';
import { useNavigate } from 'react-router-dom';

function LoginPage() {
    const [username, setUsername] = useState('');
    const [password, setPassword] = useState('');
    const navigate = useNavigate();

    const handleLogin = (event) => {
        event.preventDefault();
        // Here, you would usually handle authentication
        // For now, let's just navigate to the main page on any input
        navigate('/');
    };

    return (
        <div className="d-flex align-items-center justify-content-center" style={{ height: "100vh" }}>
            <form onSubmit={handleLogin} className="w-100" style={{maxWidth: "320px"}}>
                <h1 className="h3 mb-3 fw-normal">Please sign in</h1>
                <label htmlFor="inputUsername" className="visually-hidden">Username</label>
                <input type="text" id="inputUsername" className="form-control mb-2" placeholder="Username" required autoFocus
                    value={username} onChange={e => setUsername(e.target.value)} />
                <label htmlFor="inputPassword" className="visually-hidden">Password</label>
                <input type="password" id="inputPassword" className="form-control mb-2" placeholder="Password" required
                    value={password} onChange={e => setPassword(e.target.value)} />
                <button className="w-100 btn btn-lg btn-primary" type="submit">Sign in</button>
            </form>
        </div>
    );
}

export default LoginPage;
Step 4: Assemble the Dashboard in App.js
Now, combine these components in your App.js to create the layout.
import React from 'react';
import { BrowserRouter as Router, Routes, Route } from 'react-router-dom';
import Navbar from './Navbar';
import Sidebar from './Sidebar';
import MainContent from './MainContent';
import SettingsPage from './SettingsPage';
import LoginPage from './LoginPage';
import 'bootstrap/dist/css/bootstrap.min.css';
import 'bootstrap/dist/js/bootstrap.min.js';

function App() {
  return (
    <Router>
      <Routes>
        <Route path="/login" element={<LoginPage />} />
        <Route path="/" element={
          <div>
            <Navbar />
            <div className="d-flex">
              <Sidebar />
              <MainContent />
            </div>
          </div>
        } />
        <Route path="/settings" element={
          <div>
            <Navbar />
            <div className="d-flex">
              <Sidebar />
              <SettingsPage />
            </div>
          </div>
        } />
      </Routes>
    </Router>
  );
}

export default App;
Step 3: Optional CSS Enhancements
You might want to add some additional CSS to improve the transition or responsiveness of the sidebar. This can be done by adding some custom styles to your CSS file.
index.css (or any other CSS file)
.sidebar-hidden {
    transform: translateX(-100%);
    transition: transform 0.3s ease-in-out;
}

.sidebar-shown {
    transform: translateX(0);
    transition: transform 0.3s ease-in-out;
}
Then modify your Sidebar component to use these classes based on the state.
Step 6: Run Your Project
Now, everything is set up, run your project to see the dashboard.
npm start
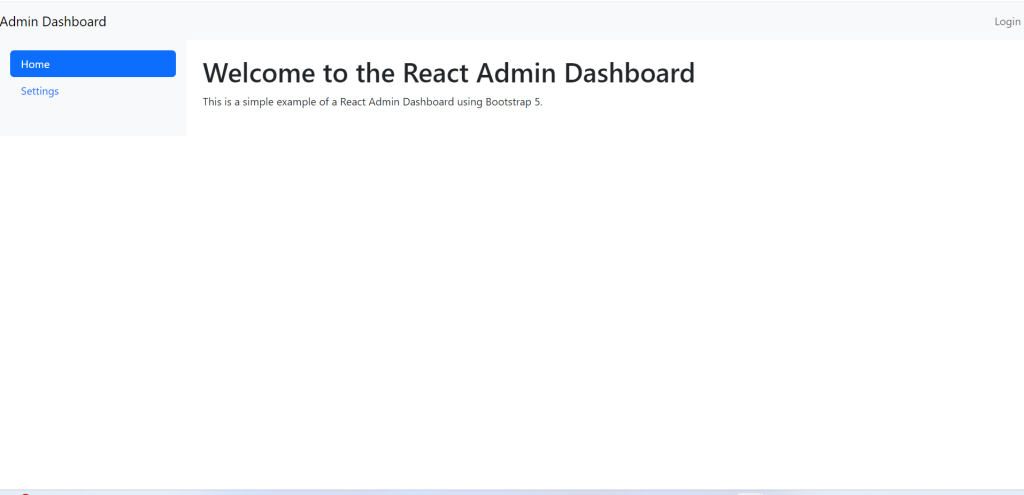
This will open your new admin dashboard in the browser. You can continue to expand on this by adding more functionality, integrating APIs, and refining the UI with custom CSS and JavaScript as needed.
This is it guys and if you will have any kind of query, suggestion or requirement then feel free to comment below.
Thanks
Ajay
Leave a Reply