
Hello guys how are you? Welcome back to my blog. Today in this blog I am going to Create Ecommerce Website in Angular 17 using Bootstrap 5 Part 1.
Creating a basic eCommerce website template using Angular 17 and Bootstrap 5 involves setting up the Angular environment, creating necessary components, and integrating Bootstrap for responsive design. Below, I’ll provide a step-by-step guide on how to set up the project and outline the basic components you’ll need. You can then expand on this foundation based on your specific requirements.
Angular 17 came and Bootstrap 5 also. If you are new then you must check below two links:
Step 1: Setting Up Angular Environment
First, make sure you have Node.js and npm (Node Package Manager) installed. Then, install Angular CLI globally using npm, which helps in creating projects, generating application code, and performing a variety of ongoing development tasks.
npm install -g @angular/cli
Step 2: Create a New Angular Project
Generate a new Angular project using the Angular CLI:
ng new ecommerce-app --style=scss
The --style=scss option allows us to use SCSS for styles which is supported by Bootstrap.
Step 3: Install Bootstrap
Install Bootstrap 5 into your Angular project. Since Angular and Bootstrap are frequently updated, ensure you are using compatible versions.
npm install bootstrap@5
After installing, include Bootstrap in your project. Open the angular.json file and add the Bootstrap CSS file to the styles array:
"styles": [
              "node_modules/bootstrap/dist/css/bootstrap.min.css",
              "src/styles.css"
            ],
            "scripts": [
              "node_modules/bootstrap/dist/js/bootstrap.bundle.min.js"
            ],
Step 4: Create Components
You will likely need several components for a basic eCommerce website. Use Angular CLI to generate them:
ng generate component components/navbar
ng generate component components/product-list
ng generate component components/product-details
ng generate component components/footer
Step 5: Add Routing
Set up routing to navigate between different components/pages. Modify app-routes.ts to define routes:
import { Routes } from '@angular/router';
import { ProductListComponent } from './components/product-list/product-list.component';
import { ProductDetailsComponent } from './components/product-details/product-details.component';

export const routes: Routes = [
    { path: '', component: ProductListComponent },
    { path: 'product/:id', component: ProductDetailsComponent },
];
Step 6: Build Basic Components
Update each component with basic HTML and Bootstrap classes for layout and styling.
- Navbar Component (navbar.component.html):
  <nav class="navbar navbar-expand-lg navbar-light bg-light">
    <div class="container-fluid">
      <a class="navbar-brand" routerLink="/">eCommerce</a>
      <button class="navbar-toggler" type="button" data-bs-toggle="collapse" data-bs-target="#navbarNav" aria-controls="navbarNav" aria-expanded="false" aria-label="Toggle navigation">
        <span class="navbar-toggler-icon"></span>
      </button>
      <div class="collapse navbar-collapse" id="navbarNav">
        <ul class="navbar-nav">
          <li class="nav-item">
            <a class="nav-link active" aria-current="page" href="#">Home</a>
          </li>
          <li class="nav-item">
            <a class="nav-link" href="#">Features</a>
          </li>
          <li class="nav-item">
            <a class="nav-link" href="#">Pricing</a>
          </li>
        </ul>
      </div>
    </div>
  </nav>
Creating a Product List page for your eCommerce website in Angular involves setting up a component to display products, which typically includes fetching product data from a backend service or a static JSON file, and displaying it in a structured format using Bootstrap for styling. Here’s how to create a basic product list page using Angular and Bootstrap.
Step 7: Define the Product Model
First, define a model for your product. Create a new file called product.model.ts in your app directory:
export interface Product {
  id: number;
  name: string;
  description: string;
  price: number;
  imageUrl: string;
}
Step 8: Create a Service to Fetch Products
Generate a service to handle data fetching:
ng generate service services/product
In your product.service.ts, you can simulate fetching data from an API by returning a static list of products:
import { Injectable } from '@angular/core';
import { Product } from '../product.model';

@Injectable({
  providedIn: 'root'
})
export class ProductService {

  private products: Product[] = [
    { id: 1, name: 'Product 1', description: 'This is product 1', price: 99.99, imageUrl: 'https://via.placeholder.com/150' },
    { id: 2, name: 'Product 2', description: 'This is product 2', price: 89.99, imageUrl: 'https://via.placeholder.com/150' },
    { id: 3, name: 'Product 3', description: 'This is product 3', price: 79.99, imageUrl: 'https://via.placeholder.com/150' }
  ];

  constructor() { }

  getProducts(): Product[] {
    return this.products;
  }

  getProductById(id: number): Product | undefined {
    return this.products.find(product => product.id === id);
  }
}
Step 9: Update the Product List Component
In your product-list.component.ts, import the ProductService and use it to fetch products:
import { Component } from '@angular/core';
import { Product } from '../../product.model';
import { ProductService } from '../../services/product.service';
import { CommonModule } from '@angular/common'
import { RouterLink, RouterOutlet } from '@angular/router';

@Component({
  selector: 'app-product-list',
  standalone: true,
  imports: [CommonModule, RouterOutlet, RouterLink],
  templateUrl: './product-list.component.html',
  styleUrl: './product-list.component.css'
})
export class ProductListComponent {
  products: Product[] = [];

  constructor(private productService: ProductService) { }

  ngOnInit(): void {
    this.products = this.productService.getProducts();
  }
}
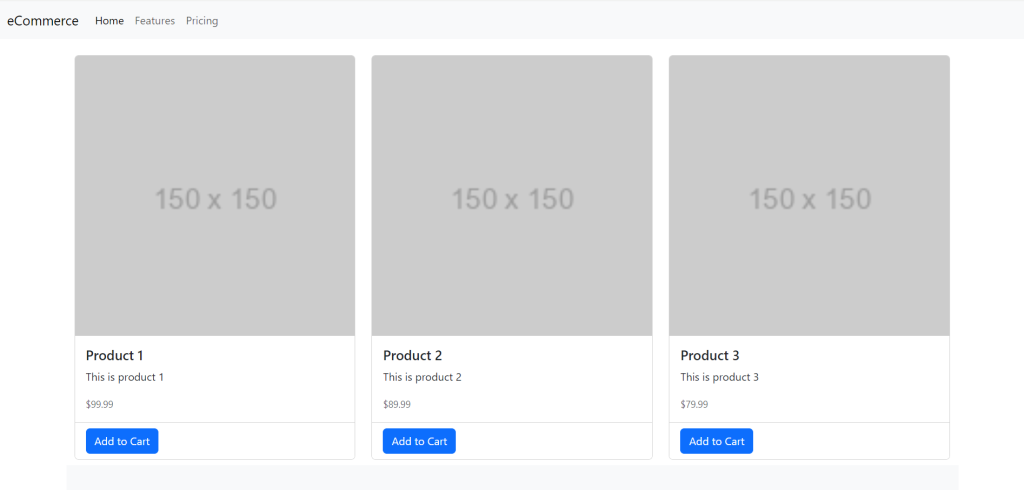
Step 10: Design the Product List HTML
Modify the product-list.component.html to use Bootstrap cards to display each product:
<div class="container mt-4">
  <div class="row row-cols-1 row-cols-md-3 g-4">
    <div class="col" *ngFor="let product of products">
      <div class="card h-100">
        <a [routerLink]="['/product', product.id]" class="link-unstyled">
          <img src="{{ product.imageUrl }}" class="card-img-top" alt="{{ product.name }}">
          <div class="card-body">
            <h5 class="card-title">{{ product.name }}</h5>
            <p class="card-text">{{ product.description }}</p>
            <p class="card-text"><small class="text-muted">{{ product.price | currency }}</small></p>
          </div>
        </a>
        <div class="card-footer bg-white">
          <button class="btn btn-primary">Add to Cart</button>
        </div>
      </div>
    </div>
  </div>
</div>
This code uses Angular’s *ngFor directive to loop through the products array and display each product in a Bootstrap card. The | currency pipe formats the price.
Step 11: Create Product Details Component
In your product-details.component.ts, fetch the product based on the ID passed through the route:
import { Component } from '@angular/core';
import { ActivatedRoute } from '@angular/router';
import { Product } from '../../product.model';
import { ProductService } from '../../services/product.service';
import { CommonModule } from '@angular/common'
@Component({
  selector: 'app-product-details',
  standalone: true,
  imports: [CommonModule],
  templateUrl: './product-details.component.html',
  styleUrl: './product-details.component.css'
})
export class ProductDetailsComponent {
  product?: Product;

  constructor(
    private productService: ProductService,
    private route: ActivatedRoute
  ) { }

  ngOnInit(): void {
    this.route.params.subscribe(params => {
      const productId = +params['id']; // Convert string to number
      this.product = this.productService.getProductById(productId);
    });
  }
}
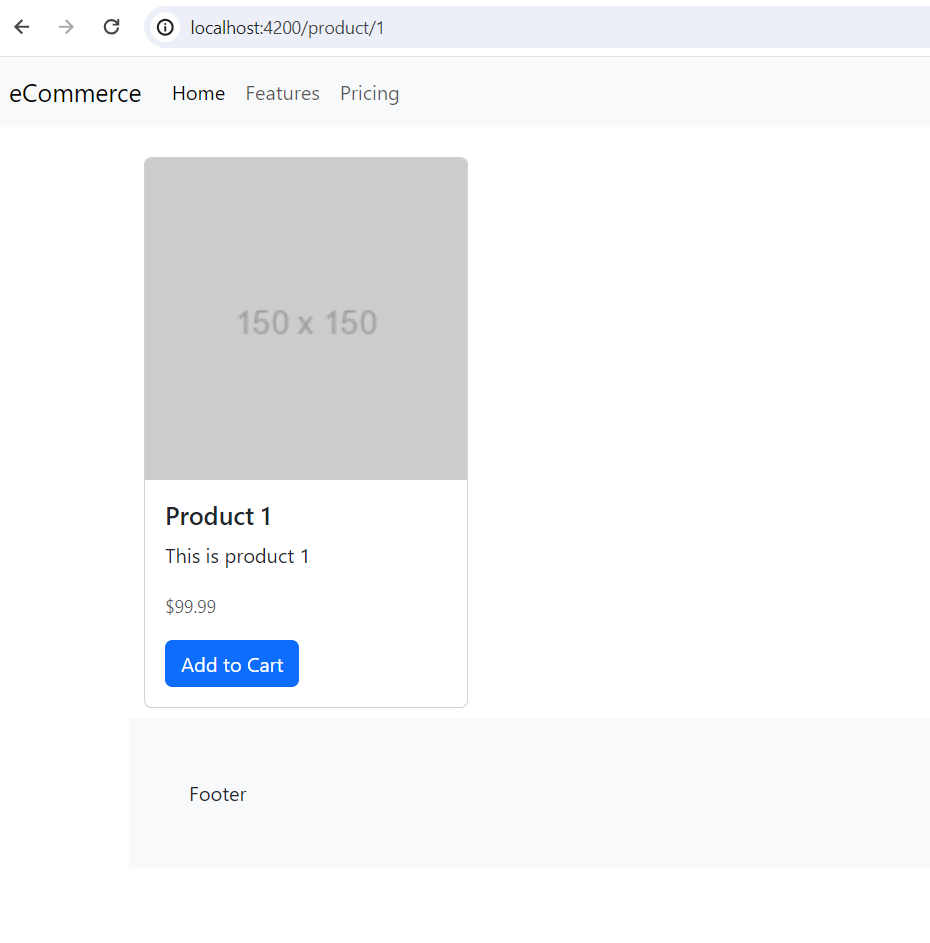
Step 12: Design the Product Details HTML
Modify the product-details.component.html to display the product details:
<div class="container mt-4" *ngIf="product">
    <div class="card">
      <img [src]="product.imageUrl" class="card-img-top" alt="{{ product.name }}">
      <div class="card-body">
        <h5 class="card-title">{{ product.name }}</h5>
        <p class="card-text">{{ product.description }}</p>
        <p class="card-text"><small class="text-muted">{{ product.price | currency }}</small></p>
        <button class="btn btn-primary">Add to Cart</button>
      </div>
    </div>
  </div>
  <div *ngIf="!product" class="container mt-4">
    <p class="text-center">Product not found!</p>
  </div>
Step 13: Update App.component.html file
<app-navbar></app-navbar>
<router-outlet></router-outlet>
<app-footer></app-footer>
Step 14: Serve the Application
Run your Angular application:
ng serve
Navigate to http://localhost:4200/ to see your new eCommerce website running.
Guys in part 2, we will do add to cart functionality:
This basic setup gives you a functional template. You can now enhance it with additional features like search functionality, user authentication, checkout processes, and more, depending on your needs.
Note: Friends, In this post, I just tell the basic setup and things, you can change the code according to your requirements.
I will appreciate that if you will tell your views for this post. Nothing matters if your views will be good or bad because with your views, I will make my next posts more good and helpful.
Jassa
Thanks
Leave a Reply