Category: Bootstrap 5

  • Angular 13 Bootstrap 5 Modal Popup Forms with Validation Working Example

    Angular 13 Bootstrap 5 Modal Popup Forms with Validation Working Example

    Hello friends, welcome back to my blog. Today this blog post will tell you, Angular 13 Bootstrap 5 Modal Popup Forms with Validation Working Example.


    Angular 12 Bootstrap Modal Popup

    Angular 13 Bootstrap 5 Modal Popup Forms Working Example
    Angular 13 Bootstrap 5 Modal Popup Forms with Validation Working Example
    Angular 12 Simple Modal Form
    AngularSimple Modal Form

    Angular13 came and Bootstrap 5 also. If you are new then you must check below two links:

    1. Angular13 Basic Tutorials
    2. Bootstrap 5

    Friends now I proceed onwards and here is the working code snippet and please use carefully this to avoid the mistakes:

    1. Firstly friends we need fresh angular 13 setup and for this we need to run below commands but if you already have angular 13 setup then you can avoid below commands. Secondly we should also have latest node version installed on our system:

    npm install -g @angular/cli 
    
    ng new angularboot5 //Create new Angular Project
    
    cd angularboot5 // Go inside the Angular Project Folder

    2. Now friends we need to run below commands into our project terminal to install bootstrap 5 modules into our angular application:

    npm install bootstrap

    3. Now friends we just need to add below code into angularboot5/src/app/app.component.html file to get final out on the web browser:

    <button type="button" class="btn btn-primary me-5" data-bs-toggle="modal" data-bs-target="#exampleModal">
      User Login
    </button>
    
    <button type="button" class="btn btn-primary" data-bs-toggle="modal" data-bs-target="#exampleModal2">
      Validation Form
    </button>
    
    <!-- Modal -->
    <div class="modal fade" id="exampleModal" tabindex="-1" aria-labelledby="exampleModalLabel" aria-hidden="true">
      <div class="modal-dialog">
        <div class="modal-content">
          <div class="modal-header">
            <h5 class="modal-title text-danger" id="exampleModalLabel">Login Form</h5>
            <button type="button" class="btn-close" data-bs-dismiss="modal" aria-label="Close"></button>
          </div>
          <div class="modal-body">
            <form>
              <div class="mb-3">
                <label for="exampleInputEmail1" class="form-label">Email address</label>
                <input type="email" class="form-control" id="exampleInputEmail1" aria-describedby="emailHelp">
                <div id="emailHelp" class="form-text">We'll never share your email with anyone else.</div>
              </div>
              <div class="mb-3">
                <label for="exampleInputPassword1" class="form-label">Password</label>
                <input type="password" class="form-control" id="exampleInputPassword1">
              </div>
              <button type="button" class="btn btn-primary">Login</button>
            </form>
          </div>
          <div class="modal-footer">
            <button type="button" class="btn btn-warning" data-bs-dismiss="modal">Close</button>
          </div>
        </div>
      </div>
    </div>
    
    
    <!-- Modal 2 with validation-->
    <div class="modal fade" id="exampleModal2" tabindex="-1" aria-labelledby="exampleModal2Label" aria-hidden="true">
      <div class="modal-dialog">
        <div class="modal-content">
          <div class="modal-header">
            <h5 class="modal-title text-danger" id="exampleModal2Label">Login Form</h5>
            <button type="button" class="btn-close" data-bs-dismiss="modal" aria-label="Close"></button>
          </div>
          <div class="modal-body">
            <form [formGroup]="registerForm" (ngSubmit)="onSubmit()">
              <div class="mb-3">
                <label for="exampleInputEmail1" class="form-label">Email address</label>
                <input type="email" formControlName="email" class="form-control" [ngClass]="{ 'is-invalid': submitted && f.email.errors }"  id="inputEmail4">
                <div *ngIf="submitted && f.email.errors" class="invalid-feedback">
                  <div *ngIf="f.email.errors.required">Email is required</div>
                  <div *ngIf="f.email.errors.email">Email must be a valid email address</div>
               </div>
              </div>
              <div class="mb-3">
                <label for="exampleInputPassword1" class="form-label">Password</label>
                <input type="password" formControlName="password" class="form-control" [ngClass]="{ 'is-invalid': submitted && f.password.errors }" id="inputPassword4">
                <div *ngIf="submitted && f.password.errors" class="invalid-feedback">
                  <div *ngIf="f.password.errors.required">Password is required</div>
               </div>
              </div>
              <button type="submit" class="btn btn-primary">Login</button>
            </form>
          </div>
          <div class="modal-footer">
            <button type="button" class="btn btn-warning" data-bs-dismiss="modal">Close</button>
          </div>
        </div>
      </div>
    </div>

    4. Now friends we just need to add below code into angularboot5/angular.json file:

    "styles": [
                  ...
                  "node_modules/bootstrap/dist/css/bootstrap.min.css"
              ],
    "scripts": [
                  ...
                   "node_modules/bootstrap/dist/js/bootstrap.min.js"
               ]

    5. Now friends we just need to add below code into angularboot5/src/app/app.module.ts file for reactive forms:

    ...
    import { ReactiveFormsModule } from '@angular/forms';
    @NgModule({
     ...
      imports: [
      ...
        ReactiveFormsModule,
      
      ],

    6. Now friends we just need to add below code into angularboot5/src/app/app.component.ts file to validation and other reactive form functions:

    ...
    import { FormBuilder, FormGroup, Validators } from '@angular/forms';
    
    export class AppComponent {
    //Form Validables 
    registerForm: FormGroup;
    submitted = false;
    constructor( private formBuilder: FormBuilder){}
    //Add user form actions
    get f() { return this.registerForm.controls; }
    onSubmit() {
      
      this.submitted = true;
      // stop here if form is invalid
      if (this.registerForm.invalid) {
          return;
      }
      //True if all the fields are filled
      if(this.submitted)
      {
        alert("Great!!");
      }
     
    }
      ngOnInit() {
        //Add User form validations
        this.registerForm = this.formBuilder.group({
        email: ['', [Validators.required, Validators.email]],
        password: ['', [Validators.required]],
        });
      }
    }

    Friends in the end must run ng serve command into your terminal to run the angular 13 project(localhost:4200).

    Now we are done friends. If you have any kind of query, suggestion and new requirement then feel free to comment below.

    Note: Friends, In this post, I just tell the basic setup and things, you can change the code according to your requirements.

    I will appreciate that if you will tell your views for this post. Nothing matters if your views will be good or bad because with your views, I will make my next posts more good and helpful.

    Jassa

    Thanks

  • Reactjs Bootstrap 5 Megamenu Working Example

    Reactjs Bootstrap 5 Megamenu Working Example

    Hello friends, welcome back to my blog. Today in this blog post, I am going to show you, Reactjs Bootstrap 5 Megamenu Working Example.


    Guys please watch below video to check how to add bootstrap 5 in reactjs application?:

    Add Bootstrap 5 in Reactjs Application

    Reactjs Bootstrap 5 Megamenu Working Example
    Reactjs Bootstrap 5 Megamenu Working Example

    For reactjs new comers, please check the below link:

    Reactjs Basic Tutorials

    Bootstrap 5 Tutorials


    Friends now I proceed onwards and here is the working code snippet and please use this carefully to avoid the mistakes:

    1. Firstly, we need fresh reactjs setup and for that, we need to run below commands into out terminal and also we should have latest node version installed on our system:

    npx create-react-app reactboot5
    
    cd reactboot5

    2. Now we need to run below commands into our project terminal to get bootstrap and related modules into our reactjs application:

    npm install bootstrap --save
    
    npm i @popperjs/core
    
    npm start //For start project again

    3. Finally for the main output, we need to add below code into our reactboot5/src/App.js file or if you have fresh setup then you can replace reactboot5/src/App.js file code with below code:

    //importing bootstrap 5 css
    import 'bootstrap/dist/css/bootstrap.min.css';
    import 'bootstrap/dist/js/bootstrap.min.js';
    import './App.css';
    function App() {
      return (
       
            <div className="APP">
          
            <nav className="navbar navbar-expand-lg navbar-light bg-white py-3 shadow-sm">
            <div className="container-fluid">
            <a href="#" className="navbar-brand font-weight-bold d-block d-lg-none">MegaMenu</a>
            <button className="navbar-toggler" type="button" data-bs-toggle="collapse" data-bs-target="#navbarSupportedContent" aria-controls="navbarSupportedContent" aria-expanded="false" aria-label="Toggle navigation">
                <span className="navbar-toggler-icon"></span>
            </button>
            <div id="navbarSupportedContent" className="collapse navbar-collapse">
                <ul className="navbar-nav mx-auto">
               
                <li className="nav-item dropdown megamenu"><a id="megamneu" href="#" id="dropdownMenuButton1" data-bs-toggle="dropdown" aria-expanded="false" className="nav-link dropdown-toggle font-weight-bold text-uppercase dropdown-toggle">Mega Menu</a>
                    <div aria-labelledby="dropdownMenuButton1" className="dropdown-menu border-0 p-0 m-0">
                    <div className="container">
                        <div className="row bg-white rounded-0 m-0 shadow-sm">
                        <div className="col-lg-7 col-xl-8">
                            <div className="p-4">
                            <div className="row">
                                <div className="col-lg-6 mb-4">
                                <h6 className="font-weight-bold text-uppercase">MegaMenu heading</h6>
                                <ul className="list-unstyled">
                                    <li className="nav-item"><a href="" className="nav-link text-small pb-0">Unique Features</a></li>
                                    <li className="nav-item"><a href="" className="nav-link text-small pb-0 ">Image Responsive</a></li>
                                    <li className="nav-item"><a href="" className="nav-link text-small pb-0 ">Auto Carousel</a></li>
                                    <li className="nav-item"><a href="" className="nav-link text-small pb-0 ">Newsletter Form</a></li>
                                </ul>
                                </div>
                                <div className="col-lg-6 mb-4">
                                <h6 className="font-weight-bold text-uppercase">MegaMenu heading</h6>
                                <ul className="list-unstyled">
                                    <li className="nav-item"><a href="" className="nav-link text-small pb-0 ">Unique Features</a></li>
                                    <li className="nav-item"><a href="" className="nav-link text-small pb-0 ">Image Responsive</a></li>
                                    <li className="nav-item"><a href="" className="nav-link text-small pb-0 ">Auto Carousel</a></li>
                                    <li className="nav-item"><a href="" className="nav-link text-small pb-0 ">Newsletter Form</a></li>
                                </ul>
                                </div>
                            </div>
                            </div>
                        </div>
                        <div class="col-lg-5 col-xl-4 px-0 d-none d-lg-block megaimaga"></div>
                        </div>
                    </div>
                    </div>
                </li>
                <li className="nav-item"><a href="" className="nav-link font-weight-bold text-uppercase">About</a></li>
                <li className="nav-item"><a href="" className="nav-link font-weight-bold text-uppercase">Services</a></li>
                <li className="nav-item"><a href="" className="nav-link font-weight-bold text-uppercase">Contact</a></li>
                </ul>
            </div>
            </div>
            </nav>


            <section className="py-5 text-white">
            <div className="container py-4">
                <div className="row">
                <div className="col-lg-8 mx-auto text-center">
                    <h1 className="display-4">Reactjs Bootstrap 5 megamenu</h1>
                    <p className="lead mb-0">A very simple way to create Reactjs Bootstrap 5 megamneu. </p>
                    <p className="lead">Snippet by <a href="https://therichpost.com/" className='text-white'><u>Therichpost</u></a>. </p>
                </div>
                </div>
                <div className="row pt-5">
                <div className="col-lg-10 mx-auto">
                    <p className="lead">Use the default Bootstrap's dropdown menu to hold your megamneu.</p>
                    <p className="lead">Set the <code>.dropdown</code> position to <code>static</code> instead of <code>absolute</code>.</p>
                    <p className="lead">We use the className <code>.megamenu</code> to hold this <code>static</code> position.</p>
                </div>
                </div>
            </div>
            </section>
           
      </div>
      );
    }
    
    export default App;

    4. Finally for the main output, we need to add below code into our reactboot5/src/App.css file:

    /*
    *
    * ==========================================
    * CUSTOM UTIL CLASSES
    * ==========================================
    *
    */
    
    .megamenu {
        position: static;
      }
      
      .megamenu .dropdown-menu {
        background: none;
        border: none;
        width: 100%;
      }
      
      /*
      *
      * ==========================================
      * FOR DEMO PURPOSES
      * ==========================================
      *
      */
      
      .APP  {
        background: #eaafc8;
        background: -webkit-linear-gradient(to right, #eaafc8, #654ea3);
        background: linear-gradient(to right, #eaafc8, #654ea3);
        min-height: 100vh;
      }
      
      code {
        color: #745eb1;
        background: #fff;
        padding: 0.1rem 0.2rem;
        border-radius: 0.2rem;
      }
      
      .text-uppercase {
        letter-spacing: 0.08em;
      }
      .megaimaga
      {
        background: center center url("https://therichpost.com/wp-content/uploads/2021/11/mega.png")no-repeat; background-size: cover;
      }

    Now we are done friends. If you have any kind of query or suggestion or any requirement then feel free to comment below.

    Note: Friends, I just tell the basic setup and things, you can change the code according to your requirements.

    I will appreciate that if you will tell your views for this post. Nothing matters if your views will be good or bad.

    Jassa

    Thanks

  • Angular 13 Bootstrap 5 Responsive Megamenu Working Example

    Angular 13 Bootstrap 5 Responsive Megamenu Working Example

    Hello friends, welcome back to my blog. Today in this blog post, I am going to tell you, Angular 13 Bootstrap 5 Responsive Megamenu Working Example.

    Here is the tutorial link for update angular version to 13: Update Angular 13 to Angular 13

    Add Bootstrap 5 in Angular 13

    Guy’s here are the more demos related to Angular 12 with Bootstrap 5:

    1. Bootstrap 5 Popover working in Angular 12
    2. Bootstrap 5 Tooltip working in Angular 12
    3. Bootstrap5 Modal with Forms in Angular 12


    Angular 13 Bootstrap 5 Responsive Megamenu Working Example
    Angular 13 Bootstrap 5 Responsive Megamenu Working Example

    Angular 13 came and Bootstrap 5 also and if you are new then you must check below two links:

    1. Angular13 Tutorials
    2. Angular12 Free Templates
    3. Bootstrap 5

    Friends now I proceed onwards and here is the working code snippet and please use carefully this to avoid the mistakes:

    1. Firstly friends we need fresh angular 13 setup and for this we need to run below commands but if you already have angular 13 setup then you can avoid below commands. Secondly we should also have latest node version installed on our system:

    npm install -g @angular/cli 
    
    ng new angularboot5 //Create new Angular Project
    
    cd angularboot5 // Go inside the Angular Project Folder

    2. Now friends, here we need to run below commands into our project terminal to install bootstrap 5 modules into our angular application:

    npm install bootstrap
    
    npm i @popperjs/core

    3. Now friends we just need to add below code into src/app/app.component.html file to get final out on the web browser:

    <div class="APP">
      <!--Mega Menu-->
      <nav class="navbar navbar-expand-lg navbar-light bg-white py-3 shadow-sm">
        <div class="container-fluid">
        <a href="#" class="navbar-brand font-weight-bold d-block d-lg-none">MegaMenu</a>
        <button class="navbar-toggler" type="button" data-bs-toggle="collapse" data-bs-target="#navbarSupportedContent" aria-controls="navbarSupportedContent" aria-expanded="false" aria-label="Toggle navigation">
          <span class="navbar-toggler-icon"></span>
        </button>
        <div id="navbarSupportedContent" class="collapse navbar-collapse">
          <ul class="navbar-nav mx-auto">
            <!-- Megamenu-->
            <li class="nav-item dropdown megamenu"><a id="megamneu" href="#" id="dropdownMenuButton1" data-bs-toggle="dropdown" aria-expanded="false" class="nav-link dropdown-toggle font-weight-bold text-uppercase dropdown-toggle">Mega Menu</a>
              <div aria-labelledby="dropdownMenuButton1" class="dropdown-menu border-0 p-0 m-0">
                <div class="container">
                  <div class="row bg-white rounded-0 m-0 shadow-sm">
                    <div class="col-lg-7 col-xl-8">
                      <div class="p-4">
                        <div class="row">
                          <div class="col-lg-6 mb-4">
                            <h6 class="font-weight-bold text-uppercase">MegaMenu heading</h6>
                            <ul class="list-unstyled">
                              <li class="nav-item"><a href="" class="nav-link text-small pb-0">Unique Features</a></li>
                              <li class="nav-item"><a href="" class="nav-link text-small pb-0 ">Image Responsive</a></li>
                              <li class="nav-item"><a href="" class="nav-link text-small pb-0 ">Auto Carousel</a></li>
                              <li class="nav-item"><a href="" class="nav-link text-small pb-0 ">Newsletter Form</a></li>
                            </ul>
                          </div>
                          <div class="col-lg-6 mb-4">
                            <h6 class="font-weight-bold text-uppercase">MegaMenu heading</h6>
                            <ul class="list-unstyled">
                              <li class="nav-item"><a href="" class="nav-link text-small pb-0 ">Unique Features</a></li>
                              <li class="nav-item"><a href="" class="nav-link text-small pb-0 ">Image Responsive</a></li>
                              <li class="nav-item"><a href="" class="nav-link text-small pb-0 ">Auto Carousel</a></li>
                              <li class="nav-item"><a href="" class="nav-link text-small pb-0 ">Newsletter Form</a></li>
                            </ul>
                          </div>
                        </div>
                      </div>
                    </div>
                    <div class="col-lg-5 col-xl-4 px-0 d-none d-lg-block" style="background: center center url(https://therichpost.com/wp-content/uploads/2021/11/mega.png)no-repeat; background-size: cover;"></div>
    </div> </div> </div> </li> <li class="nav-item"><a href="" class="nav-link font-weight-bold text-uppercase">About</a></li> <li class="nav-item"><a href="" class="nav-link font-weight-bold text-uppercase">Services</a></li> <li class="nav-item"><a href="" class="nav-link font-weight-bold text-uppercase">Contact</a></li> </ul> </div> </div> </nav> <!-- For demo purpose --> <section class="py-5 text-white"> <div class="container py-4"> <div class="row"> <div class="col-lg-8 mx-auto text-center"> <h1 class="display-4">Angular 13 Bootstrap 5 megamenu</h1> <p class="lead mb-0">A very simple way to create Angular 13 Bootstrap 5 megamneu. </p> <p class="lead">Snippet by <a href="https://therichpost.com/" class='text-white'><u>Therichpost</u></a>. </p> </div> </div> <div class="row pt-5"> <div class="col-lg-10 mx-auto"> <p class="lead">Use the default Bootstrap's dropdown menu to hold your megamneu.</p> <p class="lead">Set the <code>.dropdown</code> position to <code>static</code> instead of <code>absolute</code>.</p> <p class="lead">We use the class <code>.megamenu</code> to hold this <code>static</code> position.</p> </div> </div> </div> </section> <!-- End --> <!--Menu Menu--> </div>

    4. Now friends we just need to add below code into angular.json file:

    "styles": [
                  ...
                  "node_modules/bootstrap/dist/css/bootstrap.min.css"
              ],
    "scripts": [
                  ...
                   "node_modules/bootstrap/dist/js/bootstrap.min.js"
               ]

    5. Now friends we just need to add below code into src/app/app.component.css file:

    /*
    *
    * ==========================================
    * CUSTOM UTIL CLASSES
    * ==========================================
    *
    */
    
    .megamenu {
        position: static;
      }
      
      .megamenu .dropdown-menu {
        background: none;
        border: none;
        width: 100%;
      }
      
      /*
      *
      * ==========================================
      * FOR DEMO PURPOSES
      * ==========================================
      *
      */
      
      .APP  {
        background: #eaafc8;
        background: -webkit-linear-gradient(to right, #eaafc8, #654ea3);
        background: linear-gradient(to right, #eaafc8, #654ea3);
        min-height: 100vh;
      }
      
      code {
        color: #745eb1;
        background: #fff;
        padding: 0.1rem 0.2rem;
        border-radius: 0.2rem;
      }
      
      .text-uppercase {
        letter-spacing: 0.08em;
      }

    Friends in the end must run ng serve command into your terminal to run the angular 13 project.

    Now we are done friends. If you have any kind of query, suggestion and new requirement then feel free to comment below.

    Note: Friends, In this post, I just tell the basic setup and things, you can change the code according to your requirements.

    I will appreciate that if you will tell your views for this post. Nothing matters if your views will be good or bad because with your views, I will make my next posts more good and helpful.

    Jassa

    Thanks

  • Angular 13 Bootstrap 5 Table with Custom Search Filter

    Angular 13 Bootstrap 5 Table with Custom Search Filter

    Hello friends, welcome back to my blog. Today in this blog post, I am going to tell you, Angular 13 Bootstrap 5 Table with Custom Search Filter.

    Here is the tutorial link for update angular version to 13: Update Angular 13 to Angular 13

    Add Bootstrap 5 in Angular 13

    Guy’s here are the more demos related to Angular 12 with Bootstrap 5:

    1. Bootstrap 5 Popover working in Angular 12
    2. Bootstrap 5 Tooltip working in Angular 12
    3. Bootstrap5 Modal with Forms in Angular 12


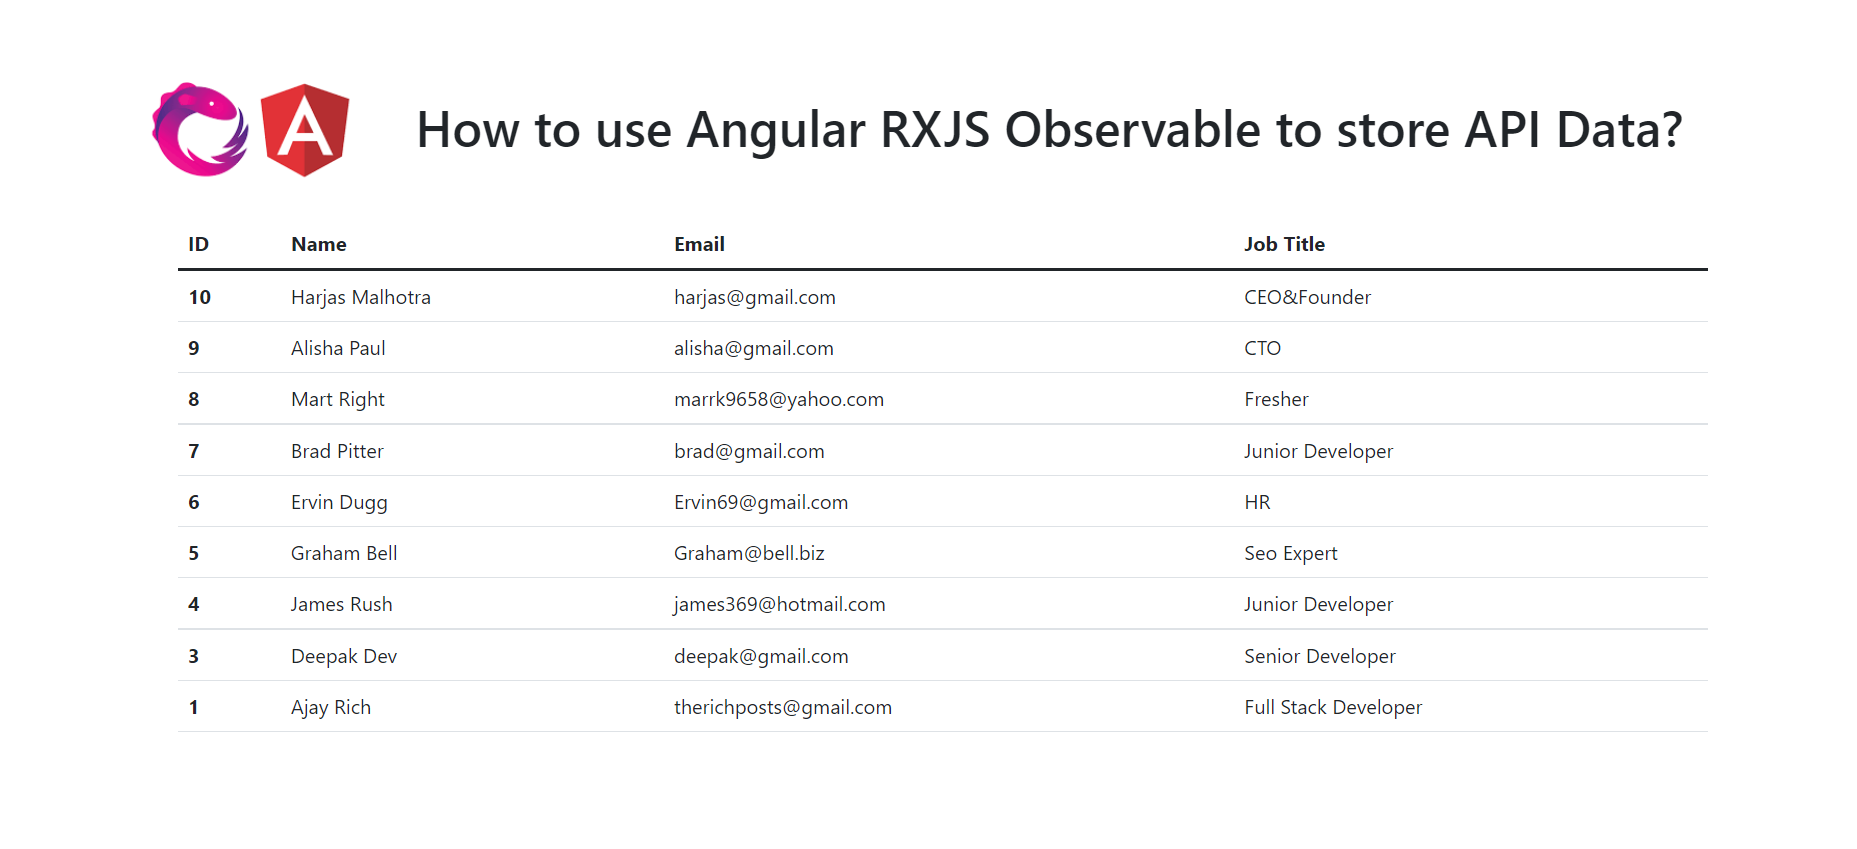
    Angular 13 bootstrap 5 table with custom search filter
    Angular 13 bootstrap 5 table with custom search filter

    Angular 16 came and Bootstrap 5 also and if you are new then you must check below two links:

    1. Angular13 Tutorials
    2. Angular12 Free Templates
    3. Bootstrap 5

    Friends now I proceed onwards and here is the working code snippet for How to add bootstrap 5 in angular 13 application? and please use carefully this to avoid the mistakes:

    1. Firstly friends we need fresh angular 13 setup and for this we need to run below commands but if you already have angular 13 setup then you can avoid below commands. Secondly we should also have latest node version installed on our system:

    npm install -g @angular/cli 
    
    ng new angularboot5 //Create new Angular Project
    
    cd angularboot5 // Go inside the Angular Project Folder

    2. Now friends, here we need to run below commands into our project terminal to install bootstrap 5 modules into our angular application:

    npm install bootstrap
    
    npm i @popperjs/core

    3. Now friends we just need to add below code into src/app/app.component.html file to get final out on the web browser:

    <div class="container text-center mt-4">
      <input class="form-control mt-2 mb-2" type="text" [(ngModel)]="searchText"  (input)="Search()" placeholder="Search by name" /> 
      <table class="table table-striped table-bordered table-sm row-border hover" id="datatableexample">
        <thead>
          <tr>
            <th>ID</th>
            <th>Name</th>
            <th>Email</th>
            <th>Job Title</th>
            </tr>
        </thead>
        <tbody>
            
                <tr *ngFor="let group of listOfContacts">
                    <td>{{group.id}}</td>
                    <td>{{group.name}}</td>
                    <td>{{group.email}}</td>
                    <td>{{group.job_title}}</td>
                </tr>
        </tbody>
      </table>
      </div>
    

    4. Now friends we just need to add below code into angular.json file:

    "styles": [
                  ...
                  "node_modules/bootstrap/dist/css/bootstrap.min.css"
              ],
    "scripts": [
                  ...
                   "node_modules/bootstrap/dist/js/bootstrap.min.js"
               ]

    5. Now friends we just need to add below code into src/app/app.component.tsfile to get search functionality:

    import { Component } from '@angular/core';
    import { HttpClient } from '@angular/common/http';
    @Component({
      selector: 'app-root',
      templateUrl: './app.component.html',
      styleUrls: ['./app.component.css']
    })
    export class AppComponent {
      title = 'angular13';
      searchText = "";
      listOfContacts:any ;
      constructor(private http: HttpClient){
        //get request from web api
        this.http.get('https://therichpost.com/testjsonapi/users/').subscribe(data => {
        
          this.listOfContacts = data;
       
              }, error => console.error(error));
      }
      Search(){
       // alert(this.searchText)
        if(this.searchText!== ""){
          let searchValue = this.searchText.toLocaleLowerCase();
         
          this.listOfContacts = this.listOfContacts.filter((contact:any) =>{
            return contact.name.toLocaleLowerCase().match(searchValue )
            ;
          // you can keep on adding object properties here   
          
                });
                
                console.log(this.listOfContacts);
              }
              else { 
               this.http.get('https://www.testjsonapi.com/users/').subscribe(data => {
        
                  this.listOfContacts = data;
               
                      }, error => console.error(error));
                // if(this.searchText== ""){ you don't need this if
                
              } 
          }
    }
    

    6. Now friends we just need to add below code into src/app/app.module.ts file:

    ...
    import { FormsModule } from '@angular/forms';
    import { HttpClientModule } from '@angular/common/http';
    @NgModule({
      declarations: [
        AppComponent
      ],
      imports: [
      ...
        HttpClientModule,
        FormsModule
      ],
      providers: [],
      bootstrap: [AppComponent]
    })
    export class AppModule { }
    

    Friends in the end must run ng serve command into your terminal to run the angular 13 project.

    Now we are done friends. If you have any kind of query, suggestion and new requirement then feel free to comment below.

    Note: Friends, In this post, I just tell the basic setup and things, you can change the code according to your requirements.

    I will appreciate that if you will tell your views for this post. Nothing matters if your views will be good or bad because with your views, I will make my next posts more good and helpful.

    Jassa

    Thanks

  • Angular 13 Bootstrap 5 Sidebar Template – Offcanvas Menu

    Angular 13 Bootstrap 5 Sidebar Template – Offcanvas Menu

    Hello friends, welcome back to my blog. Today in this blog post, I am going to tell you, Angular 13 Bootstrap 5 Sidebar Template – Offcanvas Menu.

    Here is the tutorial link for update angular version to 13: Update Angular 13 to Angular 13

    Working Demo

    Guy’s here are the more demos related to Angular 12 with Bootstrap 5:

    1. Bootstrap 5 Popover working in Angular 12
    2. Bootstrap 5 Tooltip working in Angular 12
    3. Bootstrap5 Modal with Forms in Angular 12


    Angular 13 Bootstrap 5 Sidebar Template - Offcanvas menu
    Angular13 Bootstrap 5 Sidebar Template – Offcanvas menu

    Angular 13 came and Bootstrap 5 also and if you are new then you must check below two links:

    1. Angular 13 Tutorials
    2. Angular12 Free Templates
    3. Bootstrap 5

    Friends now I proceed onwards and here is the working code snippet and please use carefully this to avoid the mistakes:

    1. Firstly friends we need fresh angular 13 setup and for this we need to run below commands but if you already have angular 13 setup then you can avoid below commands. Secondly we should also have latest node version installed on our system:

    npm install -g @angular/cli 
    
    ng new angularboot5 //Create new Angular Project
    
    cd angularboot5 // Go inside the Angular Project Folder

    2. Now friends, here we need to run below commands into our project terminal to install bootstrap 5 modules into our angular application:

    npm install bootstrap
    
    npm i @popperjs/core
    
    npm i bootstrap-icons
    

    3. Now friends we just need to add below code into src/app/app.component.html file to get final out on the web browser:

    <div class="sidebar-nav">
      <nav class="navbar navbar-dark bg-primary fixed-top">
          <div class="container">
              <!-- Mobile Menu Toggle Button -->
              <button class="navbar-toggler" type="button" data-bs-toggle="offcanvas" data-bs-target="#offcanvasNavbar" aria-controls="offcanvasNavbar">
                  <span class="navbar-toggler-icon"></span>
              </button>
    
              <!-- Menus List -->
              <div class="offcanvas offcanvas-start shadow" tabindex="-1" id="offcanvasNavbar" aria-labelledby="offcanvasNavbarLabel">
                <div class="offcanvas-body">
                      <ul class="navbar-nav">
                          <li><a href="#"><i class="bi bi-calendar3"></i> <span class="item-text">Calendar</span></a></li>
                          <li><a href="#"><i class="bi bi-pencil-square"></i> <span class="item-text">Applications</span></a></li>
                          <li><a href="#"><i class="bi bi-people"></i> <span class="item-text">Audience</span></a></li>
                          <li><a href="#"><i class="bi bi-book"></i> <span class="item-text">Books World</span></a></li>
                          <li><a href="#"><i class="bi bi-person-check"></i> <span class="item-text">Candidates</span></a></li>
                          <li><a href="#"><i class="bi bi-envelope"></i> <span class="item-text">Email</span></a></li>
                          <li><a href="#"><i class="bi bi-graph-up"></i> <span class="item-text">Analytics</span></a></li>
                      </ul>
                </div>
              </div>
    
              <div class="btn-group">
                  <a href="#" class="dropdown-toggle text-white text-decoration-none" data-bs-toggle="dropdown" aria-expanded="false">
                      <span class="usericon"><i class="bi bi-person-circle"></i></span>
                      <span class="textnone">Jassa</span>
                  </a>
                  <ul class="dropdown-menu dropdown-menu-end">
                      <li><button class="dropdown-item" type="button"><i class="bi bi-lock-fill"></i> Change Password</button></li>
                      <li><button class="dropdown-item" type="button"><i class="bi bi-gear-fill"></i> Admin Setion</button></li>
                      <li><button class="dropdown-item" type="button"><i class="bi bi-gear-wide-connected"></i> IMAP Settings</button></li>
                      <li><hr class="dropdown-divider"></li>
                      <li><button class="dropdown-item" type="button"><i class="bi bi-box-arrow-right"></i> Sign out</button></li>
                  </ul>
              </div>
    
          </div>
      </nav>
    </div>

    4. Now friends we just need to add below code into angular.json file:

    "styles": [
                  ...
                  "node_modules/bootstrap/dist/css/bootstrap.min.css",
                  "node_modules/bootstrap-icons/font/bootstrap-icons.css"
              ],
    "scripts": [
                  ...
                   "node_modules/bootstrap/dist/js/bootstrap.min.js"
               ]

    5. Now friends we just need to add below code into src/app/app.component.css file:

    .sidebar-nav ul li a {
        font-size: 26px;
        text-decoration: none;
        display: block;
        padding: 6px 10px;
        transition: 0.5s;
    }
    .sidebar-nav ul li a:hover {
        background-color: #eeeeee;
        border-radius: 4px;
    }
    .sidebar-nav .offcanvas {
        width: 220px;
        border: none;
    }
    .sidebar-nav .offcanvas ul li a span {
        font-size: 18px;
        position: relative;
        top: -4px;
        transition: 0.5s;
    }
    .sidebar-nav .offcanvas.show ul li a:hover span {
        padding-left: 10px;
    }
    .sidebar-nav .dropdown-toggle::after {
        position: relative;
        top: 3px;
    }
    .bi::before, [class^="bi-"]::before, [class*=" bi-"]::before
    {
        margin-right: 5px;
    }

    Friends in the end must run ng serve command into your terminal to run the angular 13 project.

    Now we are done friends. If you have any kind of query, suggestion and new requirement then feel free to comment below.

    Note: Friends, In this post, I just tell the basic setup and things, you can change the code according to your requirements.

    I will appreciate that if you will tell your views for this post. Nothing matters if your views will be good or bad because with your views, I will make my next posts more good and helpful.

    Jassa

    Thanks

  • Angular 13 Crud Tutorial with Services Part 1 – Add User & Get Users

    Angular 13 Crud Tutorial with Services Part 1 – Add User & Get Users

    Hello to all welcome back on my blog therichpost.com. Today in this blog post, I am going to tell you Angular 13 Crud Tutorial with Services Part 1 – Add User & Get Users.

    In this post, we will cover below things:

    1. Angular13 Crud with PHP MySQL backend.
    2. Angular 13 Crud with services.
    3. Angular 13 Reactive Forms.
    4. Bootstrap 5 in Angular 13.
    Angular 13 Crud Working Video
    Angular 13 Crud Tutorial with Services Part 1 - Add User & Get Users
    Angular 13 Crud Tutorial with Services Part 1 – Add User & Get Users
    Angular13 Reactive Forms
    Angular 12 Crud Tutorial with Services Get Users
    Angular 13 Crud Tutorial with Services Get Users

    Guys Angular 13 and if you are new in Angular 13 then please check below link:

    1. Angular 13 Tutorials

    Guys here is working code snippet and please follow carefully to avoid the mistakes:

    1. Firstly friends we need fresh angular 13 setup and for this we need to run below commands but if you already have angular 13 setup then you can avoid below commands. Secondly we should also have latest node version(14.17.0) installed on our system:

    npm install -g @angular/cli 
    
    ng new angularcrud //Create new Angular Project
    
    cd angularcrud // Go inside the Angular Project Folder

    2. Now friends, here we need to run below commands into our project terminal to install bootstrap 5 module for styling,  into our angular application:

    npm install bootstrap

    3. Now friends, here we need to run below commands into our project terminal to create service file and user related components:

    ng g service crud //create service file
    
    ng g c users //create user component
    
    ng g c adduser //create add user component

    4. Now friends, now we need to add below code into our angularcrud/angular.json file to add bootstrap style:

    ...
     "styles": [
                  "src/styles.css",
                  "node_modules/bootstrap/dist/css/bootstrap.min.css",
                  
                ],

    5. Now friends, now we need to add below code into our angularcrud/src/app/app.module.ts file to import reactive form module and HTTPCLIENT module for api calling:

    ...
    
    import { ReactiveFormsModule } from '@angular/forms';
    import { HttpClientModule } from '@angular/common/http';
    
    @NgModule({
      ...
      imports: [
       ...
        HttpClientModule,
        ReactiveFormsModule
      ]...
    

    6. Now friends, now we need to add below code into our angularcrud/src/app/app-routing.module.ts file to make routes:

    ...
    import { UsersComponent } from './users/users.component';
    import { AdduserComponent } from './adduser/adduser.component';
    const routes: Routes = [
      { path: '', component: UsersComponent },
      { path: 'users', component: UsersComponent },
      { path: 'adduser', component: AdduserComponent },
    ];
    ...
    

    7. Now friends, now we need to add below code into our angularcrud/src/app/crud.service.ts file to create API services:

    import { Injectable } from '@angular/core';
    import { HttpClient } from '@angular/common/http';
    @Injectable({
      providedIn: 'root'
    })
    export class CrudService {
      userData:any;
      constructor(private http:HttpClient) { }
    
      //get all users  details
      public getusers()
          {
            
              return this.http.get('http://localhost/users.php');
          }
    
      //add new user    
      public adduser(userData)
      {
        return this.http.post('http://localhost/users.php/'
      , userData).subscribe((res: Response) => {
        this.getusers();
      });
      }
        
    }

    8. Now guys, now we need to add below code into our angularcrud/src/app/app.component.html file to set the angular frontend and call others components:

    <nav class="navbar navbar-expand-lg navbar-light bg-light">
      <div class="container-fluid">
        <a class="navbar-brand" [routerLink]="['']">Therichpost</a>
        <button class="navbar-toggler" type="button" data-bs-toggle="collapse" data-bs-target="#navbarNav" aria-controls="navbarNav" aria-expanded="false" aria-label="Toggle navigation">
          <span class="navbar-toggler-icon"></span>
        </button>
        <div class="collapse navbar-collapse" id="navbarNav">
          <ul class="navbar-nav">
            <li class="nav-item">
              <a class="nav-link active" [routerLink]="['']" >Home</a>
            </li>
            <li class="nav-item">
              <a class="nav-link" [routerLink]="['/users']" >Users</a>
            </li>
            <li class="nav-item">
              <a class="nav-link" [routerLink]="['/adduser']" >Add User</a>
            </li>
           
          </ul>
        </div>
      </div>
    </nav>
    <router-outlet></router-outlet>

    9. Now guys, now we need to add below code into our angularcrud/src/app/adduser/adduser.component.ts file to create add user functionality and reactive form validations:

    import { Component, OnInit } from '@angular/core';
    import { FormBuilder, FormGroup, Validators } from '@angular/forms';
    import { CrudService } from '../crud.service'; 
    import { Router } from '@angular/router';
    @Component({
      selector: 'app-adduser',
      templateUrl: './adduser.component.html',
      styleUrls: ['./adduser.component.css']
    })
    export class AdduserComponent implements OnInit {
    
    registerForm: FormGroup;
    submitted = false;
    constructor( private crudservice: CrudService, private formBuilder: FormBuilder, private router: Router){}
    //Add user form actions
    get f() { return this.registerForm.controls; }
    onSubmit() {
      
      this.submitted = true;
      // stop here if form is invalid
      if (this.registerForm.invalid) {
          return;
      }
      //True if all the fields are filled
      if(this.submitted)
      {
        
        // Initialize Params Object
         var myFormData = new FormData();
      
       // Begin assigning parameters
      
          myFormData.append('myUsername', this.registerForm.value.firstname);
          myFormData.append('myEmail', this.registerForm.value.email);
      
          this.crudservice.adduser(myFormData); //caaling add user service
          this.router.navigate([`/users`]); //after form submit page will redirect to users page
      }
     
    }
      ngOnInit() {
        //Add User form validations
        this.registerForm = this.formBuilder.group({
        email: ['', [Validators.required, Validators.email]],
       
        firstname: ['', [Validators.required]]
        });
      }
    
    }
    

    10. Now guys, now we need to add below code into our angularcrud/src/app/adduser/adduser.component.html file to create add user form:

    <div class="container p-5">
        <h1 class="text-left mb-5">Add User</h1>
      <form [formGroup]="registerForm" (ngSubmit)="onSubmit()">
        <div class="row">
           <div class="col-sm-6">
              <div class="form-group">
                    <label>Username</label>
                    <input type="text" formControlName="firstname" class="form-control" [ngClass]="{ 'is-invalid': submitted && f.firstname.errors }" />
                    <div *ngIf="submitted && f.firstname.errors" class="invalid-feedback">
                          <div *ngIf="f.firstname.errors.required">Name is required</div>
                    </div>
                 </div>
           </div> 
           <div class="col-sm-6">
              <div class="form-group">
                 <label>Email</label>
                 <input type="text" formControlName="email" class="form-control" [ngClass]="{ 'is-invalid': submitted && f.email.errors }" />
                 <div *ngIf="submitted && f.email.errors" class="invalid-feedback">
                    <div *ngIf="f.email.errors.required">Email is required</div>
                    <div *ngIf="f.email.errors.email">Email must be a valid email address</div>
                 </div>
              </div>
           </div>
           
           
       </div>
       <button type="submit" class="btn btn-primary">Submit</button>
      </form>
      </div>

    11. Now guys, now we need to add below code into our angularcrud/src/app/users/users.component.ts file to create get all users details functionality:

    ...
    import { CrudService } from '../crud.service'; 
    @Component({
      selector: 'app-users',
      templateUrl: './users.component.html',
      styleUrls: ['./users.component.css']
    })
    export class UsersComponent implements OnInit {
      data = [];
      constructor( private crudservice: CrudService){
        //Get all usera details  
        this.crudservice.getusers().subscribe((res: any[])=>{
              
          this.data = res;
        });
      }
    
      ngOnInit(): void {
      }
    
    }
    

    12. Now guys, now we need to add below code into our angularcrud/src/app/users/users.component.html file to create show users details table:

    <div class="container p-5">
        <h1>Users</h1>
        <table class="table table-hover table-bordered">
            <thead>
              <tr>
                <th>ID</th>
                <th>Email</th>
                <th>Username</th>
              </tr>
            </thead>
            <tbody>
           
               
                  <tr *ngFor="let group of data">
                    <td>{{group.id}}</td>
                    <td>{{group.email}}</td>
                    <td>{{group.username}}</td>
                  </tr>


            </tbody>
          </table>
    
         
    </div>

    13. Now guys, now we need to create file users.php inside our xampp/htdocs folder and add below code inside users.php file

    Please create users database inside phpmysql admin and create userdetails tabel and create id, email and username fields

    <?php header('Access-Control-Allow-Origin: *');
    header('Access-Control-Allow-Credentials: true');
    header('Access-Control-Allow-Methods:POST,GET,PUT,DELETE');
    header('Access-Control-Allow-Headers: content-type or other');
    header('Content-Type: application/json');
    
    //Please create users database inside phpmysql admin and create userdetails tabel and create id, email and username fields
    
    $servername = "localhost";
    $username   = "root";
    $password   = "";
    $dbname     = "users";
    // Create connection
    $conn = new mysqli($servername, $username, $password, $dbname);
    // Check connection
    if ($conn->connect_error) {
        die("Connection failed: " . $conn->connect_error);
    } 
    
    //Add user
    if(isset($_POST['myEmail']))
    {
        $sql = "INSERT INTO userdetails (email, username)
            VALUES ('".$_POST['myEmail']."', '".$_POST['myUsername']."')";
        if (mysqli_query($conn,$sql)) {
        $data = array("data" => "You Data added successfully");
            echo json_encode($data);
        } else {
            $data = array("data" => "Error: " . $sql . "<br>" . $conn->error);
            echo json_encode($data);
            
        }
    }
    else
    {
        //get all users details
        $trp = mysqli_query($conn, "SELECT * from userdetails ORDER BY id DESC");
        $rows = array();
        while($r = mysqli_fetch_assoc($trp)) {
            $rows[] = $r;
        }


        print json_encode($rows);
    }
    
    die();
    

    Now in the end please run ng serve command to check the out on browser(localhost:4200) and also please start your xampp.

    After this post, I will do edit user and delete user also.

    Guys if you will still have any kind of query, suggestions or requirement then please feel free to comment below.

    I will appreciate that if you will tell your views for this post. Nothing matters if your views will be good or bad because with your views, I will make my next posts more good and helpful.

    Jassa

    Thanks

  • Angular 13 Datatable with Dynamic Data Working Example

    Angular 13 Datatable with Dynamic Data Working Example

    Hello friends, welcome back to my blog. Today in this blog post, I am going to show you, Angular 13 Datatable with Dynamic Data Working Example.

    Angular Datatable
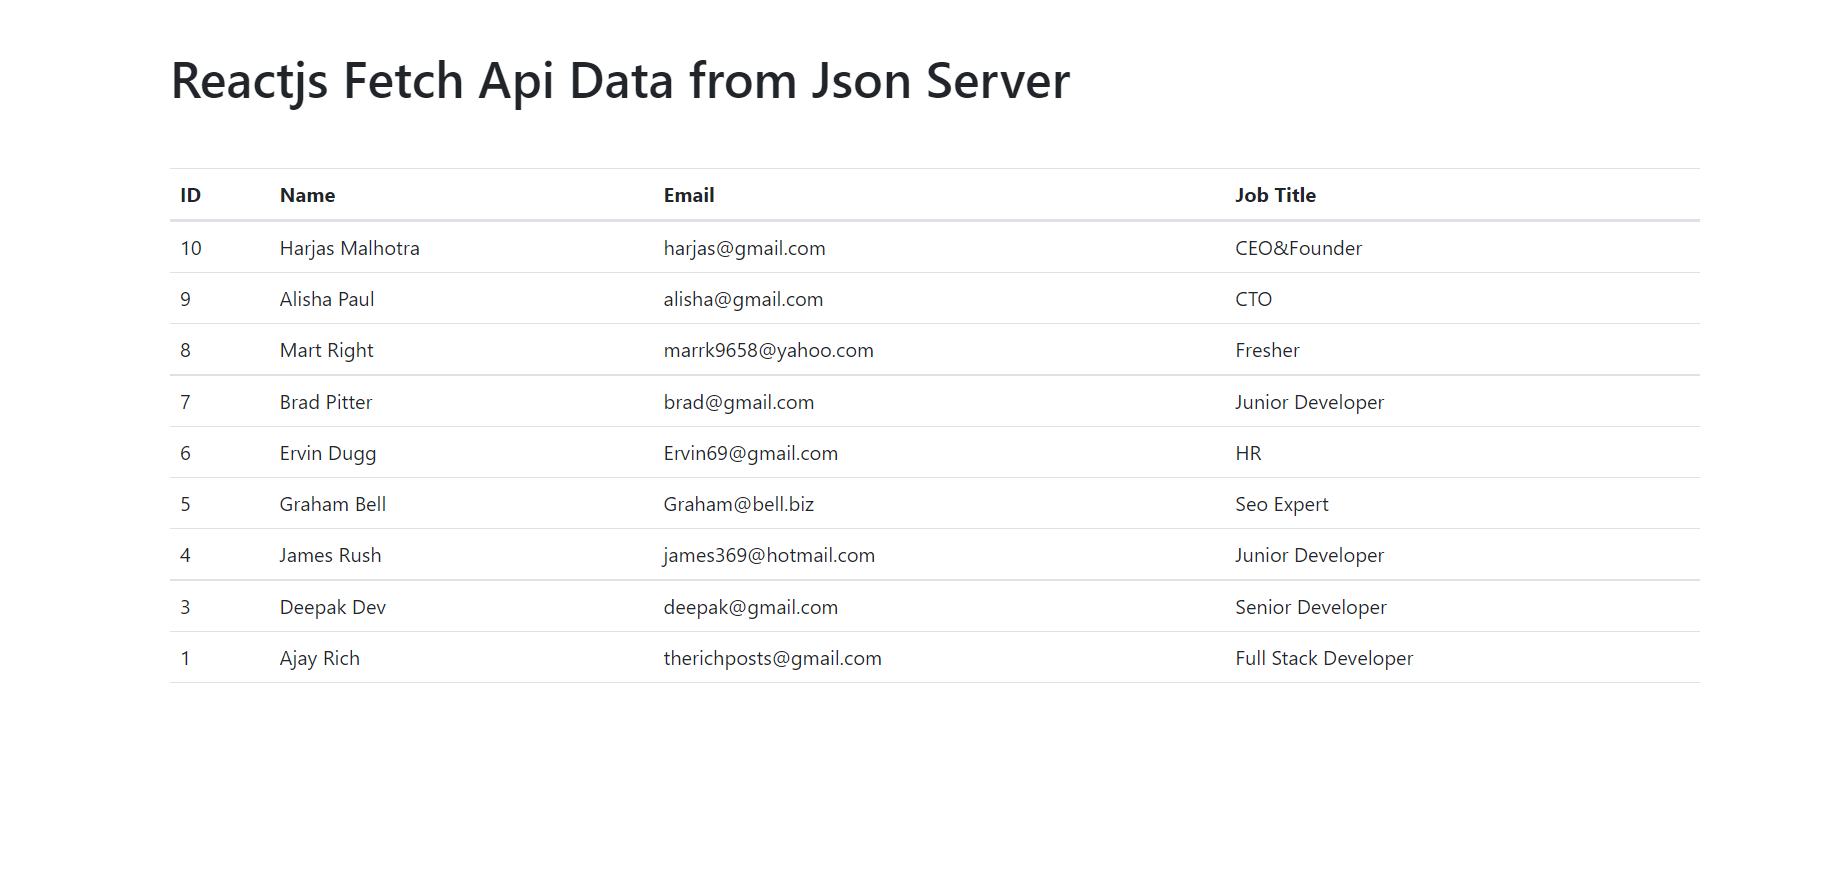
    Angular 13 Datatable with Dynamic Data Working Example
    Angular 13 Datatable with Dynamic Data Working Example

    Angular 14 came and if you are new then you must check below link:

    1. Angular14 Basic Tutorials

    Friends now I proceed onwards and here is the working code snippet and please use carefully this to avoid the mistakes:

    1. Firstly friends we need fresh angular 13 setup and for this we need to run below commands but if you already have angular 13 setup then you can avoid below commands. Secondly we should also have latest node version installed on our system:

    npm install -g @angular/cli 
    
    ng new angulardatatable //Create new Angular Project
    
    cd angulardatatable // Go inside the Angular Project Folder

    2. Now friends, here we need to run below commands into our project terminal to install datatable modules, bootstrap(for good looks), jquery  modules into our angular application:

    I am also adding bootstrap to make datatable looks good.

    npm install jquery --save
    
    npm install datatables.net --save
    
    npm install datatables.net-dt --save
    
    npm install angular-datatables --save
    
    npm install @types/jquery --save-dev
    
    npm install @types/datatables.net --save-dev
    
    npm install bootstrap --save

    3. After done with commands add below code into you angular.json file:

    ...
    "styles": [
                  ...
                  "node_modules/datatables.net-dt/css/jquery.dataTables.css",
                  "node_modules/bootstrap/dist/css/bootstrap.min.css",
                ],
                "scripts": [
                "node_modules/jquery/dist/jquery.js",
                "node_modules/datatables.net/js/jquery.dataTables.js",
                "node_modules/bootstrap/dist/js/bootstrap.js",
                ]
    ...

    4. Now friends we need to  add below code into your src/app/app.module.ts file:

    ...
    import {DataTablesModule} from 'angular-datatables';
    import { HttpClientModule } from '@angular/common/http';
    ...
    imports: [
    ...
    DataTablesModule,
    HttpClientModule
    ]

    5. Now friends we just need to add below code into src/app/app.component.ts file:

    ...
    import { HttpClient } from '@angular/common/http';
    export class AppComponent {
     ...
      data:any;
      constructor(private http: HttpClient){
      //get request from web api
      this.http.get('https://www.therichpost.com/testjsonapi/users/').subscribe(data => {
      
        this.data = data;
    
      setTimeout(()=>{   
        $('#datatableexample').DataTable( {
          pagingType: 'full_numbers',
          pageLength: 5,
          processing: true,
          lengthMenu : [5, 10, 25]
      } );
      }, 1);
            }, error => console.error(error));
    }
    
    
    }
    

    6. Now friends we need to add below code into app.component.html file to get final output on web browser:

    <table class="table table-striped table-bordered table-sm row-border hover" id="datatableexample">
      <thead>
        <tr>
          <th>ID</th>
          <th>Name</th>
          <th>Email</th>
          <th>Job Title</th>
        </tr>
      </thead>
      <tbody>
       <tr *ngFor="let group of data">
             <td>{{group.id}}</td>
             <td>{{group.name}}</td>
             <td>{{group.email}}</td>
             <td>{{group.job_title}}</td>
         </tr>
      </tbody>
    </table>

    Now we are done friends and please run ng serve command and if you have any kind of query then please do comment below.

    Note: Friends, I just tell the basic setup and things, you can change the code according to your requirements. For better understanding must watch video above.

    I will appreciate that if you will tell your views for this post. Nothing matters if your views will be good or bad.

    Jassa

    Thanks

  • How to add bootstrap 5 in angular 13 application?

    How to add bootstrap 5 in angular 13 application?

    Hello friends, welcome back to my blog. Today in this blog post, I am going to tell you, How to add bootstrap 5 in angular 13 application?

    Here is the tutorial link for update angular version to 13: Update Angular 13 to Angular 13

    Add Bootstrap 5 in Angular 13

    Guy’s here are the more demos related to Angular 12 with Bootstrap 5:

    1. Bootstrap 5 Popover working in Angular 12
    2. Bootstrap 5 Tooltip working in Angular 12
    3. Bootstrap5 Modal with Forms in Angular 12


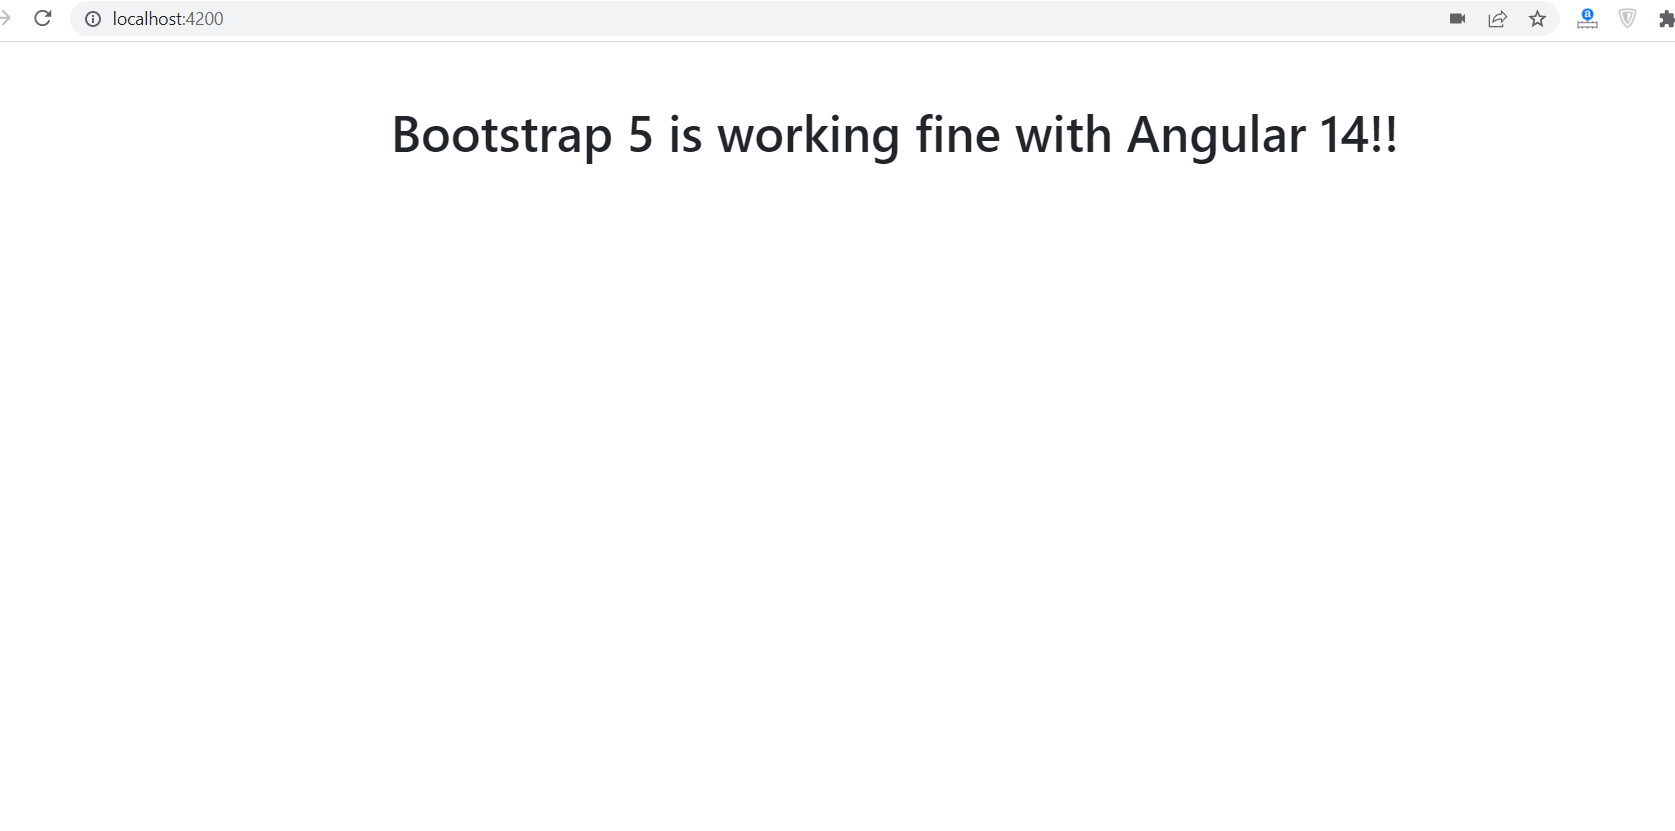
    How to add bootstrap 5 in angular 13 application?
    How to add bootstrap 5 in angular 13 application?
    Package.json file
    After run the npm bootstrap command which I have given below, you will see this code inside your package.json file

    Angular 13 came and Bootstrap 5 also and if you are new then you must check below two links:

    1. Angular 13 Tutorials
    2. Angular12 Free Templates
    3. Bootstrap 5

    Friends now I proceed onwards and here is the working code snippet for How to add bootstrap 5 in angular 13 application? and please use carefully this to avoid the mistakes:

    1. Firstly friends we need fresh angular 13 setup and for this we need to run below commands but if you already have angular 13 setup then you can avoid below commands. Secondly we should also have latest node version installed on our system:

    npm install -g @angular/cli 
    
    ng new angularboot5 //Create new Angular Project
    
    cd angularboot5 // Go inside the Angular Project Folder

    2. Now friends, here we need to run below commands into our project terminal to install bootstrap 5 modules into our angular application:

    npm install bootstrap
    
    npm i @popperjs/core

    3. Now friends we just need to add below code into src/app/app.component.html file to get final out on the web browser:

    <div class="container  text-center mt-5 mb-5">
      <h1>Bootstrap 5 is working fine with Angular 13!!</h1>
    </div>

    4. Now friends we just need to add below code into angular.json file:

    "styles": [
                  ...
                  "node_modules/bootstrap/dist/css/bootstrap.min.css"
              ],
    "scripts": [
                  ...
                   "node_modules/bootstrap/dist/js/bootstrap.min.js"
               ]

    Friends in the end must run ng serve command into your terminal to run the angular 13 project.

    Now we are done friends. If you have any kind of query, suggestion and new requirement then feel free to comment below.

    Note: Friends, In this post, I just tell the basic setup and things, you can change the code according to your requirements.

    I will appreciate that if you will tell your views for this post. Nothing matters if your views will be good or bad because with your views, I will make my next posts more good and helpful.

    Jassa

    Thanks

  • BootstrapVue – How to prevent accordion to close while clicking on sibling divs?

    BootstrapVue – How to prevent accordion to close while clicking on sibling divs?

    Hello friends, welcome back to my blog. Today in this blog post, I am going to show you, BootstrapVue – How to prevent accordion to close while clicking on sibling divs?

    Working Video

    Guy’s here you can see more Vue 3 Bootstrap 5 working example:

    1. Bootstrap 5 Popover working in Vue 3.
    2. Bootstrap 5 Tooltip working in Vue 3.
    3. Bootstrap5 Popup Modal with Forms in Vue 3.


    BootstrapVue - How to prevent accordion to close while clicking on sibling divs?
    BootstrapVue – How to prevent accordion to close while clicking on sibling divs?

    Vue 3 and Bootstrap 5 came and if you are new then you must check below two links:

    1. Vuejs
    2. Bootstrap 5

    Friends now I proceed onwards and here is the working code snippet and use this carefully to avoid the mistakes:

    1. Firstly friends we need fresh vue setup and for this we need to run below commands . Secondly we should also have latest node version installed on our system. With below we will have  bootstrap-vue  modules in our Vue 2 application:

    npm install -g @vue/cli
    
    vue create vuedemo //select vue 2
    
    cd vuedemo
    
    npm install vue bootstrap bootstrap-vue
    
    npm run serve //http://localhost:8080/

    2. Now friends we need to add below code into src/App.vue file to check the final output on browser:

    <template>
      <div>
          <b-container>
          <div class="accordion" role="tablist">
            <b-card no-body class="mb-1">
              <b-card-header header-tag="header" class="p-1" role="tab">
                <b-button block v-b-toggle.accordion-1 variant="primary">Accordion 1</b-button>
              </b-card-header>
              <b-collapse id="accordion-1" visible role="tabpanel">
                <b-card-body>
                  <b-card-text>I start opened because <code>visible</code> is <code>true</code></b-card-text>
                  <b-card-text>{{ text }}</b-card-text>
                </b-card-body>
              </b-collapse>
            </b-card>
    
            <b-card no-body class="mb-1">
              <b-card-header header-tag="header" class="p-1" role="tab">
                <b-button block v-b-toggle.accordion-2 variant="primary">Accordion 2</b-button>
              </b-card-header>
              <b-collapse id="accordion-2" role="tabpanel">
                <b-card-body>
                  <b-card-text>{{ text }}</b-card-text>
                </b-card-body>
              </b-collapse>
            </b-card>
    
            <b-card no-body class="mb-1">
              <b-card-header header-tag="header" class="p-1" role="tab">
                <b-button block v-b-toggle.accordion-3 variant="primary">Accordion 3</b-button>
              </b-card-header>
              <b-collapse id="accordion-3" role="tabpanel">
                <b-card-body>
                  <b-card-text>{{ text }}</b-card-text>
                </b-card-body>
              </b-collapse>
            </b-card>
          </div>
        </b-container>
      </div>
    </template>
    
    <script>
      export default {
        data() {
          return {
            text: `
              Anim pariatur cliche reprehenderit, enim eiusmod high life accusamus terry
              richardson ad squid. 3 wolf moon officia aute, non cupidatat skateboard dolor
              brunch. Food truck quinoa nesciunt laborum eiusmod. Brunch 3 wolf moon
              tempor, sunt aliqua put a bird on it squid single-origin coffee nulla
              assumenda shoreditch et. Nihil anim keffiyeh helvetica, craft beer labore
              wes anderson cred nesciunt sapiente ea proident. Ad vegan excepteur butcher
              vice lomo. Leggings occaecat craft beer farm-to-table, raw denim aesthetic
              synth nesciunt you probably haven't heard of them accusamus labore VHS.
            `
          }
        }
      }
    </script>

    3. Guys now add below code inside src/main js file to get bootstrap-vue styles and scripts:

    import Vue from 'vue'
    import App from './App.vue'
    import { BootstrapVue, IconsPlugin } from 'bootstrap-vue'
    
    // Import Bootstrap an BootstrapVue CSS files (order is important)
    import 'bootstrap/dist/css/bootstrap.css'
    import 'bootstrap-vue/dist/bootstrap-vue.css'
    
    // Make BootstrapVue available throughout your project
    Vue.use(BootstrapVue)
    // Optionally install the BootstrapVue icon components plugin
    Vue.use(IconsPlugin)
    
    Vue.config.productionTip = false
    
    new Vue({
      render: h => h(App),
    }).$mount('#app')

    Now we are done friends  also and If you have any kind of query or suggestion or any requirement then feel free to comment below.

    Note: Friends, I just tell the basic setup and things, you can change the code according to your requirements.

    I will appreciate that if you will tell your views for this post. Nothing matters if your views will be good or bad.

    Jassa

    Thanks

  • How to add searchable feature to a select dropdown list in angular 12?

    How to add searchable feature to a select dropdown list in angular 12?

    Hello friends, welcome back to my blog. Today in this blog post, I am going to tell you, How to add searchable feature to a select dropdown list in angular 12?

    Working Video
    How to add searchable feature to a select dropdown list in angular 12?
    How to add searchable feature to a select dropdown list in angular 12?

    Guy’s Angular 12 came . if you are new then you must check below two links:

    1. Angular12 Basic Tutorials
    2. Angular Free Templates

    Friends now I proceed onwards and here is the working code snippet and please use carefully this to avoid the mistakes:

    1. Firstly friends we need fresh angular 12 setup and for this we need to run below commands but if you already have angular 12 setup then you can avoid below commands.

    Secondly we should also have latest node version installed on our system:

    npm install -g @angular/cli 
    
    ng new angulardemo //Create new Angular Project
    
    cd angulardemo // Go inside the Angular Project Folder
    
    ng serve --open // Run and Open the Angular Project
    
    http://localhost:4200/ // Working Angular Project Url

    2. Now friends, here we need to run below commands into our project terminal to install  bootstrap(good looks), ng-select modules into our angular application:

    npm i --save bootstrap
    
    npm install --save @ng-select/ng-select

    3. Now friends, here we need to add below  into our angular.json file:

    "styles": [
               ...
               "node_modules/bootstrap/dist/css/bootstrap.min.css",
               "node_modules/@ng-select/ng-select/themes/default.theme.css"
              
             ]...

    4. Now friends we need to add below code inside src/app/app.module.ts file:

    import { NgSelectModule } from '@ng-select/ng-select';
    
    ...
    imports: [
       ...
        NgSelectModule
      ],
    ...

    5. Now friends we just need to add below code into src/app/app.component.html file:

    <ng-select [items]="fruits" appendTo="body" formControlName="fruitNames" placeholder="Select Fruits"></ng-select>

    6. Now friends we just need to add below code into src/app/app.component.tsfile:

    ...
    export class AppComponent {
      
      fruits = ["apple", "orange", "banana", "grapes"];
    ...

    Now we are done friends. and please ng serve command to see the output. If you have any kind of query, suggestion and new requirement then feel free to comment below.

    Note: Friends, In this post, I just tell the basic setup and things, you can change the code according to your requirements. For better live working experience, please check the video on the top.

    I will appreciate that if you will tell your views for this post. Nothing matters if your views will be good or bad because with your views, I will make my next posts more good and helpful.

    Jassa

    Thanks