Category: Angular7

  • How to implement responsive navbar in Angular 9?

    How to implement responsive navbar in Angular 9?

    Hello to all, welcome to therichpost.com. In this post, I will tell you, How to implement responsive navbar in Angular 9?

    angular 9 responsive navbar
    How to implement responsive navbar in Angular 9?

    Here are the commands and code snippet and please follow carefully:

    1. Here are the basics commands to set angular 9 your system:

    npm install -g @angular/cli 
    
    ng new angularbootstrap //Create new Angular Project
    
    $ cd angularbootstrap // Go inside the Angular Project Folder
    
    ng serve --open // Run and Open the Angular Project
    
    http://localhost:4200/ // Working Angular Project Url

    2. Here is the command to install bootstrap 4 and jquery into your angular 9 application:

    npm install --save bootstrap
    
    npm i jquery@3.4.1
    
    npm install --save @types/jquery
    
    npm install popper.js --save

    3. Here are the bootstrap 4 css and js path, you need to include into your angular.json file:

    "styles": [
                  ...
                  "node_modules/bootstrap/dist/css/bootstrap.min.css"
              ],
    "scripts": [
                ...
                "node_modules/jquery/dist/jquery.min.js", 
                "node_modules/bootstrap/dist/js/bootstrap.min.js",  
                "node_modules/popper.js/dist/umd/popper.min.js"]

    4. Here is the html code, you need to add into your src\app\app.component.html file:

    <div class="jumbotron text-center" style="margin-bottom:0">
      <h1>My First Bootstrap 4 Page</h1>
      <p>Resize this responsive page to see the effect!</p> 
    </div>
    
    <nav class="navbar navbar-expand-sm bg-dark navbar-dark">
      <a class="navbar-brand" href="#">Navbar</a>
      <button class="navbar-toggler" type="button" data-toggle="collapse" data-target="#collapsibleNavbar">
        <span class="navbar-toggler-icon"></span>
      </button>
      <div class="collapse navbar-collapse" id="collapsibleNavbar">
        <ul class="navbar-nav">
          <li class="nav-item">
            <a class="nav-link" href="#">Link</a>
          </li>
          <li class="nav-item">
            <a class="nav-link" href="#">Link</a>
          </li>
          <li class="nav-item">
            <a class="nav-link" href="#">Link</a>
          </li>    
        </ul>
      </div>  
    </nav>
    <div class="container" style="margin-top:30px">
      <div class="row">
        <div class="col-sm-4">
          <h2>About Me</h2>
          <h5>Photo of me:</h5>
          <div class="fakeimg">Fake Image</div>
          <p>Some text about me in culpa qui officia deserunt mollit anim..</p>
          <h3>Some Links</h3>
          <p>Lorem ipsum dolor sit ame.</p>
          <ul class="nav nav-pills flex-column">
            <li class="nav-item">
              <a class="nav-link active" href="#">Active</a>
            </li>
            <li class="nav-item">
              <a class="nav-link" href="#">Link</a>
            </li>
            <li class="nav-item">
              <a class="nav-link" href="#">Link</a>
            </li>
            <li class="nav-item">
              <a class="nav-link disabled" href="#">Disabled</a>
            </li>
          </ul>
          <hr class="d-sm-none">
        </div>
        <div class="col-sm-8">
          <h2>TITLE HEADING</h2>
          <h5>Title description, Dec 7, 2017</h5>
          <div class="fakeimg">Fake Image</div>
          <p>Some text..</p>
          <p>Sunt in culpa qui officia deserunt mollit anim id est laborum consectetur adipiscing elit, sed do eiusmod tempor incididunt ut labore et dolore magna aliqua. Ut enim ad minim veniam, quis nostrud exercitation ullamco.</p>
          <br>
          <h2>TITLE HEADING</h2>
          <h5>Title description, Sep 2, 2017</h5>
          <div class="fakeimg">Fake Image</div>
          <p>Some text..</p>
          <p>Sunt in culpa qui officia deserunt mollit anim id est laborum consectetur adipiscing elit, sed do eiusmod tempor incididunt ut labore et dolore magna aliqua. Ut enim ad minim veniam, quis nostrud exercitation ullamco.</p>
        </div>
      </div>
    </div>
    <div class="jumbotron text-center" style="margin-bottom:0">
      <p>Footer</p>
    </div>

    This is it and please run ng serve command and check the output. If you have any kind of query then please do comment below.

    Jassa

    Thank you

  • How to make simple sidebar template with Bootstrap 4 and Angular 9?

    How to make simple sidebar template with Bootstrap 4 and Angular 9?

    Hello to all, welcome back to therichpost.com. Today in this post, I will tell you, How to make simple sidebar template with Bootstrap 4 and Angular 9?

    Guys here you can get more Angular 11 Free Templates:

    Angular 11 Free Templates


    Guys here is the updated code snippet for Angular 11 Bootstrap 5 Sidebar Template: How to make simple sidebar template with Bootstrap 5 and Angular 11?


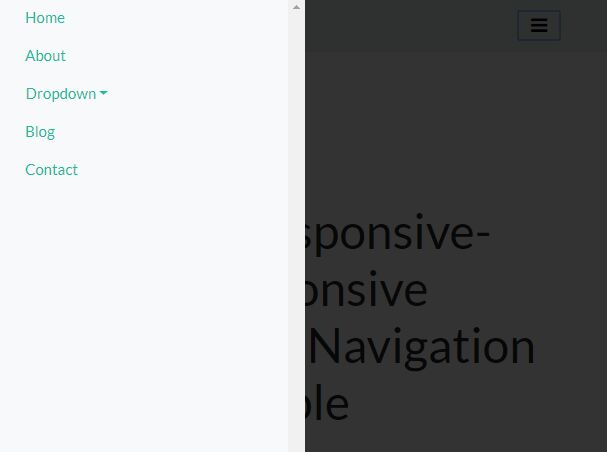
    Below you can see working images of Angular bootstrap toggle sidebar navigation menu. During click on Toggle menu, sidebar navigation will show and hide.

    angular 9 bootstrap 4 simple sidebar template image
    Angular Bootstrap 4 simple sidebar template
    Sidebar Toggle Closed
    Sidebar Toggle Closed
    Bootstrap Angular Template Mobile View
    Bootstrap Angular Template Mobile View
    Bootstrap Angular Template Mobile View with Sidebar Opened
    Bootstrap Angular Template Mobile View with Sidebar Opened

    Here is the code snippet for How to make simple sidebar template with Bootstrap 4 and Angular 9? and please follow carefully:

    1. Guys very first, we need to run below commands into our terminal to get angular 9 on our system and also we have latest node version installed:

    npm install -g @angular/cli 
    
    ng new angularbootstrap //Create new Angular Project
    
    $ cd angularbootstrap // Go inside the Angular Project Folder
    
    ng serve --open // Run and Open the Angular Project
    
    http://localhost:4200/ // Working Angular Project Url

    2. Now guys, we need to run below commands to install bootstrap 4 and jquery into our angular 9 application:

    npm install --save bootstrap
    
    npm i jquery
    
    npm install popper.js --save

    3. Now guys we need to add below code into our angular.json file to call the bootstrap and jquery styles scripts:

    "styles": [
                  "src/styles.css",
            "node_modules/bootstrap/dist/css/bootstrap.min.css"
                ],
                "scripts": [
          "node_modules/jquery/dist/jquery.min.js", 
          "node_modules/bootstrap/dist/js/bootstrap.min.js",  
          "node_modules/popper.js/dist/umd/popper.min.js"]

    4. Now friends we need to add below code into our src\app\app.component.html file:

    <div class="d-flex" id="wrapper">
    
        <!-- Sidebar -->
        <div class="bg-light border-right" id="sidebar-wrapper">
          <div class="sidebar-heading">Therichpost </div>
          <div class="list-group list-group-flush">
            <a href="#" class="list-group-item list-group-item-action bg-light">Dashboard</a>
            <a href="#" class="list-group-item list-group-item-action bg-light">Shortcuts</a>
            <a href="#" class="list-group-item list-group-item-action bg-light">Overview</a>
            <a href="#" class="list-group-item list-group-item-action bg-light">Events</a>
            <a href="#" class="list-group-item list-group-item-action bg-light">Profile</a>
            <a href="#" class="list-group-item list-group-item-action bg-light">Status</a>
          </div>
        </div>
        <!-- /#sidebar-wrapper -->
    
        <!-- Page Content -->
        <div id="page-content-wrapper">
    
          <nav class="navbar navbar-expand-lg navbar-light bg-light border-bottom">
            <button class="btn btn-primary" id="menu-toggle">Toggle Menu</button>
    
            <button class="navbar-toggler" type="button" data-toggle="collapse" data-target="#navbarSupportedContent" aria-controls="navbarSupportedContent" aria-expanded="false" aria-label="Toggle navigation">
              <span class="navbar-toggler-icon"></span>
            </button>
    
            <div class="collapse navbar-collapse" id="navbarSupportedContent">
              <ul class="navbar-nav ml-auto mt-2 mt-lg-0">
                <li class="nav-item active">
                  <a class="nav-link" href="#">Home <span class="sr-only">(current)</span></a>
                </li>
                <li class="nav-item">
                  <a class="nav-link" href="#">Link</a>
                </li>
                <li class="nav-item dropdown">
                  <a class="nav-link dropdown-toggle" href="#" id="navbarDropdown" role="button" data-toggle="dropdown" aria-haspopup="true" aria-expanded="false">
                    Dropdown
                  </a>
                  <div class="dropdown-menu dropdown-menu-right" aria-labelledby="navbarDropdown">
                    <a class="dropdown-item" href="#">Action</a>
                    <a class="dropdown-item" href="#">Another action</a>
                    <div class="dropdown-divider"></div>
                    <a class="dropdown-item" href="#">Something else here</a>
                  </div>
                </li>
              </ul>
            </div>
          </nav>
    
          <div class="container-fluid">
            <h1 class="mt-4">Simple Sidebar</h1>
            <p>The starting state of the menu will appear collapsed on smaller screens, and will appear non-collapsed on larger screens. When toggled using the button below, the menu will change.</p>
            <p>Make sure to keep all page content within the <code>#page-content-wrapper</code>. The top navbar is optional, and just for demonstration. Just create an element with the <code>#menu-toggle</code> ID which will toggle the menu when clicked.</p>
          </div>
        </div>
        <!-- /#page-content-wrapper -->
    
      </div>
      <!-- /#wrapper -->

    5. Now guys we need to add below code into our src\app\app.component.ts file:

    import { Component } from '@angular/core';
    import * as $ from 'jquery';
    @Component({
      selector: 'app-root',
      templateUrl: './app.component.html',
      styleUrls: ['./app.component.css']
    })
    export class AppComponent {
      title = 'angularbootstrap';
       ngOnInit() {
                    //Toggle Click Function
        $("#menu-toggle").click(function(e) {
          e.preventDefault();
          $("#wrapper").toggleClass("toggled");
        });
      }
      
    }
    

    6. Now guys we need to add below code into our src\app\app.component.css file:

    body {
      overflow-x: hidden;
    }
    
    #sidebar-wrapper {
      min-height: 100vh;
      margin-left: -15rem;
      -webkit-transition: margin .25s ease-out;
      -moz-transition: margin .25s ease-out;
      -o-transition: margin .25s ease-out;
      transition: margin .25s ease-out;
    }
    
    #sidebar-wrapper .sidebar-heading {
      padding: 0.875rem 1.25rem;
      font-size: 1.2rem;
    }
    
    #sidebar-wrapper .list-group {
      width: 15rem;
    }
    
    #page-content-wrapper {
      min-width: 100vw;
    }
    
    #wrapper.toggled #sidebar-wrapper {
      margin-left: 0;
    }
    
    @media (min-width: 768px) {
      #sidebar-wrapper {
        margin-left: 0;
      }
    
      #page-content-wrapper {
        min-width: 0;
        width: 100%;
      }
    
      #wrapper.toggled #sidebar-wrapper {
        margin-left: -15rem;
      }
    }
    

    This is it guys and please run ng serve command and check the output on browser. If you have any kind of query then please do comment below.

    Note: Friends, In this post, I just tell the basic setup and things, you can change the code according to your requirements.

    I will appreciate that if you will tell your views for this post. Nothing matters if your views will be good or bad because with your views, I will make my next posts more good and helpful.

    Jassa

    Thank you

  • How to send files in Angular 9 application?

    How to send files in Angular 9 application?

    Hello to all, welcome on therichpost.com. In this post, I will tell you, How to send files in Angular 9 application?

    Post Working:

    In post, I am sending files or images to my laravel backend in my Angular 9 application.

    Here is the code snippet and please use carefully:

    1. Here is my HTML code for app.component.ts file:

    <form #f="ngForm" (ngSubmit)="onSubmit(f)">
    <input type="file" #fileupload [(ngModel)]="myFile" name="myFile" (change)="fileEvent($event)"/>
    <button>Upload Image</button>


    2. Here is my code for app.component.ts file:

    ...
    import { HttpClient, HttpHeaders } from '@angular/common/http';
    import {NgForm} from '@angular/forms';
    ...
    
    filedata:any;
    
    //File onChange event, where I am getting the file details
    fileEvent(e){
            this.filedata = e.target.files[0];
        }
    
    constructor(private http: HttpClient) {}
    
    //Form Submit Function
    onSubmit(f: NgForm) {
    
              var myFormData = new FormData();
              const headers = new HttpHeaders();
              headers.append('Content-Type', 'multipart/form-data');
              headers.append('Accept', 'application/json');
    
              // store file details into formdata
              myFormData.append('image', this.filedata);
    
              //HTTP Angular service, which will send call to Laravel API With headers and myformdata
              this.http.post('http://localhost/blog/public/api/sample-restful-apis', myFormData, { headers: headers }).subscribe(data => {
              console.log(data);
          });
            
          }


    3. Code for app.module.ts file:

    ...
    import { HttpClientModule } from '@angular/common/http';
    import { FormsModule }   from '@angular/forms';
    ...
    
    ...
    imports: [
        ...
        HttpClientModule,
        FormsModule,
        ...
      ],
    ...


    In this post, I just showed, how to send files or images in Angular 9. I have used FORMDATA to send files because it is easy and clean way to send our data.

    If you have any kind of query then please do comment below.

    Jassa

    Thank you

  • How to run audio file in Angular 9 application?

    How to run audio file in Angular 9 application?

    Hello to all, welcome on therichpost.com. In this post, I will tell you, How to run audio file in Angular 9 application?

    Post Working:

    I am implementing audio player into my angular 9 application with this anyone can listen the music on my angular 9 application.
    Angular audio player
    Angular audio player

    Here is the working code snippet and commands, please use carefully:

    1. Here are the basics commands you need run to play audio into your Angular 9 application:

    ng add @angular/material
    
    npm i @angular/common
    
    npm i @angular/core
    
    npm install ngx-audio-player --save

    2. After run the above commands, you have to add below code into your app.module.ts file:

    // Import library module
    import { NgxAudioPlayerModule } from 'ngx-audio-player';
     
    @NgModule({
      imports: [
        // ...
        NgxAudioPlayerModule
      ]
    })

    3. Now you have to add below code into your app.component.ts file:

    // Material Style Basic Audio Player Title and Audio URL
       msbapTitle = 'Audio Title';
       msbapAudioUrl = 'Online MP3 File URL';   
       msbapDisplayTitle = true; 

    4. Now you have to add below code into your app.component.html file:

    <mat-basic-audio-player [audioUrl]="msbapAudioUrl" [title]="msbapTitle" [autoPlay]="false" muted="muted"
        [displayTitle]="msbapDisplayTitle" [displayVolumeControls]="true" >
    </mat-basic-audio-player>

    This is it and if you have any kind of query then please comment on below comment section.

    Note:

    We can also make playlist with this and that I will tell you in my next post.

    Jassa

    Thank you

  • Angular 9 – How to make ngform input pre-filled?

    Angular 9 – How to make ngform input pre-filled?

    Hello to all, welcome to therichpost.com. In this post, I will tell you, Angular 9 – How to make ngform input pre-filled?

    Post Working:

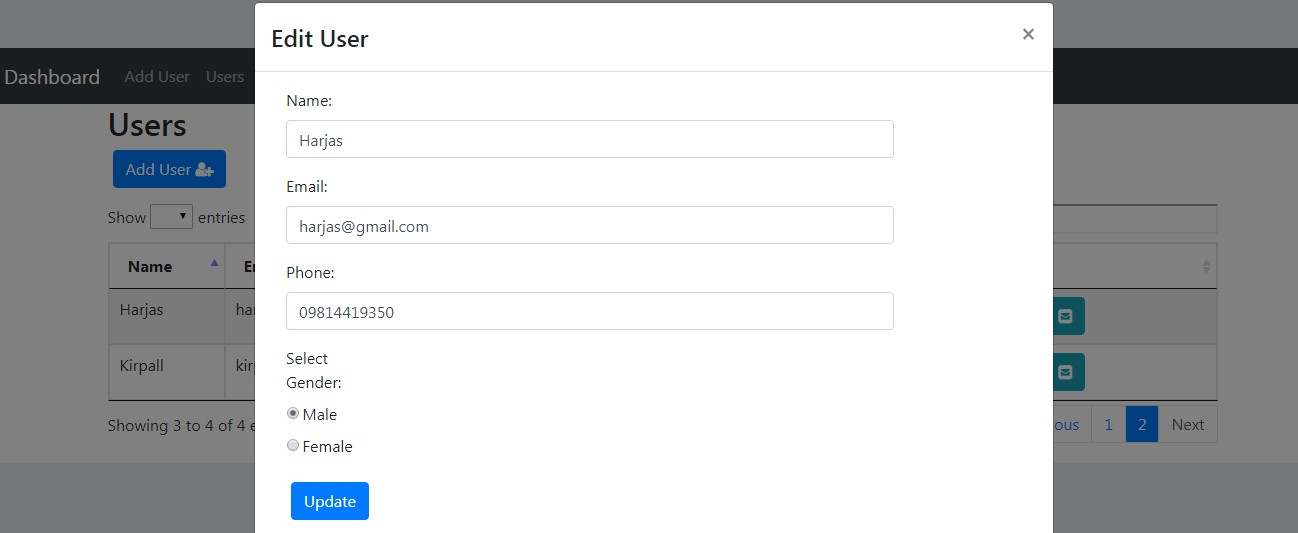
    In this post, I am making angular 9 ngform input prefilled during updation time. Form Angular 9 good looks, I have also used Bootstrap 4.

    Here is the code snippet and please use carefully:

    1. Here is my HTML code and I have added to my app.component.html file:

    I have added some code related to validation so for that you can check my old posts related to reactive form validations

    <form class="form-horizontal" [formGroup]="registerForm" (ngSubmit)="onSubmit()">
    <div class="form-group">
       <label class="control-label col-sm-2" for="name">Name:</label>
       <div class="col-sm-10">
          <input type="text" class="form-control" id="uname" placeholder="Enter Name" name="uname" formControlName="firstName" [ngClass]="{ 'is-invalid': submitted && f.firstName.errors }">
          <div *ngIf="submitted && f.firstName.errors" class="invalid-feedback">
             <div *ngIf="f.firstName.errors.required">First Name is required</div>
          </div>
       </div>
    </div>
    <div class="form-group">
       <label class="control-label col-sm-2" for="email">Email:</label>
       <div class="col-sm-10">
          <input type="email" class="form-control" id="email" placeholder="Enter email" name="email" formControlName="email" [ngClass]="{ 'is-invalid': submitted && f.email.errors }">
          <div *ngIf="submitted && f.email.errors" class="invalid-feedback">
             <div *ngIf="f.email.errors.required">Email is required</div>
             <div *ngIf="f.email.errors.email">Email must be a valid email address</div>
          </div>
       </div>
    </div>
    <div class="form-group">
       <label class="control-label col-sm-2" for="phone">Phone:</label>
       <div class="col-sm-10">
          <input type="text" class="form-control" id="phone" placeholder="Enter Phone" name="phone" formControlName="phone" [ngClass]="{ 'is-invalid': submitted && f.phone.errors }">
          <div *ngIf="submitted && f.phone.errors" class="invalid-feedback">
             <div *ngIf="f.phone.errors.required">Phone is required</div>
          </div>
       </div>
    </div>
    <div class="form-group">
       <div class="col-sm-offset-2 col-sm-10">
          <button type="submit" class="btn btn-primary">Update</button>
       </div>
    </div>
    </form>


    2. Here is code and I have added into my add.component.ts file:

    I have added the value to my ngform input during API call and this code is only for to put the values and you can use this code with your own way according to requirements

    registerForm: FormGroup

    registerForm connects formdata with value and valid state

    // I have used setValue function
    
    this.registerForm.get('firstName').setValue(data.name);
    this.registerForm.get('email').setValue(data.email);
    this.registerForm.get('phone').setValue(data.phone);


    If you have any kind of query regarding ngform then you can comment below.

    Jassa

    Thank you

  • How  to send calls in Angular  9 to an API?

    How to send calls in Angular 9 to an API?

    Hello to all, welcome to therichpost.com. In this post, I will tell you, How to send calls in Angular 9 to an API?

    Post Working:

    In this post, I will show you multiple API Calls using Angular 9 HTTP POST and HTTP GET services.

    Here are all the API calls and please learn and use them carefully:

    1. Simple API call using Angular 9 HTTP GET and you can use into your app.component.ts file or any service file:

    ...
    import { HttpClient } from '@angular/common/http';
    ...
    
    data = []; //Declare variable to store API data
    
    constructor(private http: HttpClient) {
          
        //Basic Get API call
        this.http.get('http://localhost/mypage.php').subscribe(data => {
      
        //Pushing API data to declare variable
        this.data.push(data);
        
        }, error => console.error(error));
    }


    2. API Call using Angular 9 HTTP Post service. You can send data with this service like Form Post Data and you can add this code into your app.component.ts file or any service file:

    ...
    import { HttpClient } from '@angular/common/http';
    ...
    
    
    constructor(private http: HttpClient) {}
    
    ...
    
    // Looks like Form Submit Function
    onSubmit() {
         
        // creates an empty FormData object
           var myFormData = new FormData();
    
        // Begin assigning parameters
           myFormData.append('name', this.registerForm.value.name);
           myFormData.append('email', this.registerForm.value.email);
           myFormData.append('phone', this.registerForm.value.phone);
    
          // POST API With DATA
          return this.http.post('http://localhost/mypage.php/'
      , myFormData).subscribe((res: Response) => {
        //Getting API Response	
      });
    
    }
    ...


    3. Multiple API Calls in one time using Angular 9 POST GET forkJoin  and you can add this code into your app.component.ts file or any service file:

    forkJoin seems merging API requests(array merging)

    ...
    import { HttpClient } from '@angular/common/http';
    import {forkJoin} from 'rxjs';
    ...
    
    
    ...
    data = []; // Declare array variable
    constructor(private http: HttpClient) {}
    ...
    
    ...
    
    //Something like Form Submission
    
    FormSubmit()
    {
            //creates an empty FormData object
              var myFormData = new FormData();
              myFormData.append('id', id);
    
            //Call Multiple API Using forkJoin
              forkJoin(this.http.post('http://localhost/mypage.php', myFormData), 
                 this.http.get('http://localhost/mypage.php'))
                .subscribe(([call1Response, call2Response]) => {
         
                //Pushing API data to array variable
                this.data.push(call2Response);
           });
    
    }
    ...


    If you have any kind of query regarding Angular 9 API calls then you can comment below.

    Jassa

    Thank you

  • Angular 9 – Multiple types of click events

    Angular 9 – Multiple types of click events

    Hello to all, welcome again on therichpost.com. In this post, I will tell you, Angular 9 – Multiple types of click events.

    Post Working:

    In this post, I will show you multiple types of click events like click function with parameters etc.

    Here is the code and please use carefully:

    1. Here is the code for app.component.ts file:

    ...
    
    export class AppComponent implements OnInit {
      nameDynamic = "Therichpost";
    
      //Simple Click Function
      clickme()
      {
      alert("click me clicked!!");
      }
    
      //Click Function with event trigger
      clickme2(event)
      {
        alert(event); //Mouse click event
      }
    
      //Click Function with Dynamic Parameter value
      clickme3(name)
      {
        alert(name)
      }
    
      //Click Function with Multiple Parameters values
      clickme4(event, name)
      {
      alert('Name= ' + name);
      }
    }
    
    ...


    2. Here is the code for app.component.html file:

    <!-- I have added Bootstrap 4 so I am adding bootstrap 4 classes -->
    
    <button class="btn btn-primary" (click) = "clickme()">Simple Click Function</button>
    
    <button class="btn btn-primary" (click) = "clickme2($event)">Click Function with Parameter</button>
    
    <button class="btn btn-primary" (click) = "clickme3(nameDynamic)">Click Function with Dynamic Parameter</button>
    
    <button class="btn btn-primary" (click) = "clickme4($event, nameDynamic)">Click Function with Multiple Parameter</button>


    If you have any kind of query then pleaes do comment below.

    jassa

    Thank you

  • How to make business template with Bootstrap 4 and Angular 9?

    How to make business template with Bootstrap 4 and Angular 9?

    Hello to all, welcome again on therichpost.com. In this post, I will tell you, How to make business template with Bootstrap 4 and Angular 9?

    Here are the complete commands and code snippet and please follow carefully:

    1. Here are the basics commands to set angular 9 your system:

    npm install -g @angular/cli 
    
    ng new angularbootstrap //Create new Angular Project
    
    $ cd angularbootstrap // Go inside the Angular Project Folder
    
    ng serve --open // Run and Open the Angular Project
    
    http://localhost:4200/ // Working Angular Project Url


    2. Here is the command to install bootstrap 4 and jquery into your angular 9 application:

    npm install --save bootstrap
    
    npm i jquery@3.4.1
    
    npm install --save @types/jquery
    
    npm install popper.js --save


    3. Here are the commands to create header and footer components:

    ng g c header
    
    ng g c footer


    4. Here are the bootstrap 4 css and js path, you need to include into your angular.json file:

    "styles": [
                  "src/styles.css",
            "node_modules/bootstrap/dist/css/bootstrap.min.css"
                ],
                "scripts": [
          "node_modules/jquery/dist/jquery.min.js", 
          "node_modules/bootstrap/dist/js/bootstrap.min.js",  
          "node_modules/popper.js/dist/umd/popper.min.js"]


    5. Here is the html code, you need to add into your src\app\header\header.component.html file:

    <!-- Navigation -->
     <nav class="navbar navbar-expand-lg navbar-dark bg-dark fixed-top">
       <div class="container">
         <a class="navbar-brand" href="#">Therichpost</a>
         <button class="navbar-toggler" type="button" data-toggle="collapse" data-target="#navbarResponsive" aria-controls="navbarResponsive" aria-expanded="false" aria-label="Toggle navigation">
           <span class="navbar-toggler-icon"></span>
         </button>
         <div class="collapse navbar-collapse" id="navbarResponsive">
           <ul class="navbar-nav ml-auto">
             <li class="nav-item active">
               <a class="nav-link" href="#">Home
                 <span class="sr-only">(current)</span>
               </a>
             </li>
             <li class="nav-item">
               <a class="nav-link" href="#">About</a>
             </li>
             <li class="nav-item">
               <a class="nav-link" href="#">Services</a>
             </li>
             <li class="nav-item">
               <a class="nav-link" href="#">Contact</a>
             </li>
           </ul>
         </div>
       </div>
     </nav>
    
     <!-- Header -->
     <header class="bg-primary py-5 mb-5">
       <div class="container h-100">
         <div class="row h-100 align-items-center">
           <div class="col-lg-12">
             <h1 class="display-4 text-white mt-5 mb-2">Business Name or Tagline</h1>
             <p class="lead mb-5 text-white-50">Lorem ipsum dolor sit amet, consectetur adipisicing elit. Non possimus ab labore provident mollitia. Id assumenda voluptate earum corporis facere quibusdam quisquam iste ipsa cumque unde nisi, totam quas ipsam.</p>
           </div>
         </div>
       </div>
     </header>


    6. Here is the html code, you need to add into your src\app\footer\footer.component.html file:

    <!-- Footer -->
     <footer class="py-5 bg-dark">
       <div class="container">
         <p class="m-0 text-center text-white">Copyright &copy; Your Website 2020</p>
       </div>
       <!-- /.container -->
     </footer>


    7. Here is the html code, you need to add into your src\app\app.component.html file:

    <app-header></app-header>
    <!-- Page Content -->
      <div class="container">
    
        <div class="row">
          <div class="col-md-8 mb-5">
            <h2>What We Do</h2>
            <hr>
            <p>Lorem ipsum dolor sit amet, consectetur adipisicing elit. A deserunt neque tempore recusandae animi soluta quasi? Asperiores rem dolore eaque vel, porro, soluta unde debitis aliquam laboriosam. Repellat explicabo, maiores!</p>
            <p>Lorem ipsum dolor sit amet, consectetur adipisicing elit. Omnis optio neque consectetur consequatur magni in nisi, natus beatae quidem quam odit commodi ducimus totam eum, alias, adipisci nesciunt voluptate. Voluptatum.</p>
            <a class="btn btn-primary btn-lg" href="#">Call to Action &raquo;</a>
          </div>
          <div class="col-md-4 mb-5">
            <h2>Contact Us</h2>
            <hr>
            <address>
              <strong>Start Bootstrap</strong>
              <br>3481 Melrose Place
              <br>Beverly Hills, CA 90210
              <br>
            </address>
            <address>
              <abbr title="Phone">P:</abbr>
              (123) 456-7890
              <br>
              <abbr title="Email">E:</abbr>
              <a href="mailto:#">name@example.com</a>
            </address>
          </div>
        </div>
        <!-- /.row -->
    
        <div class="row">
          <div class="col-md-4 mb-5">
            <div class="card h-100">
              <img class="card-img-top" src="http://placehold.it/300x200" alt="">
              <div class="card-body">
                <h4 class="card-title">Card title</h4>
                <p class="card-text">Lorem ipsum dolor sit amet, consectetur adipisicing elit. Sapiente esse necessitatibus neque sequi doloribus.</p>
              </div>
              <div class="card-footer">
                <a href="#" class="btn btn-primary">Find Out More!</a>
              </div>
            </div>
          </div>
          <div class="col-md-4 mb-5">
            <div class="card h-100">
              <img class="card-img-top" src="http://placehold.it/300x200" alt="">
              <div class="card-body">
                <h4 class="card-title">Card title</h4>
                <p class="card-text">Lorem ipsum dolor sit amet, consectetur adipisicing elit. Sapiente esse necessitatibus neque sequi doloribus totam ut praesentium aut.</p>
              </div>
              <div class="card-footer">
                <a href="#" class="btn btn-primary">Find Out More!</a>
              </div>
            </div>
          </div>
          <div class="col-md-4 mb-5">
            <div class="card h-100">
              <img class="card-img-top" src="http://placehold.it/300x200" alt="">
              <div class="card-body">
                <h4 class="card-title">Card title</h4>
                <p class="card-text">Lorem ipsum dolor sit amet, consectetur adipisicing elit. Sapiente esse necessitatibus neque.</p>
              </div>
              <div class="card-footer">
                <a href="#" class="btn btn-primary">Find Out More!</a>
              </div>
            </div>
          </div>
        </div>
        <!-- /.row -->
    
      </div>
      <!-- /.container -->
    <app-footer></app-footer>


    This is it and please run ng serve command and check the output. If you have any kind of query then please do comment below.

    Jassa

    Thank you

  • How to make navbar sticky in Angular 9?

    How to make navbar sticky in Angular 9?

    Hello to all, welcome on therichpost.com. In this post, I will tell you, How to make navbar sticky in Angular 9?

    Post Working:

    I am using Bootstrap 4 into my angular 9 application and just added one class, bootstrap 4 navbar changes to sticky.

    Here is the working code and please use carefully:

    1. Here is the class that I have added to my Bootstrap 4 navbar into my Angular 9 application(app.component.html file):

    <nav class="navbar navbar-expand-md bg-dark navbar-dark sticky-top">
      <a class="navbar-brand" routerLink="/users">Home</a>
      <button class="navbar-toggler" type="button" data-toggle="collapse" data-target="#collapsibleNavbar">
        <span class="navbar-toggler-icon"></span>
      </button>
      <div class="collapse navbar-collapse" id="collapsibleNavbar">
        <ul class="navbar-nav">
          
          <li class="nav-item">
            <a class="nav-link" routerLink="/adduser">Add User</a>
          </li>
          <li class="nav-item">
            <a class="nav-link" routerLink="/users">Users</a>
          </li>
        </ul>
      </div>  
    </nav>


    Here is the class name : sticky-top that we need to add into navbar.

    If you have any kind of query then please do comment below.

    Jassa

    Thak you

  • How to pass data from one component to another component in Angular 9?

    How to pass data from one component to another component in Angular 9?

    Hello to all, welcome on therichpost.com. In this post, I will tell you, How to pass data from one component to another component in Angular 9?

    Post Working:

    In this post, I will tell you, How to pass data from one component to another component in Angular 9? I am passing data between components with query parameters.

    Here is the working code snippet and please use carefully:

    1. Here is the code for First Component and that I have added into my app.firstcomponent.ts file:

    Here I am setting data

    ...
    import { Router } from '@angular/router';
    ...
    
    export class FirstComponent implements OnInit {
     ...
    adduserdata = "First Component";
    constructor(private router: Router) { }
    
    //Button click function or you can try it with api callig also
    buttonclick()
    {
     this.router.navigate(['secondcomponenturl'], {queryParams: {data : this.adduserdata}});
    }
    ...
    }


    2. Here is the code for Second Component and that I have added into my app.secondcomponent.ts file:

    Here I am getting the data

    ...
    import { ActivatedRoute, Router, NavigationEnd  } from '@angular/router';
    ...
    
    export class SecondComponent implements OnInit {
    constructor(private route: ActivatedRoute) {}
    
    ...
    ngOnInit(): void {
       console.log(this.route.snapshot.queryParams.data);
      }
    ...
    }


    If you have any kind of query then please let me know.

    Jaasa

    Thank you