Hello to all, welcome to therichpost.com. In this post, I will continue with Vue laravel Tutorial Part 4 Series – Vue Laravel Tutorial Part 4 – Form Validation.
I feel happy , every time I share the post. Maybe my writing skill ae not up to mark but I want to share the code to help others.
laravel and Vuejs both are in the top charts these days. We can easily make SPA(Single Page Application) with the help of laravel and Vuejs.
I am using both Laravel and Vuejs latests versions.
One thing must say, To understand this post, you need to see past Vue Laravel Tutorials
Posts and here are the links:

https://therichpost.com/vue-laravel-tutorial-part-1

https://therichpost.com/vue-laravel-tutorial-part-2

https://therichpost.com/vue-laravel-tutorial-part-3
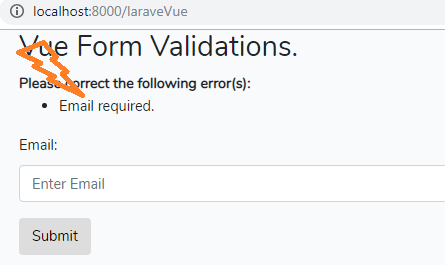
In this post, I will do form validation and this is very important past of every website for security point of view and here is the working picture:

1. Here is the working and tested code, you need to update the resources\js\components\adduser.vue file:
In my Vue Laravel Tutorial Part 3, I have made new file resources\js\components\adduser.vue file and I have added form html in it and In this post, I will validate that form.
I define array errors and make it null. I push the custom validation error message in this errors array.
<template>
    <div class="container">
        <h2>Vue Form Validations.</h2>
        <p v-if="errors.length">
            <b>Please correct the following error(s):</b>
            <ul>
              <li v-for="error in errors">{{ error }}</li>
            </ul>
        </p>
          <form @submit="checkForm">
            <div class="form-group">
              <label for="email">Email:</label>
              <input v-model="email" type="email" class="form-control" id="email" placeholder="Enter Email" name="email">
            </div>
            <button type="submit" class="btn btn-default">Submit</button>
          </form>
    </div>
</template>

<script>
    export default {
        mounted() {
            console.log('Component mounted.')
        },
        data() {
        return {
            errors: [],
            state: {
                email: ''
            }
        }
    },
    methods:{
    checkForm: function (e) {

      this.errors = [];

      if (!this.email) {
        this.errors.push('Email required.');
      }

      e.preventDefault();
    }
  }
    }
</script>
If you will face any kind of problem then do comment below or you can ask question.

Leave a Reply
You must be logged in to post a comment.