
Hello to all, welcome to therichpost.com. In this post, I will continue with Vue Laravel Tutorial Part 5 Series – Vue Laravel Tutorial Part 5 – Vue Routing.
I feel very happy, when I share the post because this something related to me like my knowledge, my writing skills, something I can share to the world.
In this post, I will share very important part, which is Routing. Routing means the way, which we can go here and there. Simple means, we can travel every part or page to Application or website.
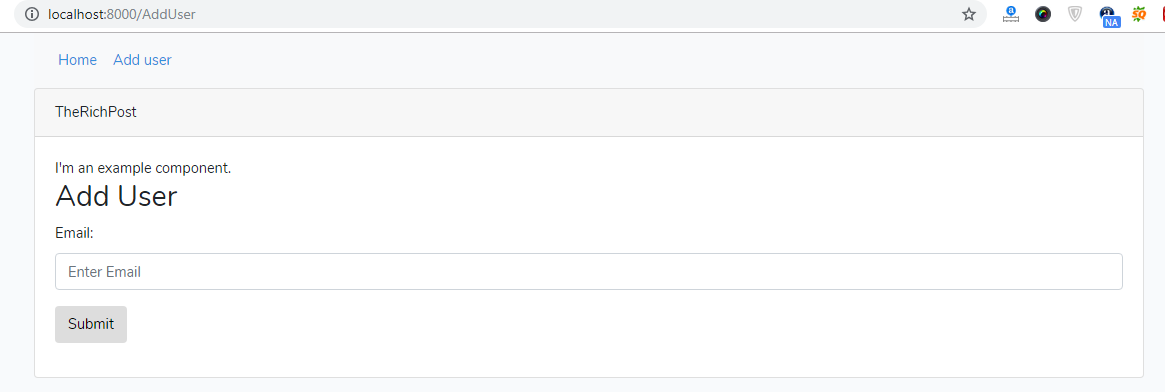
Here I am sharing some picture related to Vue Routing:

One thing must say, To understand this post, you need to see past Vue Laravel Tutorials Posts and here are the links:

https://therichpost.com/vue-laravel-tutorial-part-1

https://therichpost.com/vue-laravel-tutorial-part-2

https://therichpost.com/vue-laravel-tutorial-part-3

https://therichpost.com/vue-laravel-tutorial-part-4-form-validation
Here is the complete working code for Vue Laravel Routing Process:
I have change my app.js file code and ExampleComponent.vue file code that you will find in my past Vue Laravel Tutorial Posts:
1. First, you I ran below command into my terminal to add fresh Vuejs but laravel do this by default:
With this advance Vuejs will be installed to our application:
npm install vue
2. Second, for add routing to my Vuejs application, I ran below command into my terminal:
Router Module will be add:
npm install vue-router
3. I have also added Bootstrap into it by run below command into terminal:
With this, we can add more Vue Bootstrap feature, which are interrelated.
npm i bootstrap-vue
4. After done the command, I added below code into my resources/js/app.js file:
This is main file, In which, we declare the component, Vuejs modules and make the routes:
/**
 * First we will load all of this project's JavaScript dependencies which
 * includes Vue and other libraries. It is a great starting point when
 * building robust, powerful web applications using Vue and Laravel.
 */

import BootstrapVue from 'bootstrap-vue'

import Vue from 'vue';
import VueRouter from 'vue-router';
Vue.use(VueRouter);

// Imported components
import examplecomponent from './components/ExampleComponent.vue';
import adduser from './components/AddUser.vue';


// Route
const routes = [
  { name: 'adduser', path: '/AddUser', component: adduser },
  { name: 'examplecomponent', path: '/', component: examplecomponent }
];

// Setup Vue Router
const router = new VueRouter({
  mode: 'history',
  routes: routes,
  linkActiveClass: "", // active class for non-exact links.
  linkExactActiveClass: "active" // active class for *exact* links.
});
new Vue(Vue.util.extend({ router }, examplecomponent)).$mount('#app');
5. After that, I added below code into my resources\js\components\ExampleComponent.vue file:
In this file, I wrote code for router-link, which transfers to one component to other like anchor tags.
<template>
   <div class="container">
      <nav class="navbar navbar-expand-sm bg-light">
         <!-- Links -->
         <ul class="navbar-nav">
        <li class="nav-item">
               <router-link tag="li" class="nav-item" to="/laraveVue">
                  <a class="nav-link">Home</a>
               </router-link>
            </li>
            <li class="nav-item">
               <router-link tag="li" class="nav-item" to="/AddUser">
                  <a class="nav-link">Add user</a>
               </router-link>
            </li>
         </ul>
      </nav>
      <div class="card card-default">
         <div class="card-header">TheRichPost</div>
         <div class="card-body">
            I'm an example component.
      <br>
            <router-view></router-view>
         </div>
      </div>
   </div>
</template>
<script>
    export default {
        mounted() {
            console.log('Component mounted.')
        }
    }
</script>
After all added the above code, we need to npm run watch and php artisan serve commands to run our application.
If you have any query related to this post, then please comment below or ask questions.
Leave a Reply