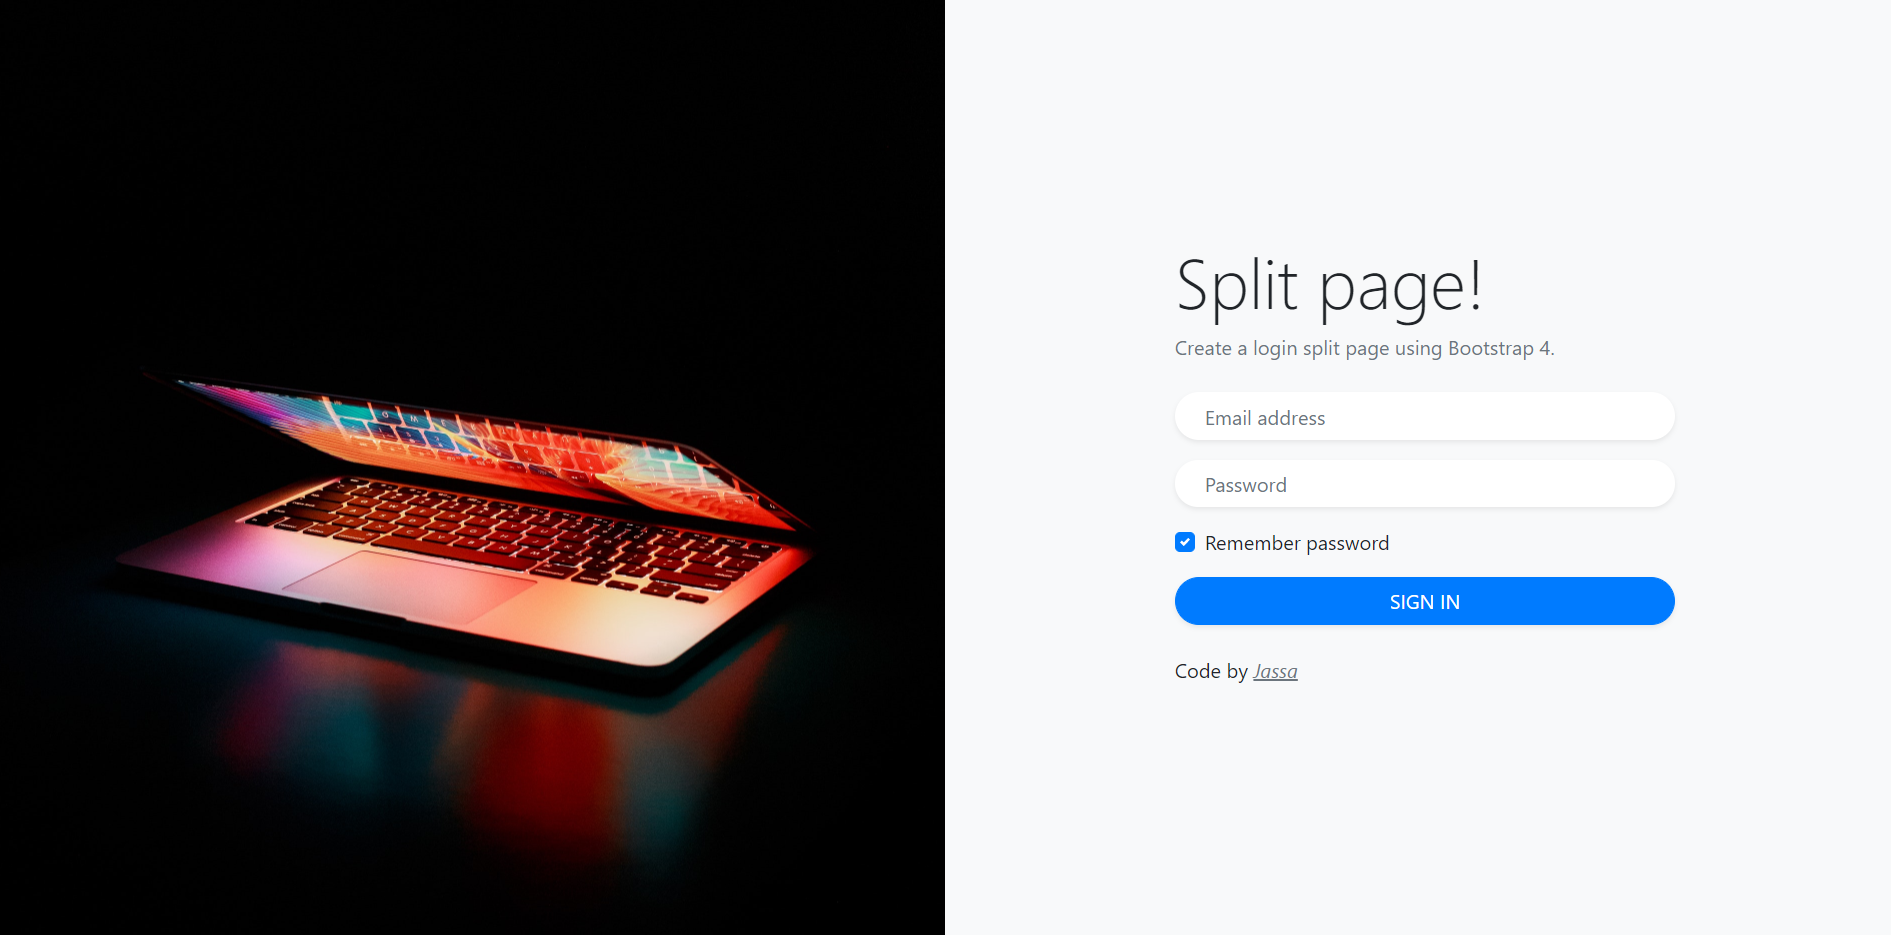
Hello my friends, welcome back to my blog. Today in this blog post, I am going to show you, Vue Js Bootstrap 4 Login Split Page Template Free.
Vue 3 came and if you are new then you must check below link::
Vuejs
Friends now I proceed onwards and here is the working code snippet for Vue Js Bootstrap 4 Login Split Page Template Free and please use this carefully to avoid the mistakes:
1. Firstly friends we need fresh vuejs(Vue 3) setup and for that we need to run below commands into our terminal and also w should have latest node version installed on our system:
Guys you can skip this first step if you already have vuejs fresh setup:
npm install -g @vue/cli

vue create vuetemplate

cd vuetemplate

npm run serve //http://localhost:8080/
2. Now friends please add below inside vuetemplate/public/index.html file:
...
<head>
...
   <link rel="stylesheet" href="https://cdnjs.cloudflare.com/ajax/libs/twitter-bootstrap/4.3.1/css/bootstrap.min.css">
    <link rel="stylesheet" href="https://stackpath.bootstrapcdn.com/font-awesome/4.7.0/css/font-awesome.min.css">
  </head>
...
3. Finally friends we need to add below code into our src/App.vue file to get final output on web browser:
<template>
 <div class="container-fluid">
    <div class="row no-gutter">
        <!-- The image half -->
        <div class="col-md-6 d-none d-md-flex bg-image"></div>


        <!-- The content half -->
        <div class="col-md-6 bg-light">
            <div class="login d-flex align-items-center py-5">

                <!-- Demo content-->
                <div class="container">
                    <div class="row">
                        <div class="col-lg-10 col-xl-7 mx-auto">
                            <h3 class="display-4">Split page!</h3>
                            <p class="text-muted mb-4">Create a login split page using Bootstrap 4.</p>
                            <form>
                                <div class="form-group mb-3">
                                    <input id="inputEmail" type="email" placeholder="Email address" required="" autofocus="" class="form-control rounded-pill border-0 shadow-sm px-4">
                                </div>
                                <div class="form-group mb-3">
                                    <input id="inputPassword" type="password" placeholder="Password" required="" class="form-control rounded-pill border-0 shadow-sm px-4 text-primary">
                                </div>
                                <div class="custom-control custom-checkbox mb-3">
                                    <input id="customCheck1" type="checkbox" checked class="custom-control-input">
                                    <label for="customCheck1" class="custom-control-label">Remember password</label>
                                </div>
                                <button type="submit" class="btn btn-primary btn-block text-uppercase mb-2 rounded-pill shadow-sm">Sign in</button>
                                <div class="text-center d-flex justify-content-between mt-4"><p>Code by <a href="#" class="font-italic text-muted">
                                        <u>Jassa</u></a></p></div>
                            </form>
                        </div>
                    </div>
                </div><!-- End -->

            </div>
        </div><!-- End -->

    </div>
</div>
</template>
<style>
.login,
.image {
  min-height: 100vh;
}

.bg-image {
  background-image: url('https://therichpost.com/wp-content/uploads/2021/02/login-split.jpg');
  background-size: cover;
  background-position: center center;
}
</style>
Now we are done friends also and If you have any kind of query or suggestion or any requirement then feel free to comment below.
Note: Friends, I just tell the basic setup and things, you can change the code according to your requirements. For better understanding must watch video above.
I will appreciate that if you will tell your views for this post. Nothing matters if your views will be good or bad.
Jassa
Thanks

Leave a Reply
You must be logged in to post a comment.