
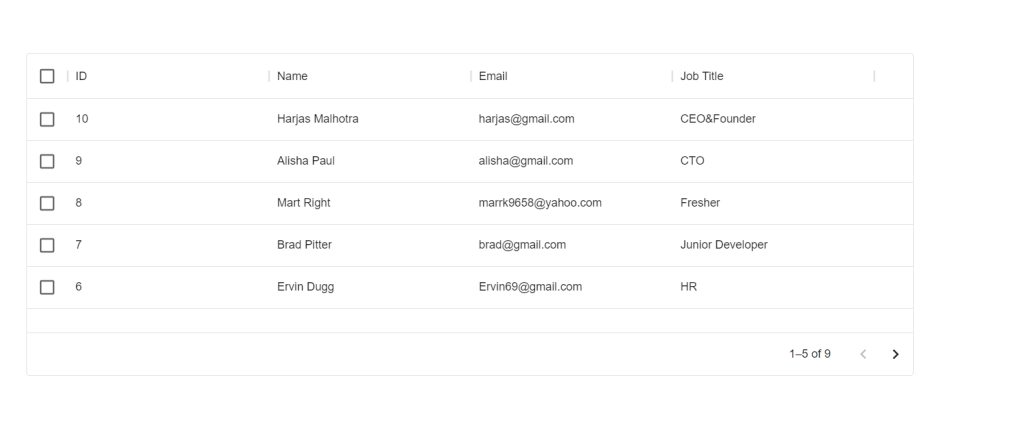
Hello friends, welcome back to my blog. Today in this blog post, I am going to tell you, Reactjs Material UI Editable Data Grid with Dynamic Data(Web API).
For reactjs new comers, please check the below link for basic understanding:
Web API Fake Json Data API ULR
Here is the working code snippet and please use carefully and avoid mistakes:
1. Firstly friends we need reactjs fresh setup and for then we need to run below commands into our terminal and also we should have latest node version installed on our pc:
npx create-react-app reactdemo

cd reactdemo

npm install @mui/material @emotion/react @emotion/styled

npm install axios --save

npm install @mui/icons-material

npm install @material-ui/core

npm install @mui/x-data-grid

npm start
2. Now, we need to add below code into our src/app.js file or you can replace below code with existing one that you have into your src/app.js file:
import Box from '@mui/material/Box';
import { DataGrid } from '@mui/x-data-grid';
import "./App.css"
import React, {useState, useEffect} from 'react';
import axios from 'axios'
const columns = [
  { field: 'id', headerName: 'ID', width: 250 },
  {
    field: 'name',
    headerName: 'Name',
    width: 250,
    editable: true,
  },
  {
    field: 'email',
    headerName: 'Email',
    width: 250,
    editable: true,
  },
  {
    field: 'job_title',
    headerName: 'Job Title',
    width: 250,
    editable: true,
  },

];


function App() {
  let [data, setdata] = useState([])
  function getUsers()
  {

    axios.get("https://therichpost.com/testjsonapi/users/")
            .then(response => response.data)
            .then((data) => {
              setdata(data)
            });

  }
  useEffect(() => {
    getUsers();
  },[])
  return (
    <div className="App p-5">

        <Box sx={{ height: 400, width: '1100px' }}>
        <DataGrid
          rows={data}
          columns={columns}
          pageSize={5}
          rowsPerPageOptions={[5]}
          checkboxSelection
          disableSelectionOnClick
          experimentalFeatures={{ newEditingApi: true }}
        />
      </Box>
      </div>

  );
}

export default App;
Now we are done friends. If you have any kind of query or suggestion or any requirement then feel free to comment below.
Note: Friends, I just tell the basic setup and things, you can change the code according to your requirements. For better understanding and live working must watch video above.
I will appreciate that if you will tell your views for this post. Nothing matters if your views will good or bad.
Jassa
Thanks
Leave a Reply