
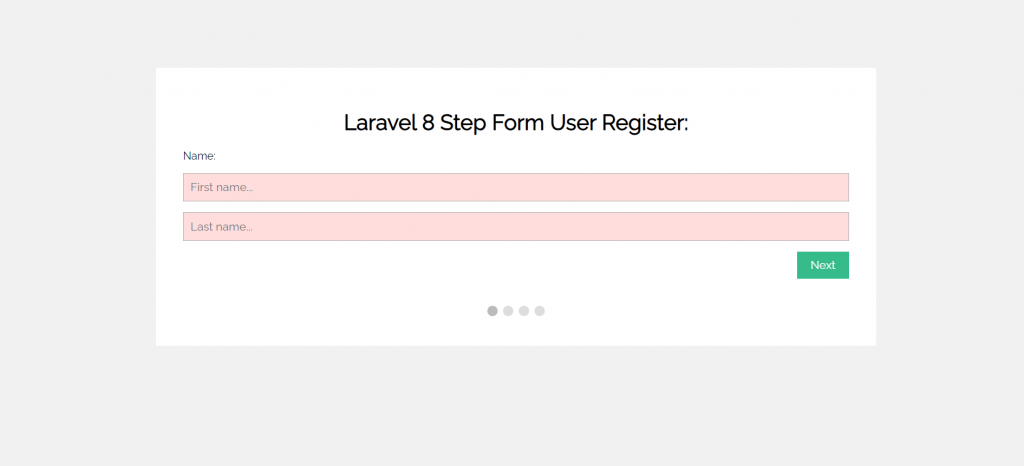
Hello to all, welcome to therichpost.com. In this post, I will show you, Laravel 8 Multi Step Form Working Example.
Guys if you are new in Laravel 8 the please check below link for Laravel basics information:
Laravel 8 Basics Tutorial for beginners
Here is the code snippet and please use carefully:
1. Here is the code below and you can add into your resources/views/ welcome.blade.php file:
<!DOCTYPE html>
<html>
<meta name="viewport" content="width=device-width, initial-scale=1.0">
<link href="https://fonts.googleapis.com/css?family=Raleway" rel="stylesheet">
<style>
* {
  box-sizing: border-box;
}

body {
  background-color: #f1f1f1;
}

#regForm {
  background-color: #ffffff;
  margin: 100px auto;
  font-family: Raleway;
  padding: 40px;
  width: 70%;
  min-width: 300px;
}

h1 {
  text-align: center;
}

input {
  padding: 10px;
  width: 100%;
  font-size: 17px;
  font-family: Raleway;
  border: 1px solid #aaaaaa;
}

/* Mark input boxes that gets an error on validation: */
input.invalid {
  background-color: #ffdddd;
}

/* Hide all steps by default: */
.tab {
  display: none;
}

button {
  background-color: #04AA6D;
  color: #ffffff;
  border: none;
  padding: 10px 20px;
  font-size: 17px;
  font-family: Raleway;
  cursor: pointer;
}

button:hover {
  opacity: 0.8;
}

#prevBtn {
  background-color: #bbbbbb;
}

/* Make circles that indicate the steps of the form: */
.step {
  height: 15px;
  width: 15px;
  margin: 0 2px;
  background-color: #bbbbbb;
  border: none;
  border-radius: 50%;
  display: inline-block;
  opacity: 0.5;
}

.step.active {
  opacity: 1;
}

/* Mark the steps that are finished and valid: */
.step.finish {
  background-color: #04AA6D;
}
</style>
<body>

<form id="regForm" action="">
  <h1>Laravel 8 Step Form User Register:</h1>
  <!-- One "tab" for each step in the form: -->
  <div class="tab">Name:
    <p><input placeholder="First name..." oninput="this.className = ''" name="fname"></p>
    <p><input placeholder="Last name..." oninput="this.className = ''" name="lname"></p>
  </div>
  <div class="tab">Contact Info:
    <p><input placeholder="E-mail..." oninput="this.className = ''" name="email"></p>
    <p><input placeholder="Phone..." oninput="this.className = ''" name="phone"></p>
  </div>
  <div class="tab">Birthday:
    <p><input placeholder="dd" oninput="this.className = ''" name="dd"></p>
    <p><input placeholder="mm" oninput="this.className = ''" name="nn"></p>
    <p><input placeholder="yyyy" oninput="this.className = ''" name="yyyy"></p>
  </div>
  <div class="tab">Login Info:
    <p><input placeholder="Username..." oninput="this.className = ''" name="uname"></p>
    <p><input placeholder="Password..." oninput="this.className = ''" name="pword" type="password"></p>
  </div>
  <div style="overflow:auto;">
    <div style="float:right;">
      <button type="button" id="prevBtn" onclick="nextPrev(-1)">Previous</button>
      <button type="button" id="nextBtn" onclick="nextPrev(1)">Next</button>
    </div>
  </div>
  <!-- Circles which indicates the steps of the form: -->
  <div style="text-align:center;margin-top:40px;">
    <span class="step"></span>
    <span class="step"></span>
    <span class="step"></span>
    <span class="step"></span>
  </div>
</form>

<script>
var currentTab = 0; // Current tab is set to be the first tab (0)
showTab(currentTab); // Display the current tab

function showTab(n) {
  // This function will display the specified tab of the form...
  var x = document.getElementsByClassName("tab");
  x[n].style.display = "block";
  //... and fix the Previous/Next buttons:
  if (n == 0) {
    document.getElementById("prevBtn").style.display = "none";
  } else {
    document.getElementById("prevBtn").style.display = "inline";
  }
  if (n == (x.length - 1)) {
    document.getElementById("nextBtn").innerHTML = "Submit";
  } else {
    document.getElementById("nextBtn").innerHTML = "Next";
  }
  //... and run a function that will display the correct step indicator:
  fixStepIndicator(n)
}

function nextPrev(n) {
  // This function will figure out which tab to display
  var x = document.getElementsByClassName("tab");
  // Exit the function if any field in the current tab is invalid:
  if (n == 1 && !validateForm()) return false;
  // Hide the current tab:
  x[currentTab].style.display = "none";
  // Increase or decrease the current tab by 1:
  currentTab = currentTab + n;
  // if you have reached the end of the form...
  if (currentTab >= x.length) {
    // ... the form gets submitted:
    document.getElementById("regForm").submit();
    return false;
  }
  // Otherwise, display the correct tab:
  showTab(currentTab);
}

function validateForm() {
  // This function deals with validation of the form fields
  var x, y, i, valid = true;
  x = document.getElementsByClassName("tab");
  y = x[currentTab].getElementsByTagName("input");
  // A loop that checks every input field in the current tab:
  for (i = 0; i < y.length; i++) {
    // If a field is empty...
    if (y[i].value == "") {
      // add an "invalid" class to the field:
      y[i].className += " invalid";
      // and set the current valid status to false
      valid = false;
    }
  }
  // If the valid status is true, mark the step as finished and valid:
  if (valid) {
    document.getElementsByClassName("step")[currentTab].className += " finish";
  }
  return valid; // return the valid status
}

function fixStepIndicator(n) {
  // This function removes the "active" class of all steps...
  var i, x = document.getElementsByClassName("step");
  for (i = 0; i < x.length; i++) {
    x[i].className = x[i].className.replace(" active", "");
  }
  //... and adds the "active" class on the current step:
  x[n].className += " active";
}
</script>

</body>
</html>
Now we are done friends. If you have any kind of query or suggestion or any requirement then feel free to comment below.
Note: Friends, I just tell the basic setup and things, you can change the code according to your requirements. For better understanding must watch video above. I will come with more demos.
I will appreciate that if you will tell your views for this post. Nothing matters if your views will be good or bad.
Jassa
Thanks
Leave a Reply