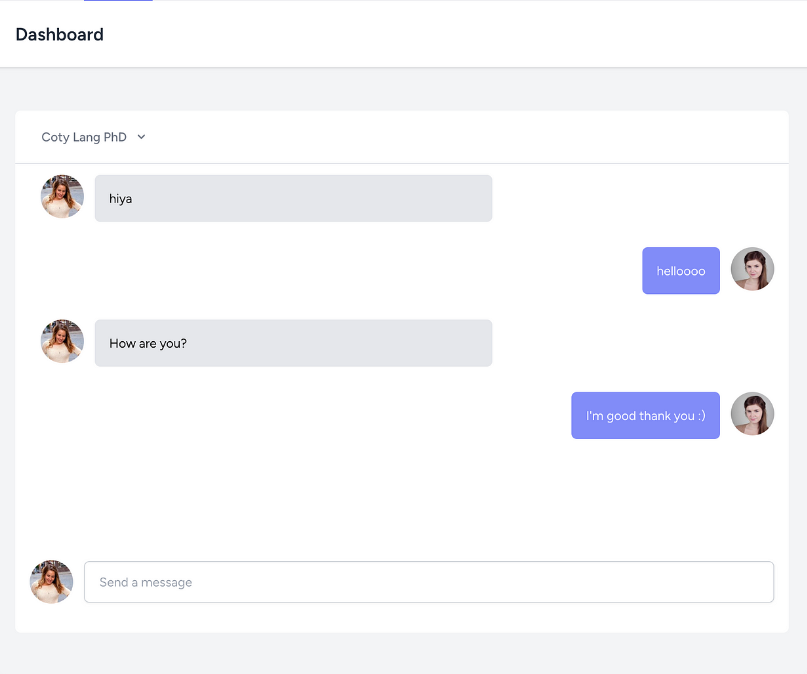
Guys in thus blog post we are Implementing messaging functionality between users in a Laravel 10 application involves several steps, including setting up the database structure, creating the necessary models and controllers, and configuring the routes and views. Here’s a detailed guide on how to do this:

Guys if you are new in Laravel 10 the please check below link for Laravel basics information:
Laravel 10 Basics Tutorial for beginners
1. Database Setup
First, you need to create tables for storing user details and their messages. You can use Laravel’s migration system for this.
Migration for Users (if you don’t already have this setup)
php artisan make:migration create_users_table --create=users
Add fields like name, email, and password to the migration file in database/migrations.
Migration for Messages
php artisan make:migration create_messages_table --create=messages
In the migration file for messages:
Schema::create('messages', function (Blueprint $table) {
    $table->id();
    $table->foreignId('from_user_id')->constrained('users');
    $table->foreignId('to_user_id')->constrained('users');
    $table->text('message');
    $table->timestamps();
});
Run the migrations:
php artisan migrate
2. Models
Create a Message model.
php artisan make:model Message
In app/Models/Message.php, define the relationships:
namespace App\Models;

use Illuminate\Database\Eloquent\Model;

class Message extends Model
{
    protected $fillable = ['from_user_id', 'to_user_id', 'message'];

    public function fromUser()
    {
        return $this->belongsTo(User::class, 'from_user_id');
    }

    public function toUser()
    {
        return $this->belongsTo(User::class, 'to_user_id');
    }
}
3. Controllers
Create a controller for handling messaging logic.
php artisan make:controller MessageController
In app/Http/Controllers/MessageController.php, you can add methods to send and retrieve messages:
namespace App\Http\Controllers;

use App\Models\Message;
use Illuminate\Http\Request;
use Illuminate\Support\Facades\Auth;

class MessageController extends Controller
{
    public function index()
    {
        $messages = Message::where('to_user_id', Auth::id())->get();
        return view('messages.index', compact('messages'));
    }

    public function store(Request $request)
    {
        $message = new Message();
        $message->from_user_id = Auth::id();
        $message->to_user_id = $request->to_user_id;
        $message->message = $request->message;
        $message->save();

        return back()->with('success', 'Message sent successfully!');
    }
}
4. Routes
Add routes for the messaging functionality in routes/web.php:
use App\Http\Controllers\MessageController;

Route::get('/messages', [MessageController::class, 'index'])->name('messages.index')->middleware('auth');
Route::post('/messages', [MessageController::class, 'store'])->name('messages.store')->middleware('auth');
5. Views
Create views to list and send messages. You can use Blade templates for this.
Create the view for listing messages:
Create a Blade file at resources/views/messages/index.blade.php.
<h1>Messages</h1>
<ul>
@foreach($messages as $message)
    <li>{{ $message->fromUser->name }}: {{ $message->message }}</li>
@endforeach
</ul>

<form method="post" action="{{ route('messages.store') }}">
    @csrf
    <input type="text" name="to_user_id" placeholder="Recipient ID">
    <textarea name="message" placeholder="Write your message here"></textarea>
    <button type="submit">Send</button>
</form>
This basic setup gives you the structure needed for a simple messaging system in Laravel. You can extend and modify it to add more features like AJAX-based chat, notifications, etc.
Jassa
Thanks
Leave a Reply
You must be logged in to post a comment.