
Hello guys how are you? Welcome back to my blog. Today in this post I am Creating Admin Dashboard Template in Angular 17 using Primeng.
Angular 17 came. If you are new then you must check below two links:
Now guys here is the complete code snippet and please follow carefully:
Step 1: Set Up Your Angular Project
- Install Angular CLI (if not already installed):
npm install -g @angular/cli
2. Create a new Angular project:
ng new admin-dashboard
3. Navigate to the project directory:
cd admin-dashboard
Step 2: Install PrimeNG and PrimeIcons
npm install primeng --save
npm install primeicons --save
npm install @angular/cdk --save
Step 3: Configure PrimeNG
Add PrimeNG CSS in angular.json:
"styles": [
  "node_modules/primeng/resources/themes/saga-blue/theme.css",
  "node_modules/primeng/resources/primeng.min.css",
  "node_modules/primeicons/primeicons.css",
  "src/styles.css"
],
Step 4: Create the Admin Dashboard Layout, auth & service:
ng generate component layout/header
ng generate component layout/sidebar
ng generate component layout/footer
ng generate component dashboard
ng generate guard auth/auth
npm install chart.js --save
ng generate component auth/login
ng generate service auth/auth
Create the basic structure for the admin dashboard in app.component.html:
<div class="layout-wrapper">
  <app-header></app-header>
  <div class="layout-content">
    <app-sidebar></app-sidebar>
    <div class="content-container">
      <router-outlet></router-outlet>
    </div>
  </div>
  <app-footer></app-footer>
</div>
Add some basic styles in styles.css:
/* You can add global styles to this file, and also import other style files */
.layout-wrapper {
    display: flex;
    flex-direction: column;
    height: 100vh;
  }

  .layout-content {
    display: flex;
    flex: 1;
  }

  .content-container {
    flex: 1;
    padding: 1rem;
  }

  app-header,
  app-footer {
    flex-shrink: 0;
  }

  app-sidebar {
    width: 250px;
  }
  .dashboard-summary {
    text-align: center;
    padding: 20px;
  }

  .dashboard-amount {
    font-size: 2em;
    font-weight: bold;
  }
  .login-wrapper {
    display: flex;
    justify-content: center;
    align-items: center;
    height: 100vh;
    background-color: #f4f4f4;
  }

  p-card {
    width: 300px;
  }
Step 5: Implement PrimeNG Components
Header Component (header.component.html):
<p-toolbar>
  <div class="p-toolbar-group-left">
    <button pButton type="button" icon="pi pi-bars" class="p-mr-2"></button>
    <span class="p-input-icon-left">
      <i class="pi pi-search"></i>
      <input pInputText type="text" placeholder="Search">
    </span>
  </div>
  <div class="p-toolbar-group-right">
    <button pButton type="button" icon="pi pi-user" class="p-button-rounded p-button-text p-mr-2"></button>
    <button pButton type="button" icon="pi pi-sign-out" class="p-button-rounded p-button-text" (click)="logout()"></button>
  </div>
</p-toolbar>
Header Component (header.component.ts):
import { Component } from '@angular/core';
import { ToolbarModule } from 'primeng/toolbar';
import { ButtonModule } from 'primeng/button';
import { InputTextModule } from 'primeng/inputtext';
import { Router } from '@angular/router';
import { AuthService } from '../../auth/auth.service';

@Component({
  selector: 'app-header',
  standalone: true,
  imports: [ToolbarModule, ButtonModule, InputTextModule],
  templateUrl: './header.component.html',
  styleUrl: './header.component.css'
})
export class HeaderComponent {
  constructor(private authService: AuthService, private router: Router) {}

  logout(): void {
    this.authService.logout();
    this.router.navigate(['/login']);
  }
}
Sidebar Component (sidebar.component.html):
<p-panelMenu [model]="items"></p-panelMenu>
Sidebar Component (sidebar.component.ts):
import { Component } from '@angular/core';
import { PanelMenuModule } from 'primeng/panelmenu';
@Component({
  selector: 'app-sidebar',
  standalone: true,
  imports: [PanelMenuModule],
  templateUrl: './sidebar.component.html',
  styleUrl: './sidebar.component.css'
})
export class SidebarComponent {
  items: any[] = [];

  ngOnInit() {
    this.items = [
      {
        label: 'Dashboard',
        icon: 'pi pi-fw pi-home',
        items: [
          {label: 'Overview', icon: 'pi pi-fw pi-chart-bar', routerLink: ['/dashboard']},
          {label: 'Reports', icon: 'pi pi-fw pi-chart-line'}
        ]
      },
      {
        label: 'Settings',
        icon: 'pi pi-fw pi-cog',
        items: [
          {label: 'Profile', icon: 'pi pi-fw pi-user'},
          {label: 'Preferences', icon: 'pi pi-fw pi-sliders-h'}
        ]
      }
    ];
  }
}
Dashboard Component (dashboard.component.html):
<div class="p-grid">
    <div class="p-col-12 p-md-6 p-lg-3">
      <p-card>
        <ng-template pTemplate="header">
          <i class="pi pi-chart-line"></i>
          Sales Statistics
        </ng-template>
        <ng-template pTemplate="content">
          <p-chart type="bar" [data]="data"></p-chart>
        </ng-template>
      </p-card>
    </div>
    <div class="p-col-12 p-md-6 p-lg-3">
      <p-card>
        <ng-template pTemplate="header">
          <i class="pi pi-dollar"></i>
          Revenue
        </ng-template>
        <ng-template pTemplate="content">
          <div class="dashboard-summary">
            <span class="dashboard-amount">$20,000</span>
            <p>Total Revenue for the last month</p>
          </div>
        </ng-template>
      </p-card>
    </div>
    <div class="p-col-12 p-md-6 p-lg-3">
      <p-card>
        <ng-template pTemplate="header">
          <i class="pi pi-user"></i>
          New Customers
        </ng-template>
        <ng-template pTemplate="content">
          <div class="dashboard-summary">
            <span class="dashboard-amount">150</span>
            <p>New Customers this month</p>
          </div>
        </ng-template>
      </p-card>
    </div>
    <div class="p-col-12 p-md-6 p-lg-3">
      <p-card>
        <ng-template pTemplate="header">
          <i class="pi pi-comments"></i>
          Feedback
        </ng-template>
        <ng-template pTemplate="content">
          <div class="dashboard-summary">
            <span class="dashboard-amount">120</span>
            <p>Customer Feedbacks</p>
          </div>
        </ng-template>
      </p-card>
    </div>
  </div>
  <div class="p-grid">
    <div class="p-col-12">
      <p-card>
        <ng-template pTemplate="header">
          <i class="pi pi-table"></i>
          Recent Products
        </ng-template>
        <ng-template pTemplate="content">
          <p-table [value]="products">
            <ng-template pTemplate="header">
              <tr>
                <th>Id</th>
                <th>Name</th>
                <th>Category</th>
                <th>Price</th>
              </tr>
            </ng-template>
            <ng-template pTemplate="body" let-product>
              <tr>
                <td>{{ product.id }}</td>
                <td>{{ product.name }}</td>
                <td>{{ product.category }}</td>
                <td>{{ product.price }}</td>
              </tr>
            </ng-template>
          </p-table>
        </ng-template>
      </p-card>
    </div>
  </div>
Dashboard Component (dashboard.component.ts):
import { Component } from '@angular/core';
import { CardModule } from 'primeng/card';
import { ChartModule } from 'primeng/chart';
import { TableModule } from 'primeng/table';
@Component({
selector: 'app-dashboard',
standalone: true,
imports: [CardModule, ChartModule, TableModule],
templateUrl: './dashboard.component.html',
styleUrl: './dashboard.component.css'
})
export class DashboardComponent {
data: any;
products: any[] = [];
ngOnInit(): void {
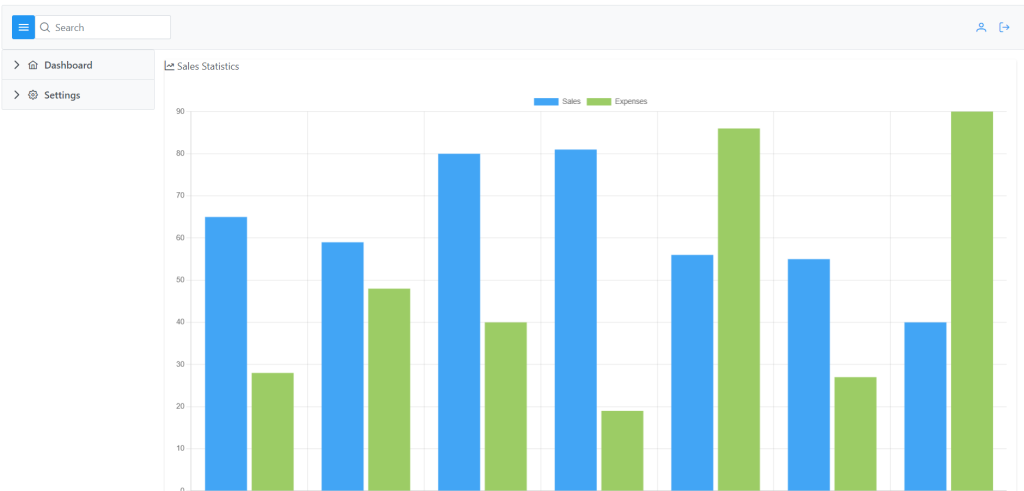
this.data = {
labels: ['January', 'February', 'March', 'April', 'May', 'June', 'July'],
datasets: [
{
label: 'Sales',
backgroundColor: '#42A5F5',
borderColor: '#1E88E5',
data: [65, 59, 80, 81, 56, 55, 40]
},
{
label: 'Expenses',
backgroundColor: '#9CCC65',
borderColor: '#7CB342',
data: [28, 48, 40, 19, 86, 27, 90]
}
]
};
this.products = [
{ id: '1000', name: 'Product 1', category: 'Category 1', price: 100 },
{ id: '1001', name: 'Product 2', category: 'Category 2', price: 150 },
{ id: '1002', name: 'Product 3', category: 'Category 3', price: 200 },
{ id: '1003', name: 'Product 4', category: 'Category 4', price: 250 }
];
}
}
Step 6: Add Routing
Configure routes in app-routis.ts:
import { Routes } from '@angular/router';
import { DashboardComponent } from './dashboard/dashboard.component';
import { LoginComponent } from './auth/login/login.component';
import { AuthGuard } from './auth/auth.guard';
export const routes: Routes = [
    { path: 'login', component: LoginComponent },
    { path: 'dashboard', component: DashboardComponent, canActivate: [AuthGuard] },
    { path: '', redirectTo: '/login', pathMatch: 'full' }
];
login.component.html:
<div class="login-wrapper">
    <p-card header="Login">
      <form (ngSubmit)="onSubmit()">
        <div class="p-fluid">
          <div class="p-field">
            <label for="username">Username</label>
            <input id="username" type="text" pInputText [(ngModel)]="username" name="username" required>
          </div>
          <div class="p-field">
            <label for="password">Password</label>
            <input id="password" type="password" pInputText [(ngModel)]="password" name="password" required>
          </div>
          <div class="p-field">
            <button pButton type="submit" label="Login" class="p-button-primary"></button>
          </div>
        </div>
      </form>
    </p-card>
  </div>
login.component.ts:
import { Component } from '@angular/core';
import { CardModule } from 'primeng/card';
import { Router } from '@angular/router';
import { FormsModule } from '@angular/forms';
import { ButtonModule } from 'primeng/button';
import { InputTextModule } from 'primeng/inputtext';
import { AuthService } from '../auth.service';
@Component({
  selector: 'app-login',
  standalone: true,
  imports: [CardModule, FormsModule, ButtonModule, InputTextModule],
  templateUrl: './login.component.html',
  styleUrl: './login.component.css'
})
export class LoginComponent {
  username: any;
  password: any;

  constructor(private authService: AuthService, private router: Router) {}

  onSubmit(): void {
    if (this.authService.login(this.username, this.password)) {
      this.router.navigate(['/dashboard']);
    } else {
      alert('Invalid credentials');
    }
  }
}
auth.guard.ts:
import { Injectable } from '@angular/core';
import { CanActivate, ActivatedRouteSnapshot, RouterStateSnapshot, Router } from '@angular/router';
import { AuthService } from './auth.service';

@Injectable({
  providedIn: 'root'
})
export class AuthGuard implements CanActivate {

  constructor(private authService: AuthService, private router: Router) {}

  canActivate(
    next: ActivatedRouteSnapshot,
    state: RouterStateSnapshot): boolean {
    if (this.authService.isLoggedIn()) {
      return true;
    } else {
      this.router.navigate(['/login']);
      return false;
    }
  }
}
auth.service.ts:
import { Injectable } from '@angular/core';

@Injectable({
  providedIn: 'root'
})
export class AuthService {
  private isLoggedInStatus = false;

  constructor() { }

  login(username: string, password: string): boolean {
    if (username === 'admin' && password === 'admin') {
      this.isLoggedInStatus = true;
      return true;
    }
    return false;
  }

  logout(): void {
    this.isLoggedInStatus = false;
  }

  isLoggedIn(): boolean {
    return this.isLoggedInStatus;
  }
}
Run Your Application
ng serve
Navigate to http://localhost:4200/login to see the login page. Enter the username admin and password admin to log in and be redirected to the dashboard. The authentication guard will protect the dashboard route, ensuring only authenticated users can access it. If you face any issues, double-check the code for any typos and ensure all services and guards are correctly implemented.
Note: Friends, In this post, I just tell the basic setup and things, you can change the code according to your requirements.
I will appreciate that if you will tell your views for this post. Nothing matters if your views will be good or bad because with your views, I will make my next posts more good and helpful.
Jassa
Thanks
Leave a Reply