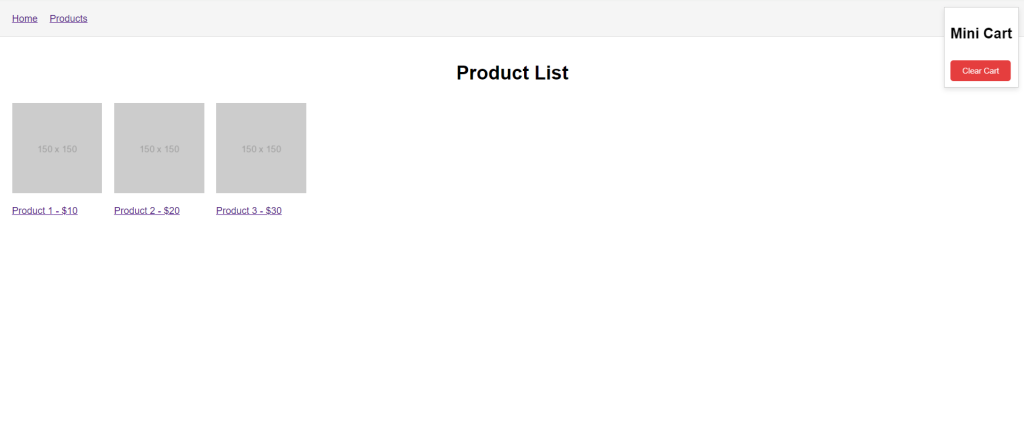
Hello guys how are you? Welcome back to my blog. Today in this blog post we will Create a Simple E-commerce Website using Next.js.
For react js new comers, please check the below links:

Guys here is the complete code snippet and please do carefully to avoid the mistakes:
- Home Page: Displays a list of products.
- Product Page: Shows details of a single product.
- Mini Cart: A small cart component that shows the items added to the cart.
First, ensure you have Node.js and npm installed. Then, create a new Next.js project.
Step 1: Setup the Project
npx create-next-app ecommerce-site
cd ecommerce-site
npm install
Step2. Guys here is the project folder structure we need to follow:

Step3. Guys we need to create components, context, data, pages and styles folders on project root directory.
Step 4: Create the Products Data
Create a new file products.js in the data folder to store product information:
// data/products.js
const products = [
  { id: 1, name: 'Product 1', price: 10, description: 'This is product 1', image: 'https://via.placeholder.com/150' },
  { id: 2, name: 'Product 2', price: 20, description: 'This is product 2', image: 'https://via.placeholder.com/150' },
  { id: 3, name: 'Product 3', price: 30, description: 'This is product 3', image: 'https://via.placeholder.com/150' },
];

export default products;
Step 5: Share Cart State with Context API
To manage the cart state globally, we’ll use the React Context API. First, create a context for the cart state.
Create a new file context/CartContext.js:
import { createContext, useState } from 'react';

const CartContext = createContext();

export function CartProvider({ children }) {
  const [cart, setCart] = useState([]);

  const addToCart = (product) => {
    setCart([...cart, product]);
  };

  const clearCart = () => {
    setCart([]);
  };

  return (
    <CartContext.Provider value={{ cart, addToCart, clearCart }}>
      {children}
    </CartContext.Provider>
  );
}

export default CartContext;
Step 6: Create the Header Component
Create a new file Header.js in the components folder:
import Link from 'next/link';

export default function Header() {
  return (
    <header>
      <nav>
        <ul>
          <li>
            <Link href="/">Home</Link>
          </li>
          <li>
            <Link href="/">Products</Link>
          </li>
        </ul>
      </nav>
      <style jsx>{`
        header {
          padding: 20px;
          background-color: #f5f5f5;
          border-bottom: 1px solid #ddd;
        }
        nav ul {
          list-style: none;
          padding: 0;
          margin: 0;
          display: flex;
          gap: 20px;
        }
        nav li {
          margin: 0;
        }
      `}</style>
    </header>
  );
}
Step 7: Create a Layout Component
Create a layout component that includes the header and wraps the content of your pages. Create a new file Layout.js in the components folder:
import Header from './Header';
import MiniCart from './MiniCart';

export default function Layout({ children }) {
  return (
    <div>
      <Header />
      <MiniCart />
      <main>{children}</main>
      <style jsx>{`
        main {
          padding: 20px;
        }
      `}</style>
    </div>
  );
}
Step 8: Create the Mini Cart Component
Create a new file components/MiniCart.js for the mini cart:
import { useContext } from 'react';
import CartContext from '../context/CartContext';

export default function MiniCart() {
  const { cart, clearCart } = useContext(CartContext);

  return (
    <div className="mini-cart">
      <h2>Mini Cart</h2>
      <ul>
        {cart.map((item, index) => (
          <li key={index}>
            {item.name} - ${item.price}
          </li>
        ))}
      </ul>
      <button onClick={clearCart}>Clear Cart</button>
      <style jsx>{`
        .mini-cart {
          position: fixed;
          top: 10px;
          right: 10px;
          border: 1px solid #ccc;
          padding: 10px;
          background-color: white;
          box-shadow: 0 4px 8px rgba(0, 0, 0, 0.1);
          z-index: 1000;
        }
        button {
          background-color: #e53e3e;
          color: white;
          border: none;
          padding: 10px 20px;
          cursor: pointer;
          border-radius: 5px;
          margin-top: 10px;
        }
        button:hover {
          background-color: #c53030;
        }
      `}</style>
    </div>
  );
}
Step 9: Create the Product Detail Page
Create a new folder pages/product and add [id].js to handle dynamic routes for each product:
import { useRouter } from 'next/router';
import products from '../../data/product';
import { useContext } from 'react';
import CartContext from '../../context/CartContext';
import MiniCart from '../../components/MiniCart';

export default function Product() {
  const router = useRouter();
  const { id } = router.query;
  const product = products.find((p) => p.id === parseInt(id));
  const { addToCart } = useContext(CartContext);

  if (!product) return <div>Product not found</div>;

  return (
    <div>
      <h1>{product.name}</h1>
      <img src={product.image} alt={product.name} />
      <p>{product.description}</p>
      <p>${product.price}</p>
      <button onClick={() => addToCart(product)}>Add to Cart</button>
      <MiniCart />
      <style jsx>{`
        img {
          width: 300px;
          height: 300px;
          object-fit: cover;
          display: block;
          margin: 0 auto 20px;
        }
      `}</style>
    </div>
  );
}
Step 10: Create the Product List Page
Update the pages/index.js to display the list of products:
import Link from 'next/link';
import products from '../data/product';

export default function Home() {
  return (
    <div>
      <h1>Product List</h1>
      <ul>
        {products.map((product) => (
          <li key={product.id}>
            <Link href={`/product/${product.id}`}>
              <div>
                <img src={product.image} alt={product.name} />
                <p>{product.name} - ${product.price}</p>
              </div>
            </Link>
          </li>
        ))}
      </ul>
      <style jsx>{`
        ul {
          display: flex;
          flex-wrap: wrap;
          gap: 20px;
        }
        li {
          list-style: none;
          width: 150px;
        }
        img {
          width: 150px;
          height: 150px;
          object-fit: cover;
        }
      `}</style>
    </div>
  );
}
Step 11: Wrap the Application with the Cart Provider
pages/_app.js to include the CartProvider:
import '../styles/globals.css';
import { CartProvider } from '../context/CartContext';
import Layout from '../components/Layout';

function MyApp({ Component, pageProps }) {
  return (
    <CartProvider>
      <Layout>
        <Component {...pageProps} />
      </Layout>
    </CartProvider>
  );
}

export default MyApp;
Step 12: Style the Application
Finally, you can add some basic styles to make the application look better. Create a new file styles/globals.css:
/* styles/globals.css */
body {
  font-family: Arial, sans-serif;
  margin: 0;
  padding: 0;
  box-sizing: border-box;
}

h1 {
  text-align: center;
}

ul {
  list-style: none;
  padding: 0;
}

li {
  margin: 10px 0;
}

button {
  background-color: #0070f3;
  color: white;
  border: none;
  padding: 10px 20px;
  cursor: pointer;
  border-radius: 5px;
}

button:hover {
  background-color: #005bb5;
}

.MiniCart {
  position: fixed;
  top: 10px;
  right: 10px;
  border: 1px solid #ccc;
  padding: 10px;
  background-color: white;
}
Run the Application
Now, run your application:
npm run dev
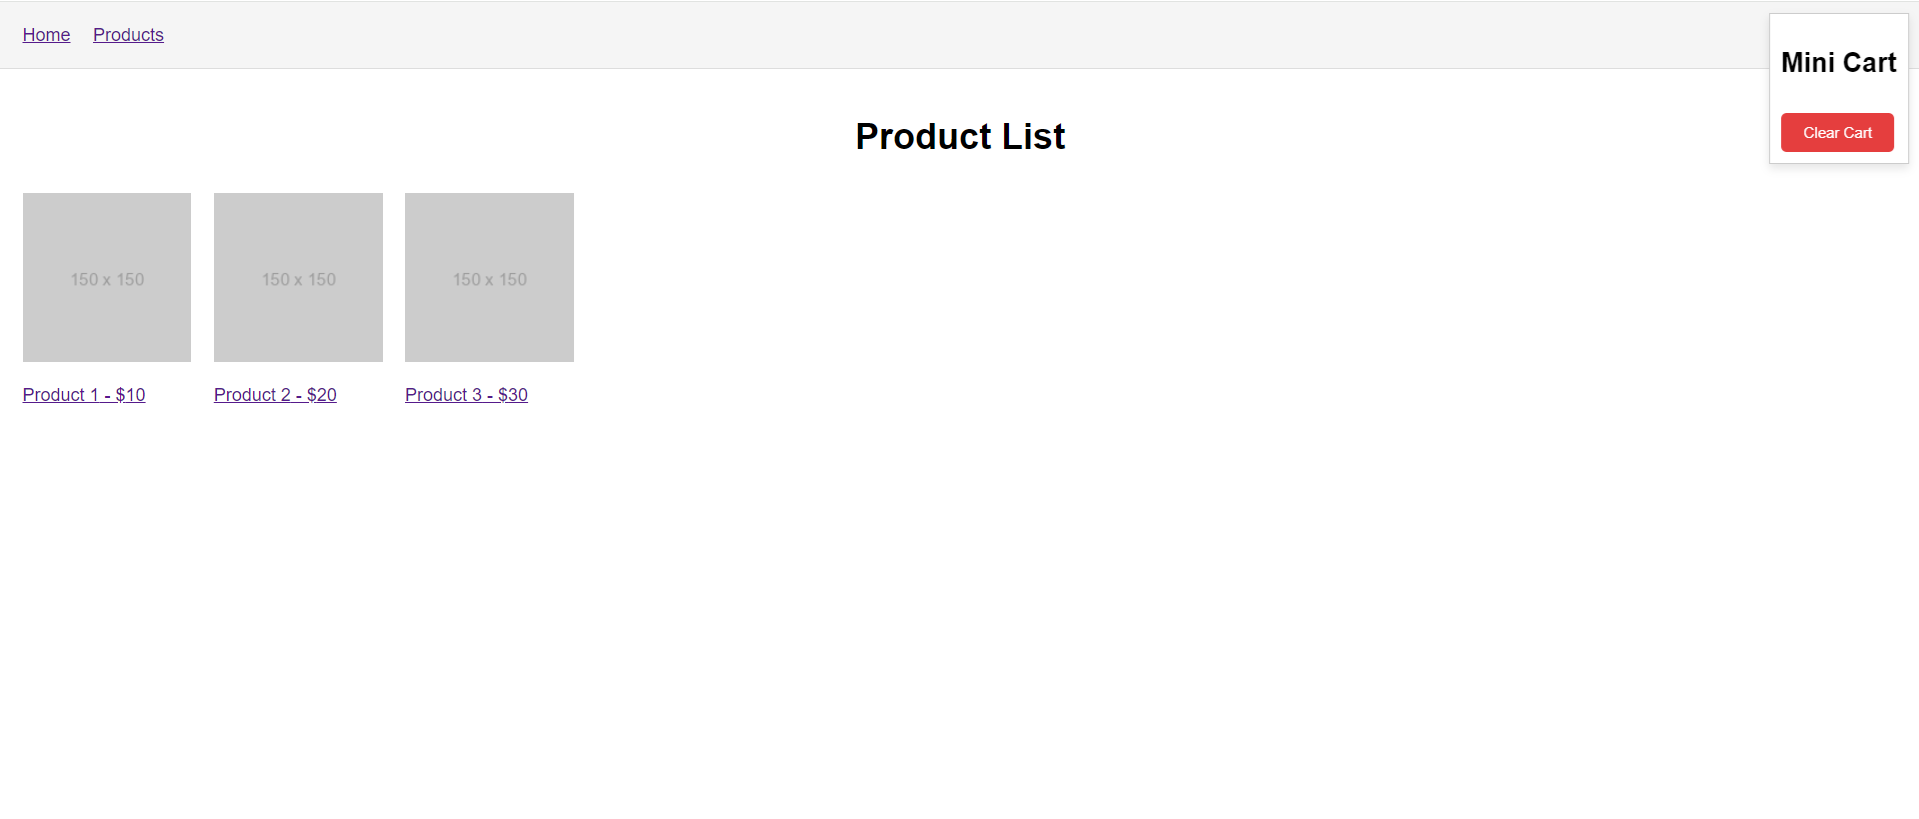
Open your browser and navigate to http://localhost:3000 to see your e-commerce website in action. You should see the product list on the home page, and clicking on a product will take you to its details page where you can add it to the mini cart. The mini cart will show the items added with clear cart button.
This is it guys and if you will have any kind of query, suggestion or requirement then feel free to comment below.
Thanks
Ajay

Leave a Reply
You must be logged in to post a comment.