Category: Bootstrap 5

  • Laravel 8 Jquery Datatable Row Click open Bootstrap 5 Modal Popup with Dynamic Data Working Functionality

    Laravel 8 Jquery Datatable Row Click open Bootstrap 5 Modal Popup with Dynamic Data Working Functionality

    Hello friends, welcome back on blog. Today in this blog post, I am going to tell you, Laravel 8 Jquery Datatable Row Click open Bootstrap 5 Modal Popup with Dynamic Data Working Functionality.

    Working Demo
    Laravel 8 Jquery Datatable Row Click open Bootstrap 5 Modal Popup with Dynamic Data Working Functionality
    Laravel 8 Jquery Datatable Row Click open Bootstrap 5 Modal Popup with Dynamic Data Working Functionality

    Guys if you are new in Laravel8 the please check below link for Laravel basics information:

    Laravel Basics Tutorial for beginners

    Bootstrap 5

    Datatable


    Here is the code snippet and please use carefully:

    1. Friends here is the code below and you can add into your resources/views/ welcome.blade.php file:

    Guys for demo purpose, I have used this code into my welcome blade:

    <!DOCTYPE html>
    <html lang="en">
    <head>
    <title>Ecommerce Template</title>
    <meta charset="UTF-8">
    <meta name="viewport" content="width=device-width, initial-scale=1">


      <!-- Template Main JS & CSSFile -->
      <script src="https://ajax.googleapis.com/ajax/libs/jquery/3.5.1/jquery.min.js"></script>
     
      <link rel="stylesheet" type="text/css" href="https://cdn.datatables.net/1.10.25/css/jquery.dataTables.css">
      <link href="https://cdn.jsdelivr.net/npm/bootstrap@5.0.2/dist/css/bootstrap.min.css" rel="stylesheet">
    <script type="text/javascript" charset="utf8" src="https://cdn.datatables.net/1.10.25/js/jquery.dataTables.js"></script>
    <script src="https://cdn.jsdelivr.net/npm/bootstrap@5.0.2/dist/js/bootstrap.min.js"></script>
      <script>
        jQuery(document).ready(function($) {
    
          //jQuery Functionality
          $('#example').DataTable();
          $(document).on('click', '#example tbody tr button', function() {       
            $("#modaldata tbody tr").html("");
            $("#modaldata tbody tr").html($(this).closest("tr").html());
            $("#exampleModal").modal("show");
          });
        } );
        </script>
        <style>
    
          //Hide last td for modal popup
          #modaldata tbody tr > td:last-of-type{display:none;}
        </style>
    </head>
    <body>
    <div class="container p-5">
    <table id="example" class="table table-striped table-hover table-bordered">
            <thead>
                <tr>
                    <th>Name</th>
                    <th>Position</th>
                    <th>Office</th>
                    <th>Age</th>
                    <th>Start date</th>
                    <th>Salary</th>
                    <th>Action</th>
                </tr>
            </thead>
            <tbody>
                <tr>
                    <td>Tiger Nixon</td>
                    <td>System Architect</td>
                    <td>Edinburgh</td>
                    <td>61</td>
                    <td>2011/04/25</td>
                    <td>$320,800</td>
                    <td><button class="btn btn-info">View</button></td>
                </tr>
                <tr>
                    <td>Garrett Winters</td>
                    <td>Accountant</td>
                    <td>Tokyo</td>
                    <td>63</td>
                    <td>2011/07/25</td>
                    <td>$170,750</td>
                    <td><button class="btn btn-info">View</button></td>
                </tr>
                <tr>
                    <td>Ashton Cox</td>
                    <td>Junior Technical Author</td>
                    <td>San Francisco</td>
                    <td>66</td>
                    <td>2009/01/12</td>
                    <td>$86,000</td>
                    <td><button class="btn btn-info">View</button></td>
                </tr>
                <tr>
                    <td>Cedric Kelly</td>
                    <td>Senior Javascript Developer</td>
                    <td>Edinburgh</td>
                    <td>22</td>
                    <td>2012/03/29</td>
                    <td>$433,060</td>
                    <td><button class="btn btn-info">View</button></td>
                </tr>
                <tr>
                    <td>Airi Satou</td>
                    <td>Accountant</td>
                    <td>Tokyo</td>
                    <td>33</td>
                    <td>2008/11/28</td>
                    <td>$162,700</td>
                    <td><button class="btn btn-info">View</button></td>
                </tr>
                <tr>
                    <td>Brielle Williamson</td>
                    <td>Integration Specialist</td>
                    <td>New York</td>
                    <td>61</td>
                    <td>2012/12/02</td>
                    <td>$372,000</td>
                    <td><button class="btn btn-info">View</button></td>
                </tr>
                <tr>
                    <td>Herrod Chandler</td>
                    <td>Sales Assistant</td>
                    <td>San Francisco</td>
                    <td>59</td>
                    <td>2012/08/06</td>
                    <td>$137,500</td>
                    <td><button class="btn btn-info">View</button></td>
                </tr>
                <tr>
                    <td>Rhona Davidson</td>
                    <td>Integration Specialist</td>
                    <td>Tokyo</td>
                    <td>55</td>
                    <td>2010/10/14</td>
                    <td>$327,900</td>
                    <td><button class="btn btn-info">View</button></td>
                </tr>
                <tr>
                    <td>Colleen Hurst</td>
                    <td>Javascript Developer</td>
                    <td>San Francisco</td>
                    <td>39</td>
                    <td>2009/09/15</td>
                    <td>$205,500</td>
                    <td><button class="btn btn-info">View</button></td>
                </tr>
                <tr>
                    <td>Sonya Frost</td>
                    <td>Software Engineer</td>
                    <td>Edinburgh</td>
                    <td>23</td>
                    <td>2008/12/13</td>
                    <td>$103,600</td>
                    <td><button class="btn btn-info">View</button></td>
                </tr>
                <tr>
                    <td>Jena Gaines</td>
                    <td>Office Manager</td>
                    <td>London</td>
                    <td>30</td>
                    <td>2008/12/19</td>
                    <td>$90,560</td>
                    <td><button class="btn btn-info">View</button></td>
                </tr>
                <tr>
                    <td>Quinn Flynn</td>
                    <td>Support Lead</td>
                    <td>Edinburgh</td>
                    <td>22</td>
                    <td>2013/03/03</td>
                    <td>$342,000</td>
                    <td><button class="btn btn-info">View</button></td>
                </tr>
                <tr>
                    <td>Charde Marshall</td>
                    <td>Regional Director</td>
                    <td>San Francisco</td>
                    <td>36</td>
                    <td>2008/10/16</td>
                    <td>$470,600</td>
                    <td><button class="btn btn-info">View</button></td>
                </tr>
                <tr>
                    <td>Haley Kennedy</td>
                    <td>Senior Marketing Designer</td>
                    <td>London</td>
                    <td>43</td>
                    <td>2012/12/18</td>
                    <td>$313,500</td>
                    <td><button class="btn btn-info">View</button></td>
                </tr>
                
            </tbody>
            <tfoot>
                <tr>
                    <th>Name</th>
                    <th>Position</th>
                    <th>Office</th>
                    <th>Age</th>
                    <th>Start date</th>
                    <th>Salary</th>
                </tr>
            </tfoot>
        </table>
    
    </div>
    <!-- Modal -->
    <div class="modal fade" id="exampleModal" tabindex="-1" aria-labelledby="exampleModalLabel" aria-hidden="true">
      <div class="modal-dialog">
        <div class="modal-content">
          <div class="modal-header">
            <h5 class="modal-title" id="exampleModalLabel">User Details</h5>
            <button type="button" class="btn-close" data-bs-dismiss="modal" aria-label="Close"></button>
          </div>
          <div class="modal-body">
          <table id="modaldata" class="table table-striped table-hover table-bordered">
            <thead>
                <tr>
                    <th>Name</th>
                    <th>Position</th>
                    <th>Office</th>
                    <th>Age</th>
                    <th>Start date</th>
                    <th>Salary</th>
                  
                </tr>
            </thead>
            <tbody>
                <tr></tr>
          </tbody>
          </table>
          </div>
          <div class="modal-footer">
            <button type="button" class="btn btn-secondary" data-bs-dismiss="modal">Close</button>
          
          </div>
        </div>
      </div>
    </div>
    </body>
    </html>

    Now we are done friends and please run your Laravel 8 project and see the working site home page.  Also and If you have any kind of query or suggestion or any requirement then feel free to comment below.

    Note: Friends, I just tell the basic setup and things, you can change the code according to your requirements. For better understanding must watch video above.

    I will appreciate that if you will tell your views for this post. Nothing matters if your views will be good or bad.

    Jassa

    Thanks

  • Angular 12 Open Bootstrap 5 Modal Popup with Dynamic Data on Button Click Table Row

    Angular 12 Open Bootstrap 5 Modal Popup with Dynamic Data on Button Click Table Row

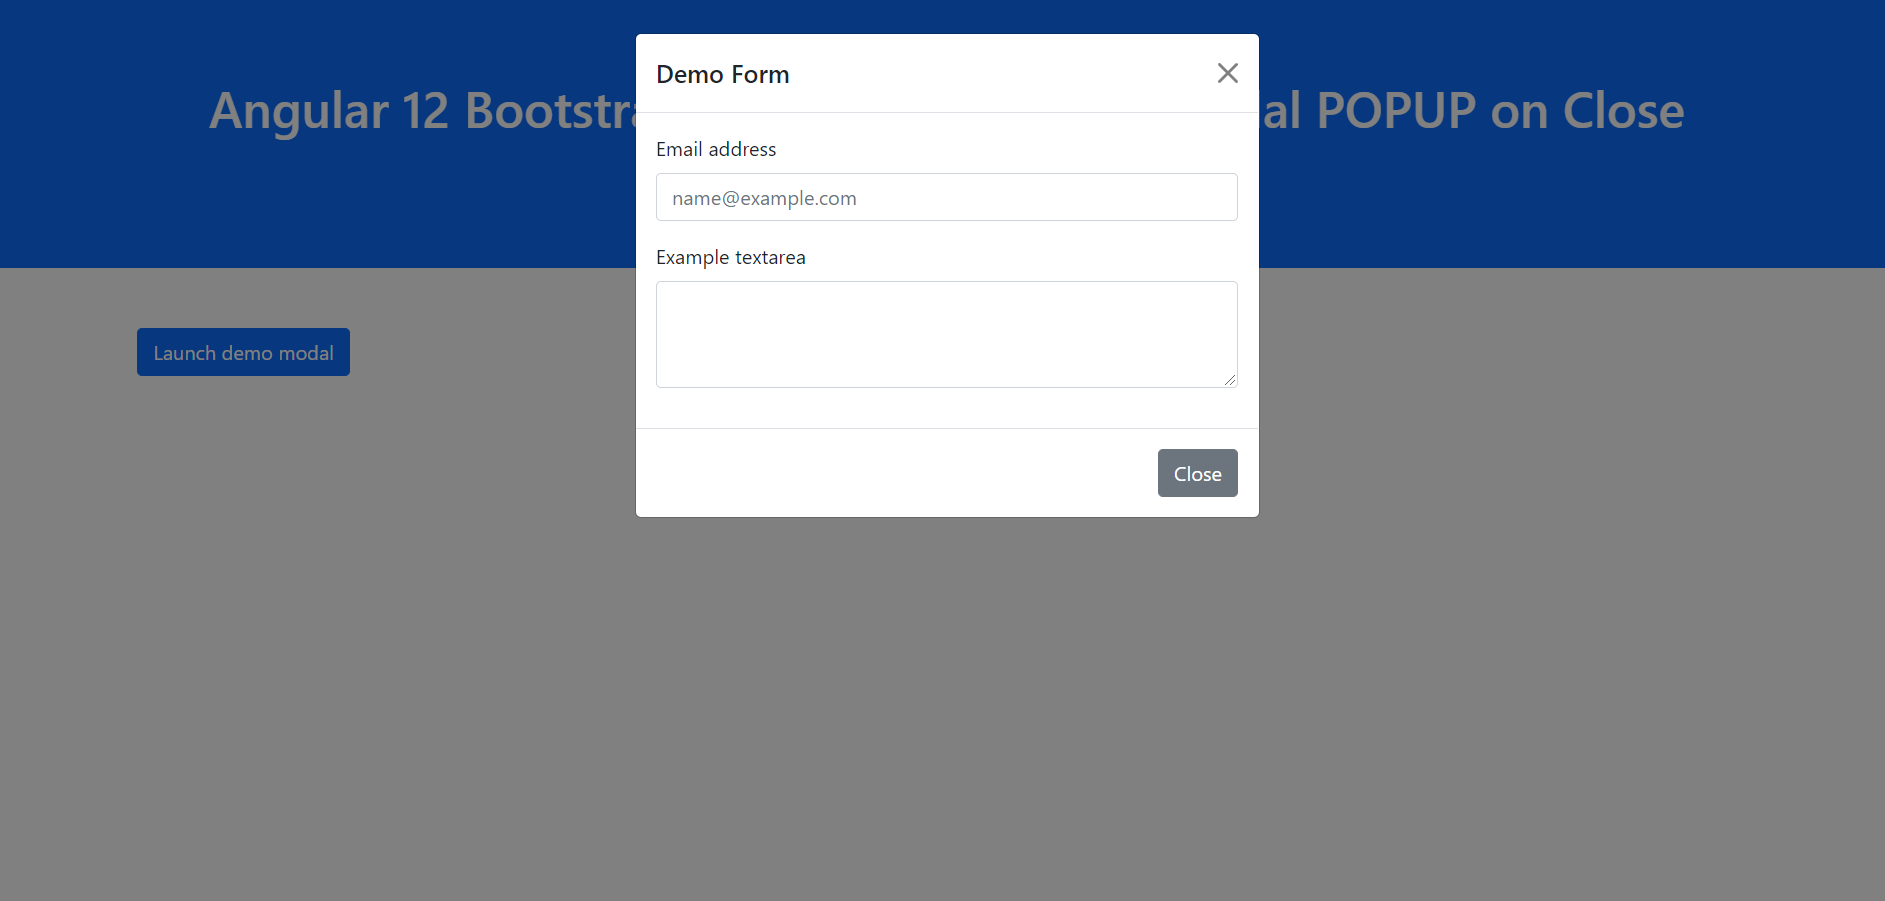
    Hello friends, welcome back to my blog. Today in this blog post, I am going to tell you, Angular 12 Open Bootstrap 5 Modal Popup with Dynamic Data on Button Click Table Row.

    Working Video
    Angular 12 Open Bootstrap 5 Modal Popup with Dynamic Data on Button Click Table Row
    Angular 12 Open Bootstrap 5 Modal Popup with Dynamic Data on Button Click Table Row

    Angular 12 Bootstrap 5 Table
    User Table

    Guy’s Angular 12 came . if you are new then you must check below two links:

    1. Angular12 Basic Tutorials
    2. Angular Free Templates

    Friends now I proceed onwards and here is the working code snippet and please use carefully this to avoid the mistakes:

    1. Firstly friends we need fresh angular 12 setup and for this we need to run below commands but if you already have angular 12 setup then you can avoid below commands.

    Secondly we should also have latest node version installed on our system:

    npm install -g @angular/cli 
    
    ng new angulardemo //Create new Angular Project
    
    cd angulardemo // Go inside the Angular Project Folder
    
    ng serve --open // Run and Open the Angular Project
    
    http://localhost:4200/ // Working Angular Project Url

    2. Now friends, here we need to run below commands into our project terminal to install bootstrap modules into our angular application:

    npm i --save bootstrap

    3. Now friends, here we need to add below  into our angular.json file:

    "styles": [
               ...
              "node_modules/bootstrap/dist/css/bootstrap.min.css"
               
             ],
             "scripts": [
           ...
             "node_modules/bootstrap/dist/js/bootstrap.js"
         
             ],

    4. Now friends we just need to add below code into src/app/app.component.ts file:

    import { Component, ViewChild, ElementRef  } from '@angular/core';
    
    @Component({
      selector: 'app-root',
      templateUrl: './app.component.html',
      styleUrls: ['./app.component.css']
    })
    
    export class AppComponent {
          UserId    : string;
          Firstname : string;
          Lastname  : string;
          Email     : string;
          
          onClick(event)
          {
           
              this.UserId = event.target.id;
              this.Firstname = document.getElementById("firstname"+this.UserId).innerHTML;
              this.Lastname = document.getElementById("lastname"+this.UserId).innerHTML;
              this.Email = document.getElementById("email"+this.UserId).innerHTML;
          }
          
    }

    5. Now friends we just need to add below code into src/app/app.component.html file:

    <table class="table table-hover table-bordered">
      <thead>
        <tr>
          <th>Firstname</th>
          <th>Lastname</th>
          <th>Email</th>
          <th>Action</th>
        </tr>
      </thead>
      <tbody>
        <tr>
          <td id="firstname1">Jassa</td>
          <td id="lastname1">Rich</td>
          <td id="email1">jassa@example.com</td>
          <td id="1" (click)="onClick($event)" data-bs-toggle="modal" href="#exampleModalToggle" style="cursor: pointer;font-weight: bold;">Show</td>
    
        </tr>
        <tr>
          <td id="firstname2">Rich</td>
          <td id="lastname2">Post</td>
          <td id="email2">rich@example.com</td>
          <td id="2" (click)="onClick($event)" data-bs-toggle="modal" href="#exampleModalToggle" style="cursor: pointer;font-weight: bold;">Show</td>
        </tr>
        <tr>
          <td id="firstname3">Ajay</td>
          <td id="lastname3">Kumar</td>
          <td id="email3">ajay@example.com</td>
          <td id="3" (click)="onClick($event)" data-bs-toggle="modal" href="#exampleModalToggle" style="cursor: pointer;font-weight: bold;">Show</td>
        </tr>
      </tbody>
    </table>
    
    
    <!-- The Modal -->
    <div class="modal" id="exampleModalToggle" aria-hidden="true" aria-labelledby="exampleModalToggleLabel" tabindex="-1">
      <div class="modal-dialog">
        <div class="modal-content">
        
          <!-- Modal Header -->
          <div class="modal-header">
            <h4 class="modal-title">User Details:</h4>
            <button type="button" class="btn-close" data-bs-dismiss="modal" aria-label="Close"></button>
          </div>
          
          <!-- Modal body -->
          <div class="modal-body">
           <p class="border-bottom">User ID : {{UserId}}</p>
           <p class="border-bottom">Firstname : {{Firstname}}</p>
           <p class="border-bottom">Lastname : {{Lastname}}</p>
           <p class="border-bottom">Email : {{Email}}</p>
          </div>
          
          <!-- Modal footer -->
          <div class="modal-footer">
            <button class="btn btn-primary" data-bs-target="#exampleModalToggle" data-bs-toggle="modal" data-bs-dismiss="modal">Close</button>
          </div>
          
        </div>
      </div>
    </div>


    Now we are done friends. Don’t forget to run ng serve command. If you have any kind of query, suggestion and new requirement then feel free to comment below.

    Note: Friends, In this post, I just tell the basic setup and things, you can change the code according to your requirements. For better live working experience, please check the video on the top.

    I will appreciate that if you will tell your views for this post. Nothing matters if your views will be good or bad because with your views, I will make my next posts more good and helpful.

    Jassa

    Thanks

  • Vuejs Vue 3 Image Upload Preview Working Functionality

    Vuejs Vue 3 Image Upload Preview Working Functionality

    Hello friends, welcome back to my blog. Today in this blog post, I am going to show you, Vuejs Vue 3 Image Upload Preview Working Functionality.


    Working Video

    Vuejs Vue 3 Image Upload Preview Working Functionality
    Vuejs Vue 3 Image Upload Preview Working Functionality

    Vue 3 and Bootstrap 5 came and if you are new then you must check below two links:

    1. Vuejs
    2. Bootstrap 5

    Friends now I proceed onwards and here is the working code snippet and use this carefully to avoid the mistakes:

    1. Firstly friends we need fresh vue 3 setup and for this we need to run below commands . Secondly we should also have latest node version installed on our system. With below we will have bootstrap 5(for good looks) modules in our Vue 3 application:

    npm install -g @vue/cli
    
    vue create vuedemo
    
    cd vuedemo
    
    npm install bootstrap --save
    
    npm run serve //http://localhost:8080/

    2. Now friends we need to add below code into vuedemo/src/App.vue file to check the final output on browser:

    <template>
     
     <div class="App container mt-5">
         
        <div class="mb-3">
          <label for="formFile" class="form-label">Upload Image:</label>
          
          <input class="form-control" ref="fileInput" type="file" @input="pickFile">
          </div>
           <div class="imagePreviewWrapper" :style="{ 'background-image': `url(${previewImage})` }" @click="selectImage"></div>
        </div>
        
    </template>
    
    <script>
    
    //importing bootstrap 5 and pdf maker Modules
    import "bootstrap/dist/css/bootstrap.min.css";
    import "./App.css";
    export default {


        methods: {
    
          //image upload and preview methods
            selectImage () {
              this.$refs.fileInput.click()
          },
          pickFile () {
            let input = this.$refs.fileInput
            let file = input.files
            if (file && file[0]) {
              let reader = new FileReader
              reader.onload = e => {
                this.previewImage = e.target.result
              }
              reader.readAsDataURL(file[0])
              this.$emit('input', file[0])
            }
          }
    },
    ,
          data: function() {
      return {
         previewImage: null
      }  
    }
    </script>

    3. Now friends we need to create `App.css` file inside vuedemo/src folder add below code into vuedemo/src/App.css file:

    .imagePreviewWrapper {
      background-repeat: no-repeat;
        width: 250px;
        height: 250px;
        display: block;
        cursor: pointer;
        margin: 0 auto 30px;
        background-size: contain;
        background-position: center center;
    }

    Now we are done friends and If you have any kind of query or suggestion or any requirement then feel free to comment below.

    Note: Friends, I just tell the basic setup and things, you can change the code according to your requirements.

    I will appreciate that if you will tell your views for this post. Nothing matters if your views will be good or bad.

    Jassa

    Thanks

  • Vue 3 Convert HTML into PDF working Functionality

    Vue 3 Convert HTML into PDF working Functionality

    Hello friends, welcome back to my blog. Today in this blog post, I am going to show you, Vue 3 Convert HTML into PDF working Functionality.


    Working Video

    Vue 3 Convert HTML into PDF working Functionality
    Vue 3 Convert HTML into PDF working Functionality
    html to pdf
    HTML to PDF

    Vue 3 and Bootstrap 5 came and if you are new then you must check below two links:

    1. Vuejs
    2. Bootstrap 5

    Friends now I proceed onwards and here is the working code snippet and use this carefully to avoid the mistakes:

    1. Firstly friends we need fresh vue 3 setup and for this we need to run below commands . Secondly we should also have latest node version installed on our system. With below we will have pdf maker and bootstrap 5 modules in our Vue 3 application:

    npm install -g @vue/cli
    
    vue create vuedemo
    
    cd vuedemo
    
    npm install bootstrap --save
    
    npm install --save pdfmake
    
    npm install html-to-pdfmake
    
    npm install jspdf --save
    
    npm run serve //http://localhost:8080/

    2. Now friends we need to add below code into vuedemo/src/App.vue file to check the final output on browser:

    <template>
     
     <div class="App container mt-5">
         
        <div id="divToPrint">
            <h2>therichpost.com</h2>
                      
            <table class="table table-bordered">
              <thead>
                <tr>
                  <th>Firstname</th>
                  <th>Lastname</th>
                  <th>Website</th>
                </tr>
              </thead>
              <tbody>
                <tr>
                  <td>Ajay</td>
                  <td>Malhotra</td>
                  <td>Therichpost.com</td>
                </tr>
                <tr>
                  <td>Ajay</td>
                  <td>Malhotra</td>
                  <td>Therichpost.com</td>
                </tr>
                <tr>
                  <td>Ajay</td>
                  <td>Malhotra</td>
                  <td>Therichpost.com</td>
                </tr>
                <tr>
                  <td>Ajay</td>
                  <td>Malhotra</td>
                  <td>Therichpost.com</td>
                </tr>
                <tr>
                  <td>Jassa</td>
                  <td>Malhotra</td>
                  <td>Therichpost.com</td>
                </tr>
              </tbody>
            </table>
          </div>
          
          <button class="btn btn-primary" @click="printDocument()">Export To PDF</button>
        </div>
        
    </template>
    
    <script>
    
    //importing bootstrap 5 and pdf maker Modules
    import "bootstrap/dist/css/bootstrap.min.css";
    import pdfMake from 'pdfmake';
    import pdfFonts from 'pdfmake/build/vfs_fonts';
    import htmlToPdfmake from 'html-to-pdfmake';
    export default {


        methods: {
           printDocument() {
         
             
              //get table html
              const pdfTable = document.getElementById('divToPrint');
              //html to pdf format
              var html = htmlToPdfmake(pdfTable.innerHTML);
            
              const documentDefinition = { content: html };
              pdfMake.vfs = pdfFonts.pdfMake.vfs;
              pdfMake.createPdf(documentDefinition).open();
            
        }
    }  
    }
    </script>

    Now we are done friends and If you have any kind of query or suggestion or any requirement then feel free to comment below.

    Note: Friends, I just tell the basic setup and things, you can change the code according to your requirements.

    I will appreciate that if you will tell your views for this post. Nothing matters if your views will be good or bad.

    Jassa

    Thanks

  • Reactjs Convert HTML into PDF working Functionality

    Reactjs Convert HTML into PDF working Functionality

    Hello friends, welcome back to my blog. Today in this blog post, I am going to show you, Reactjs Convert HTML into PDF working Functionality.


    Working Video
    Reactjs Convert HTML into PDF working Functionality
    Reactjs Convert HTML into PDF working Functionality
    HTML to PDF
    HTML to PDF

    For reactjs and bootstrap 5 new comers, please check the below links:

    Reactjs Basic Tutorials

    Bootstrap 5 Tutorials


    Friends now I proceed onwards and here is the working code snippet for react ecommerce template free and please use this carefully to avoid the mistakes:

    1. Firstly, we need fresh reactjs setup and for that, we need to run below commands into out terminal and also we should have latest node version installed on our system:

    npx create-react-app reactpdf
    
    cd reactpdf

    2. Now we need to run below commands into our project terminal to get, pdf genrator, bootstrap and related modules into our reactjs application:

    npm install bootstrap --save
    
    npm install --save pdfmake
    
    npm install html-to-pdfmake
    
    npm install jspdf --save
    
    npm start //For start project

    3. Finally for the main output, we need to add below code into our reactboot5/src/App.js file or if you have fresh setup then you can replace reactpdf/src/App.js file code with below code:

    import React from 'react';
    
    import '../node_modules/bootstrap/dist/css/bootstrap.min.css';
    
    import jsPDF from 'jspdf';
    import pdfMake from 'pdfmake';
    import pdfFonts from 'pdfmake/build/vfs_fonts';
    import htmlToPdfmake from 'html-to-pdfmake';
    
    class App extends React.Component {
    
        printDocument() {
          //const input = document.getElementById('divToPrint');
        
    
              const doc = new jsPDF();
             
              //get table html
              const pdfTable = document.getElementById('divToPrint');
              //html to pdf format
              var html = htmlToPdfmake(pdfTable.innerHTML);
            
              const documentDefinition = { content: html };
              pdfMake.vfs = pdfFonts.pdfMake.vfs;
              pdfMake.createPdf(documentDefinition).open();
            
        }
     
      render() {
       
        return (
        <div className="App container mt-5">
         
        <div id="divToPrint">
            <h2>therichpost.com</h2>
                      
            <table class="table table-bordered">
              <thead>
                <tr>
                  <th>Firstname</th>
                  <th>Lastname</th>
                  <th>Website</th>
                </tr>
              </thead>
              <tbody>
                <tr>
                  <td>Ajay</td>
                  <td>Malhotra</td>
                  <td>Therichpost.com</td>
                </tr>
                <tr>
                  <td>Ajay</td>
                  <td>Malhotra</td>
                  <td>Therichpost.com</td>
                </tr>
                <tr>
                  <td>Ajay</td>
                  <td>Malhotra</td>
                  <td>Therichpost.com</td>
                </tr>
                <tr>
                  <td>Ajay</td>
                  <td>Malhotra</td>
                  <td>Therichpost.com</td>
                </tr>
                <tr>
                  <td>Jassa</td>
                  <td>Malhotra</td>
                  <td>Therichpost.com</td>
                </tr>
              </tbody>
            </table>
          </div>
          
          <button class="btn btn-primary" onClick={this.printDocument}>Export To PDF</button>
        </div>
     )
    };
    }
    
    export default App;

    Now we are done friends. If you have any kind of query or suggestion or any requirement then feel free to comment below.

    Note: Friends, I just tell the basic setup and things, you can change the code according to your requirements.

    I will appreciate that if you will tell your views for this post. Nothing matters if your views will be good or bad.

    Jassa

    Thanks

  • Angular 12 Getting Dynamic Data From WordPress Rest API

    Angular 12 Getting Dynamic Data From WordPress Rest API

    Hello to all welcome back on my blog therichpost.com. Today in this blog post, I am going to tell you, Angular 12 Getting Dynamic Data From WordPress Rest API.

    Working Video
    Angular 12 Getting Dynamic Data From WordPress Rest API
    Angular 12 Getting Dynamic Data From WordPress Rest API
    WordPress Backend Posts
    WordPress Backend Posts
    WordPress Rest API
    WordPress Rest API

    Guy’s Angular 12 came and if you are new in Angular 12 and WordPress then please check the below links:

    1. Angular 12 Tutorials
    2. WordPress Free Plugins
    3. Wp Tricks

    Guy’s here is working code snippet and please follow it carefully to avoid the mistakes:

    1. Firstly friends we need fresh angular 12 setup and for this we need to run below commands but if you already have angular 12 setup then you can avoid below commands. Secondly we should also have latest node version(14.17.0) installed on our system:

    npm install -g @angular/cli 
    
    ng new angularwp //Create new Angular Project
    
    cd angularwp // Go inside the Angular Project Folder

    2. Now guy’s, here we need to run below command into our project terminal to install bootstrap 5 module for styling and good looks into our angular application(optional):

    npm install bootstrap
    
    npm i @popperjs/core

    3. Now guy’s, now we need to add below code into our angularwp/angular.json file to add bootstrap style:

    ...
     "styles": [
                 ...
                  "node_modules/bootstrap/dist/css/bootstrap.min.css",
                  
                ],
                "scripts": [
                ...
                "node_modules/bootstrap/dist/js/bootstrap.js",
              
                ],

    4. Now guy’s, now we need to add below code into our angularwp/src/app/app.module.ts file to call API module:

    ...
    import { HttpClientModule } from '@angular/common/http';
    @NgModule({
      declarations: [
        AppComponent
      ],
      imports: [
        ...
        HttpClientModule
      ],
      providers: [],
      bootstrap: [AppComponent]
    })
    export class AppModule { }
    

    5. Now guys, now we need to add below code into our angularwp/src/app/app.component.html file to get final output on browser:

    <div class="table-responsive">
       <table class="table text-center table-hover table-bordered">
         <thead>
           <tr>
             <th style="width: 34%;">ID</th>
             <th style="width: 22%;">Title</th>
             <th style="width: 22%;">Description</th>
           
           </tr>
         </thead>
         <tbody>
           <tr  *ngFor="let post of posts">
             
             <td>{{post.id}}</td>
             <td>{{post.title.rendered}}</td>
             <td>{{post.content.rendered}}</td>
           </tr>
          
         </tbody>
    
        
       </table>

    6. Now guys, now we need to add below code into our angularwp/src/app/app.component.ts file:

    import { Component } from '@angular/core';
    import { HttpClient } from '@angular/common/http';
    @Component({
      selector: 'app-root',
      templateUrl: './app.component.html',
      styleUrls: ['./app.component.css']
    })
    export class AppComponent {
     ...
      posts: any;
      constructor(public http: HttpClient) {
    
       //Rest API Calling
        this.http.get('http://localhost/wordpress57backend/wp-json/wp/v2/posts/').subscribe(data => {
          this.posts = data;
          console.log(this.posts);
        
        });
      }
    }
    

    Guy’s in the end please run ng serve command to check the out on browser(localhost:4200) and if you will have any query then feel free to comment below.

    Guy’s I will appreciate that if you will tell your views for this post. Nothing matters if your views will be good or bad because with your views, I will make my next posts more good and helpful.

    Jassa

    Thanks.

  • Reactjs Save User Register Form Data into PHP MySQL Database

    Reactjs Save User Register Form Data into PHP MySQL Database

    Hello my friends, welcome back to my blog. Today in this blog post, I am going to tell you, Reactjs Save User Register Form Data into PHP MySQL Database.

    Reactjs save form data to mysql
    Reactjs Save User Register Form Data into PHP MySQL Database
    Reactjs Save User Register Form Data into PHP MySQL Database

    For reactjs new comers, please check the below link:

    Reactjs Basic Tutorials


    Friends now I proceed onwards and here is the working code snippet and please use this carefully to avoid the mistakes:

    1. Firstly friends we need fresh reactjs setup and for that we need to run below commands into our terminal and also w should have latest node version installed on our system:

    npx create-react-app reactsaveform
    
    cd reactsaveform

    2. Now we need to run below commands to get bootstrap 5(for good layout), sweetalert to show success message after for submit and axios(to post data request to php)  modules into our react js app:

    npm install bootstrap --save
    
    npm install sweetalert2-react //Show success message after form submission
    
    npm install axios --save
    
    npm start

    3. Finally friends we need to add below code into our src/App.js file to get final output on web browser:

    import React from 'react';
    
    import '../node_modules/bootstrap/dist/css/bootstrap.min.css';
    
    //Include Sweetalert
    import Swal from 'sweetalert2'
    
    
    //axios for api request
    import axios from 'axios';
    class App extends React.Component {
      constructor(props)
        {
          super(props);
          this.addFormData = this.addFormData.bind(this);
        }
      //Form Submission
      addFormData(evt)
        {
          evt.preventDefault();
          const fd = new FormData();
          fd.append('myUsername', this.refs.myUsername.value);
          fd.append('myEmail', this.refs.myEmail.value);
          fd.append('myAdd1', this.refs.myAdd1.value);
          fd.append('myAdd2', this.refs.myAdd2.value);
          fd.append('myCity', this.refs.myCity.value);
          fd.append('myState', this.refs.myState.value);
          fd.append('myZip', this.refs.myZip.value);
          
          axios.post('http://localhost/reactimageupload.php', fd
          ).then(res=>
          {
           
             //Success alert
           Swal.fire({
            title: 'Therichpost',
            text: res.data.data,
            icon: 'success',
            
          });
        this.myFormRef.reset();
        
        }
        );
        }
     
      render() {
       
        return (
        <div className="App container mt-5">
         
          <h1 className="text-center mt-2 mb-2">Reactjs Save User Register Form Data in phpmysql database</h1>
          <form class="row g-3" ref={(el) => this.myFormRef = el}>
            <div class="col-md-6">
              <label for="inputEmail4" class="form-label">Email</label>
              <input type="email" class="form-control" id="inputEmail4" ref="myEmail" required />
            </div>
            <div class="col-md-6">
              <label for="inputUsername4" class="form-label">Username</label>
              <input type="text" class="form-control" id="inputUsername4" ref="myUsername" required />
            </div>
            <div class="col-12">
              <label for="inputAddress" class="form-label">Address</label>
              <input type="text" class="form-control" id="inputAddress" placeholder="1234 Main St" ref="myAdd1" required />
            </div>
            <div class="col-12">
              <label for="inputAddress2" class="form-label">Address 2</label>
              <input type="text" class="form-control" id="inputAddress2" placeholder="Apartment, studio, or floor" ref="myAdd2" required />
            </div>
            <div class="col-md-6">
              <label for="inputCity" class="form-label">City</label>
              <input type="text" class="form-control" id="inputCity" ref="myCity" required />
            </div>
            <div class="col-md-4">
              <label for="inputState" class="form-label">State</label>
              <select id="inputState" class="form-select" ref="myState">
                <option value="">Choose...</option>
                <option value="PB">Punjab</option>
              </select>
            </div>
            <div class="col-md-2">
              <label for="inputZip" class="form-label">Zip</label>
              <input type="text" class="form-control" id="inputZip" ref="myZip" required />
            </div>
            <div class="col-12">
              <div class="form-check">
                <input class="form-check-input" type="checkbox" id="gridCheck" required />
                <label class="form-check-label" for="gridCheck">
                  Check me out
                </label>
              </div>
            </div>
            <div class="col-12">
              <button type="submit" class="btn btn-primary" onClick={this.addFormData}>Submit</button>
            </div>
          </form>
        </div>
     )
    };
    }
    
    export default App;

    4. Now friends here is my php code snippet to save reactjs for data and I added this code into my xampp/htdocs/save.php file:

    //Please create users database inside phpmysql admin and create registerusers tabel and create  `email`, `username`, `add1`, `add2`, `city`, `state`, `zip` fields

    <?php
    header('Access-Control-Allow-Origin: *');
    header('Access-Control-Allow-Credentials: true');
    header('Access-Control-Allow-Methods:POST,GET,PUT,DELETE');
    header('Access-Control-Allow-Headers: content-type or other');
    header('Content-Type: application/json');
    
    //Please create users database inside phpmysql admin and create registerusers tabel and create  `email`, `username`, `add1`, `add2`, `city`, `state`, `zip` fields
    $servername = "localhost";
    $username   = "root";
    $password   = "";
    $dbname     = "users";
    // Create connection
    $conn = new mysqli($servername, $username, $password, $dbname);
    // Check connection
    if ($conn->connect_error) {
        die("Connection failed: " . $conn->connect_error);
    } 
    
    //Add user
    if(isset($_POST['myEmail']))
    {
        $sql = "INSERT INTO `registerusers`( `email`, `username`, `add1`, `add2`, `city`, `state`, `zip`)
            VALUES ('".$_POST['myEmail']."', '".$_POST['myUsername']."', '".$_POST['myAdd1']."', '".$_POST['myAdd2']."'
            , '".$_POST['myCity']."', '".$_POST['myState']."', '".$_POST['myZip']."')";
        if (mysqli_query($conn,$sql)) {
        $data = array("data" => "Your Data added successfully");
            echo json_encode($data);
        } else {
            $data = array("data" => "Error: " . $sql . "<br>" . $conn->error);
            echo json_encode($data);
            
        }
    }
    die();
    ?>

    Now we are done friends and don’t forget to start xampp. If you have any kind of query or suggestion or any requirement then feel free to comment below.

    Note: Friends, I just tell the basic setup and things, you can change the code according to your requirements. For better understanding must watch video above.
    I will appreciate that if you will tell your views for this post. Nothing matters if your views will good or bad.

    Jassa

    Thanks

  • Angular 12 Child Routing Working Example

    Angular 12 Child Routing Working Example

    Hello to all welcome back on my blog therichpost.com. Today in this blog post, I am going to tell you Angular 12 Child Routing Working Example.

    Guys in this post we will cover below things:

    1. Angular12 Child Routing.
    2. Responsive Navigation in Angular12 with Bootstrap 5.
    3. Angular12 Nested Routing.
    4. Create parent and child components in Angular 12.
    Angular Routing Working Demo
    Angular 12 Child Routing Working Example
    Angular 12 Child Routing Working Example

    Guy’s Angular 12 came and if you are new in Angular 12 then please check the below link:

    1. Angular 12 Tutorials

    Guy’s here is working code snippet for Angular 12 Routing Tutorial and please follow it carefully to avoid the mistakes:

    1. Firstly friends we need fresh angular 12 setup and for this we need to run below commands but if you already have angular 12 setup then you can avoid below commands. Secondly we should also have latest node version(14.17.0) installed on our system:

    npm install -g @angular/cli 
    
    ng new angularrouting //Create new Angular Project
    
    cd angularrouting // Go inside the Angular Project Folder

    2. Now guy’s, here we need to run below command into our project terminal to install bootstrap 5 module for styling and good looks into our angular application(optional):

    npm install bootstrap
    
    npm i @popperjs/core

    3. Now guy’s, here we need to run below commands into our project terminal to create home and about components and child components for routing:

    ng g c home
    
    ng g c home/home1 --module app
    
    ng g c home/home2 --module app
    
    ng g c about
    
    ng g c about/about1 --module app
    
    ng g c about/about2 --module app

    4. Now guy’s, now we need to add below code into our angularrouting/angular.json file to add bootstrap style:

    ...
     "styles": [
                 ...
                  "node_modules/bootstrap/dist/css/bootstrap.min.css",
                  
                ],
                "scripts": [
                ...
                "node_modules/bootstrap/dist/js/bootstrap.js",
              
                ],

    5. Now guy’s, now we need to add below code into our angularrouting/src/app/app-routing.module.ts file to make routes:

    ...
    
    import { HomeComponent } from './home/home.component';
    import { AboutComponent } from './about/about.component';
    import { Home1Component } from './home/home1/home1.component';
    import { Home2Component } from './home/home2/home2.component';
    import { About1Component } from './about/about1/about1.component';
    import { About2Component } from './about/about2/about2.component';
    const routes: Routes = [
      { path: '', component: HomeComponent },
      { path: 'home', component: HomeComponent, 
      children: [
        {
          path: 'home1',
          component: Home1Component
        },
        {
          path: 'home2',
          component: Home2Component
        }
      ]},
      { path: 'about', component: AboutComponent,
      children: [
        {
          path: 'about1',
          component: About1Component
        },
        {
          path: 'about2',
          component: About2Component
        }
      ]
     },
    ];
    
    ...
    

    6. Now guys, now we need to add below code into our angularrouting/src/app/app.component.html file to set the angular frontend and call others components with routing:

    <nav class="navbar navbar-expand-lg navbar-light bg-light">
      <div class="container-fluid">
        <a class="navbar-brand" [routerLink]="['']">Therichpost</a>
        <button class="navbar-toggler" type="button" data-bs-toggle="collapse" data-bs-target="#navbarNav" aria-controls="navbarNav" aria-expanded="false" aria-label="Toggle navigation">
          <span class="navbar-toggler-icon"></span>
        </button>
        <div class="collapse navbar-collapse" id="navbarNav">
          <ul class="navbar-nav">
          
            <li class="nav-item dropdown">
              <a class="nav-link dropdown-toggle" id="navbarDropdown" role="button" data-bs-toggle="dropdown" aria-expanded="false">
                Home
              </a>
              <ul class="dropdown-menu" aria-labelledby="navbarDropdown">
                <li><a class="dropdown-item" [routerLink]="['/home/home1']">Home 1</a></li>
                <li><a class="dropdown-item" [routerLink]="['/home/home2']">Home 2</a></li>
               
              </ul>
            </li>
            <li class="nav-item dropdown">
              <a class="nav-link dropdown-toggle" id="navbarDropdown" role="button" data-bs-toggle="dropdown" aria-expanded="false">
                About
              </a>
              <ul class="dropdown-menu" aria-labelledby="navbarDropdown">
                <li><a class="dropdown-item" [routerLink]="['/about/about1']">About 1</a></li>
                <li><a class="dropdown-item" [routerLink]="['/about/about2']">About 2</a></li>
               
              </ul>
            </li>
           
           
          </ul>
        </div>
      </div>
    </nav>
    <div class="container p-5">
    
    <!-- Calling routing components --> 
    <router-outlet></router-outlet>
    </div>

    7. Now guys, now we need to add below code into our angularrouting/src/app/home/home.component.html file:

    <h1>Home Page</h1>
    <h4><router-outlet></router-outlet></h4>
    

    8. Now guys, now we need to add below code into our angularrouting/src/app/about/about.component.html file:

    <h1>About Page</h1>
    <h4><router-outlet></router-outlet></h4>

    Guy’s in the end please run ng serve command to check the out on browser(localhost:4200) and if you will have any query then feel free to comment below.

    Guy’s I will appreciate that if you will tell your views for this post. Nothing matters if your views will be good or bad because with your views, I will make my next posts more good and helpful.

    Jassa

    Thanks.

  • Angular 12 Select2 Working Example

    Angular 12 Select2 Working Example

    Hello friends, welcome back to my blog. Today in this blog post, I am going to tell you, Angular 12 Select2 Working Example.

    Working Video
    Angular 12 Select2 Working Example
    Angular 12 Select2 Working Example

    Guy’s Angular 12 came . if you are new then you must check below two links:

    1. Angular12 Basic Tutorials
    2. Angular Free Templates

    Friends now I proceed onwards and here is the working code snippet and please use carefully this to avoid the mistakes:

    1. Firstly friends we need fresh angular 12 setup and for this we need to run below commands but if you already have angular 12 setup then you can avoid below commands.

    Secondly we should also have latest node version installed on our system:

    npm install -g @angular/cli 
    
    ng new angulardemo //Create new Angular Project
    
    cd angulardemo // Go inside the Angular Project Folder
    
    ng serve --open // Run and Open the Angular Project
    
    http://localhost:4200/ // Working Angular Project Url

    2. Now friends, here we need to run below commands into our project terminal to install select2, jquery, bootstrap(good looks) modules into our angular application:

    npm install select2
    
    npm i --save bootstrap
    npm i  jquery
    ng serve --o //will run the angular project

    3. Now friends, here we need to add below  into our angular.json file:

    "styles": [
               ...
               "node_modules/bootstrap/dist/css/bootstrap.min.css",
               "node_modules/select2/dist/css/select2.min.css"
              
             ],
                "scripts": [
                "node_modules/jquery/dist/jquery.js",
                "node_modules/select2/dist/js/select2.min.js",
                "src/custom.js"
                ],

    4. Now friends we need to create new file `custom.js` inside src folder and add below code inside it:

    $(document).ready(function() {
    $('.select2').select2(); //initialize 
    });

    5. Now friends we just need to add below code into src/app/app.component.html file:

    <div class="container mt-5">
    
      <h2 class="mb-4">therihpost.com</h2>


      <div class="col-md-12">
        <div class="form-group"> 
          <label>Minimal</label> 
          <select class="form-control select2 select2-hidden-accessible" style="width: 100%;" tabindex="-1" aria-hidden="true">
          <option selected="selected">Alabama</option>
          <option>Alaska</option>
          <option>California</option>
          <option>Delaware</option>
          <option>Tennessee</option>
          <option>Texas</option>
          <option>Washington</option>
      </select> </div> 
      </div>
    
    </div>

    Now we are done friends. and please ng serve command to see the output. If you have any kind of query, suggestion and new requirement then feel free to comment below.

    Note: Friends, In this post, I just tell the basic setup and things, you can change the code according to your requirements. For better live working experience, please check the video on the top.

    I will appreciate that if you will tell your views for this post. Nothing matters if your views will be good or bad because with your views, I will make my next posts more good and helpful.

    Jassa

    Thanks

  • Angular 12 Convert HTML into PDF working Functionality

    Angular 12 Convert HTML into PDF working Functionality

    Hello friends, welcome back to my blog. Today in this blog post, I am going to tell you, Angular 12 Convert HTML into PDF working Functionality.

    Angular 12 HTML to PDF
    Html to Pdf
    Html to Pdf

    Angular 12 Convert HTML into PDF working Functionality
    Angular 12 Convert HTML into PDF working Functionality

    Guy’s Angular 12 came . if you are new then you must check below two links:

    1. Angular12 Basic Tutorials
    2. Angular Free Templates

    Friends now I proceed onwards and here is the working code snippet and please use carefully this to avoid the mistakes:

    1. Firstly friends we need fresh angular 12 setup and for this we need to run below commands but if you already have angular 12 setup then you can avoid below commands.

    Secondly we should also have latest node version installed on our system:

    npm install -g @angular/cli 
    
    ng new htmltopdf //Create new Angular Project
    
    cd htmltopdf // Go inside the Angular Project Folder
    
    ng serve --open // Run and Open the Angular Project
    
    http://localhost:4200/ // Working Angular Project Url

    2. Now friends, here we need to run below commands into our project terminal to install pdfmake, bootstrap(good looks) modules into our angular application:

    npm install --save pdfmake
    
    npm install html-to-pdfmake
    
    npm install jspdf --save
    
    npm i --save bootstrap
    
    ng serve --o //will run the angular project

    3. Now friends, here we need to add below  into our angular.json file:

    "styles": [
               ...
               "node_modules/bootstrap/dist/css/bootstrap.min.css",
              
             ],

    4. Now friends we just need to add below code into src/app/app.component.ts file:

    import { Component, ViewChild, ElementRef  } from '@angular/core';
    
    import jsPDF from 'jspdf';
    import pdfMake from 'pdfmake/build/pdfmake';
    import pdfFonts from 'pdfmake/build/vfs_fonts';
    pdfMake.vfs = pdfFonts.pdfMake.vfs;
    import htmlToPdfmake from 'html-to-pdfmake';
    
    ...
    export class AppComponent {
      @ViewChild('pdfTable') pdfTable: ElementRef;
      ...
      //PDF genrate button click function
      public downloadAsPDF() {
        const doc = new jsPDF();
        //get table html
        const pdfTable = this.pdfTable.nativeElement;
    
        //html to pdf format
        var html = htmlToPdfmake(pdfTable.innerHTML);
       
        const documentDefinition = { content: html };
    
        pdfMake.createPdf(documentDefinition).open();


      }


    }


    5. Now friends we just need to add below code into src/app/app.component.html file:

    <div id="pdfTable" #pdfTable>
            <h2>HTML To PDF</h2>
                      
            <table class="table table-bordered">
              <thead>
                <tr>
                  <th>Firstname</th>
                  <th>Lastname</th>
                  <th>Website</th>
                </tr>
              </thead>
              <tbody>
                <tr>
                  <td>Ajay</td>
                  <td>Malhotra</td>
                  <td>Therichpost.com</td>
                </tr>
                <tr>
                  <td>Ajay</td>
                  <td>Malhotra</td>
                  <td>Therichpost.com</td>
                </tr>
                <tr>
                  <td>Ajay</td>
                  <td>Malhotra</td>
                  <td>Therichpost.com</td>
                </tr>
              </tbody>
            </table>
          </div>
          
          <button class="btn btn-primary" (click)="downloadAsPDF()">Export To PDF</button>


    Now we are done friends. If you have any kind of query, suggestion and new requirement then feel free to comment below.

    Note: Friends, In this post, I just tell the basic setup and things, you can change the code according to your requirements. For better live working experience, please check the video on the top.

    I will appreciate that if you will tell your views for this post. Nothing matters if your views will be good or bad because with your views, I will make my next posts more good and helpful.

    Jassa

    Thanks