Hello to all, welcome again on therichpost.com. In this post, I will tell you, How to make array push or empty in Angular 9 when getting data from API?
Post Working:
In this post, I am showing with video example that, how I am pushing the data to an array and also make that array empty during getting updated data.
Here is working code and please use or check carefully:
1. Here is my app.component.ts file and below code will push api data to an array:
...
data = []; //Declare array variable
constructor(private http: HttpClient) {
this.http.get('http://localhost/mypage.php').subscribe(data => {
this.data.push(data); // Pushing data to declared array variable
console.log(this.data);
}, error => console.error(error));
}
...
2. Here is my app.component.ts file and below code will make array variable empty:
Hello to all, welcome again on therichpost.com. In this post, I will tell you, How to login into Angular 9 application with Facebook?
Here are the complete commands and code snippet and please follow carefully:
1. Here are the basics commands to set angular 9 your system:
npm install -g @angular/cli
ng new angularbootstrap //Create new Angular Project
$ cd angularbootstrap // Go inside the Angular Project Folder
ng serve --open // Run and Open the Angular Project
http://localhost:4200/ // Working Angular Project Url
2. Here is the command to install bootstrap 4 into your angular 9 applicatiopn:
npm install --save bootstrap
3. Here is the command to install Angular 9 Social login module:
npm install --save angularx-social-login
4. Here are the bootstrap 4 css and js path, you need to include into your angular.json file:
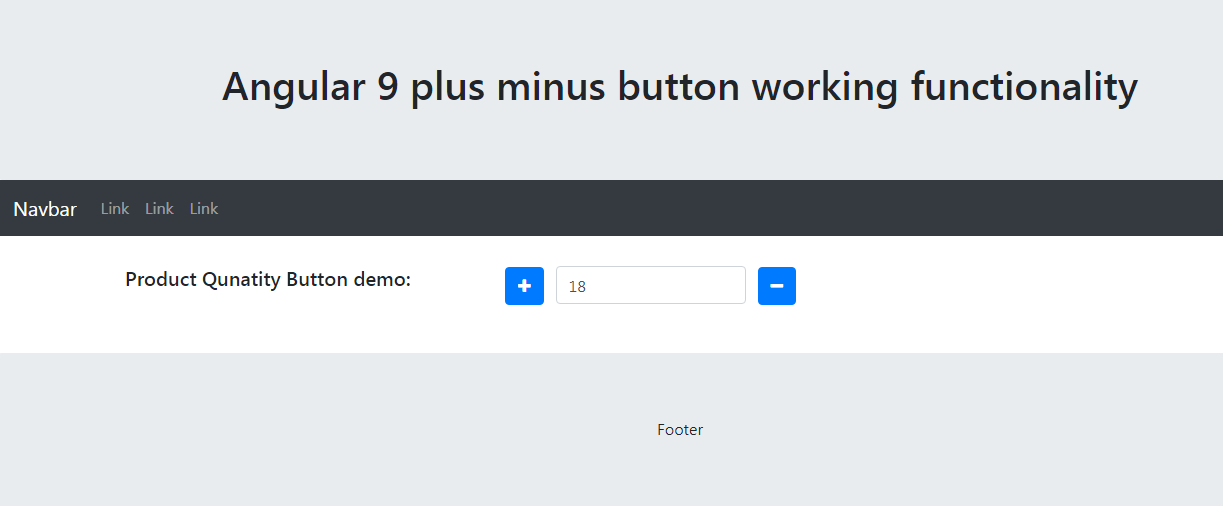
Hello to all, welcome again on therichpost.com. In this post, I will tell you, How to make custom quantity selector into Angular 9 application?
Here are the complete commands and code snippet and please follow carefully:
1. Here are the basics commands to set angular 9 your system:
npm install -g @angular/cli
ng new angularbootstrap //Create new Angular Project
$ cd angularbootstrap // Go inside the Angular Project Folder
ng serve --open // Run and Open the Angular Project
http://localhost:4200/ // Working Angular Project Url
2. Here is the command to install bootstrap 4 into your angular 9 applicatiopn:
npm install --save bootstrap
3. Here are the bootstrap 4 css and js path, you need to include into your angular.json file:
Hello to all, welcome again on therichpost.com. In this post, I will tell you, Angular 9 Bootstrap 4 theme integration.
Here are the complete commands and code snippet and please follow carefully:
1. Here are the basics commands to set angular 9 your system:
npm install -g @angular/cli
ng new angularbootstrap //Create new Angular Project
$ cd angularbootstrap // Go inside the Angular Project Folder
ng serve --open // Run and Open the Angular Project
http://localhost:4200/ // Working Angular Project Url
2. Here is the command to install bootstrap 4 into your angular 9 applicatiopn:
npm install --save bootstrap
3. Here are the commands to create header and footer components:
ng g c header
ng g c footer
4. Here are the bootstrap 4 css and js path, you need to include into your angular.json file:
Hello to all, welcome to therichpost.com. In this post, I will tell you, How to make title dynamic in Angular 9?
Here are the basics commands and code and please follow carefully:
1. Here are the basics commands to install angular 9 on your system:
npm install -g @angular/cli
ng new angularpopup //Create new Angular Project
cd angularpopup // Go inside the Angular Project Folder
ng serve --open // Run and Open the Angular Project
http://localhost:4200/ // Working Angular Project Url
2. Here is the code for app.component.ts file:
import {Title} from "@angular/platform-browser";
...
export class AppComponent {
...
constructor(private titleService:Title) {
this.titleService.setTitle("Add Product");
}
...
}
This is it and if you have any kind of query then please comment below.
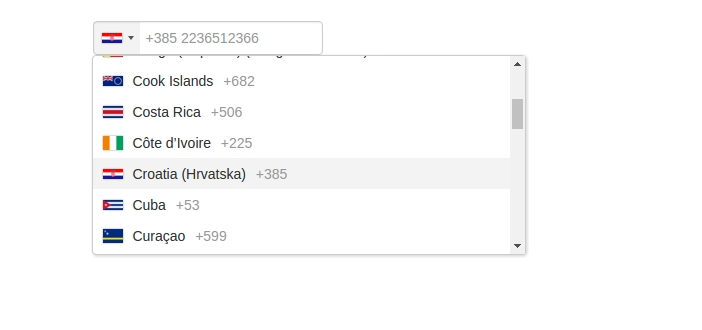
Hello to all, welcome to therichpost.com. In this post, I will tell you, Angular 8 input phone number with country code.
Guy’s this post code snippet will also work in angular latest version Angular 17 input type phone number with country code and country flags.
Guys click here to see the updated version of this post for Angular 11+ versions.
Post Working:
In this post, I am showing input field with enter phone number with country code and country flags.
Here is the working coding steps and please follow carefully:
1. Here are the basics commands to install angular 17 on your system:
npm install -g @angular/cli
ng new angularpopup //Create new Angular Project
cd angularpopup // Go inside the Angular Project Folder
ng serve --open // Run and Open the Angular Project
http://localhost:4200/ // Working Angular Project Url
2. Here is the below command you need to run into your terminal to add intl tel input into your angular 8 application:
npm install ng2-tel-input intl-tel-input --save
3. Now you need to add below code into your angular.json file:
Hello to all, welcome to therichpost.com. In this post, I will tell you, how to playing with API data in Angular 7, Angular 8 and Angular 9.
Post Working:
In this post, I will show the code snippet in which I am getting data from laravel in json format and I am getting that json data in my angular 9 application with the help of HttpClient and then call that data into my angular html component.
This will be helpful in Angular 7, Angular 8 and Angular 9.
Here is the working code snippet and please use carefully:
1. Here is the code for app.component.ts file:
...
import { HttpClient} from '@angular/common/http';
...
export class AppComponent implements OnInit {
data: any;
constructor( private http: HttpClient) {
// Example API DATA Format [{"id":22,"title":"Title 1"},{"id":23,"title":"Title 2"},{"id":24,"title":"Title 3"},{"id":25,"title":"Title 4"}]
this.http.get('APIURL').subscribe(data => {
this.data = data;
}, error => console.error(error));
}
}
2. Here is the code for app.component.html file:
<ul>
<li *ngFor="let item of data; let i = index" [attr.data-index]="i">
{{item.title}}
</li>
</ul>
This is it and I think this will be helpful and if you have any query then please let me know.
<div class="date">{{item.dateadded | date:'dd'}}<br>{{item.dateadded | date:'MMM'}}</div>
// This will show the date in format what you want
5. Looping in Angular:
<ul>
<li *ngFor="let tag of tags; let i = index" [attr.data-index]="i">
<a href="#">{{tag}}</a>
</li>
</ul>
// tags data is coming from angular component and number the tags data will generate same number of li
I will share more in angular and if you have any query then please let me know.
Hello to all, welcome to therichpost.com. In this post, I will tell you, Angular Latest Versions Loader Working Example.
I am doing this in Angular7.2.4 version. This is very interesting post because I liked it very much.
In this post, loader will show according to content load and this is the awesome thing.
I am calling Angular loader before API data will load successfully and I am getting API data with Angular HTTP Client.
Here is the working code, you need to follow carefully:
1. Here is the code, you need to add into app.module.ts file:
import { BrowserModule } from '@angular/platform-browser';
import { NgModule } from '@angular/core';
// we need this because we are calling API to get records
import { HttpClientModule } from '@angular/common/http';
import { AppComponent } from './app.component';
@NgModule({
declarations: [
AppComponent
],
imports: [
BrowserModule,
HttpClientModule
],
providers: [],
bootstrap: [AppComponent]
})
export class AppModule { }
2. You need to add below code into your app.component.ts file:
import { Component } from '@angular/core';
// HttpClient will call the API and get data
import { HttpClient } from '@angular/common/http';
@Component({
selector: 'app-root',
templateUrl: './app.component.html',
styleUrls: ['./app.component.css']
})
export class AppComponent {
title = 'angularloader'; //Initiate loader
loader = true;
post : any;
constructor(private http: HttpClient) {
this.http.get('https://project/posts').subscribe(data => {
this.post = data;
this.loader = false;
}, error => console.error(error));
}
}
3. You need to add below code into app.component.html file:
<!DOCTYPE html>
<html lang="en">
<head>
<title>Bootstrap Example</title>
<meta charset="utf-8">
<meta name="viewport" content="width=device-width, initial-scale=1">
<link rel="stylesheet" href="https://maxcdn.bootstrapcdn.com/bootstrap/4.3.1/css/bootstrap.min.css">
<script src="https://ajax.googleapis.com/ajax/libs/jquery/3.3.1/jquery.min.js"></script>
<script src="https://cdnjs.cloudflare.com/ajax/libs/popper.js/1.14.7/umd/popper.min.js"></script>
<script src="https://maxcdn.bootstrapcdn.com/bootstrap/4.3.1/js/bootstrap.min.js"></script>
</head>
<body>
<div class="loader" *ngIf="loader">
<div class="bar"></div>
</div>
<div class="jumbotron text-center">
<h1> Welcome to {{ title }}!</h1>
<p>Resize this responsive page to see the effect!</p>
</div>
<div class="container">
<div class="row">
<ul>
<!-- Get The API Data -->
<li *ngFor="let Posts of post">
<span>{{ Posts.id }}</span>
<h2>{{ Posts.title }}</h2>
<p>{{ Posts.body }}</p>
</li>
</ul>
</div>
</div>
</body>
</html>
4. You need to add the below code into app.component.css file to styling loader: