Author: therichpost

  • Angular 8 circle progress bar during api call

    Angular 8 circle progress bar during api call

    Hello to all, welcome again on therichpost.com. In this post, I will tell you, Angular 8 circle progress bar during api call.

    Angular 8 circle progress bar during api call
    Angular 8 circle progress bar during api call

    Post Working:

    In this post, I am showing progress bar loader in Angular 8 during API call.

    Here is the working code snippet and please follow carefully:

    1. Very first, here are common basics steps to add angular 8 application on your machine:

    $ npm install -g @angular/cli
    
    $ ng new angularloader // Set Angular8 Application on your pc
    
    cd angularloader // Go inside project folder
    
    ng serve // Run project
    
    http://localhost:4200/  //Check working Local server


    2. Now run below command into your terminal to include progress bar package into your angular 8 application:

    npm install ng-circle-progress --save


    3. Now add below code into your app.module.ts file:

    import { BrowserModule } from '@angular/platform-browser';
    import { NgModule } from '@angular/core';
    import { NgCircleProgressModule } from 'ng-circle-progress';
    import { AppComponent } from './app.component';
    import { HttpClientModule } from '@angular/common/http';
    @NgModule({
      declarations: [
        AppComponent
      ],
      imports: [
        BrowserModule,
        HttpClientModule,
        NgCircleProgressModule.forRoot({
          // set defaults here
          radius: 100,
          outerStrokeWidth: 16,
          innerStrokeWidth: 8,
          outerStrokeColor: "#78C000",
          innerStrokeColor: "#C7E596",
          animationDuration: 300,
        })
      ],
      providers: [],
      bootstrap: [AppComponent]
    })
    export class AppModule { }


    4. Add, below code into your app.component.ts file:

    import { Component } from '@angular/core';
    import { HttpClient} from '@angular/common/http';
    @Component({
      selector: 'app-root',
      templateUrl: './app.component.html',
      styleUrls: ['./app.component.css']
    })
    export class AppComponent {
      title = 'ngrx';
      showSpinner = true;
      data: any;
      constructor(private http: HttpClient) {
        this.http.get('http://YourApiAddress').subscribe(data => {
            this.data = data;
            this.showSpinner = false;
            }, error => console.error(error));
       }
    }


    5. Finally add below code into app.component.html file:

    <circle-progress *ngIf="showSpinner"
      [percent]="100"
      [radius]="100"
      [outerStrokeWidth]="16"
      [innerStrokeWidth]="8"
      [outerStrokeColor]="'#78C000'"
      [innerStrokeColor]="'#C7E596'"
      [animation]="true"
      [animationDuration]="10000"
    ></circle-progress>


    This is it and if you have any kind of query then please let me know. Don’t forget to run ng serve command.

    Jas

    Thank you

  • Angular 8 Mxgraph working example

    Angular 8 Mxgraph working example

    Hello to all, welcome to therichpost.com. In this post, I will tell you, Angular 8 Mxgraph working example.

    Angular 8 Mxgraph working example
    Angular 8 Mxgraph working example

    Post Working:

    In this post, I am intigerating MxGraph in Angular 8.

    Here is the working code snippet and please follow carefully:

    1. Very first, here are common basics steps to add angular 8 application on your machine:

    $ npm install -g @angular/cli
    
    $ ng new angularmxgraph // Set Angular8 Application on your pc
    
    cd angularmxgraph // Go inside project folder
    
    ng serve // Run project
    
    http://localhost:4200/  //Check working Local server


    2. Now run below command into your terminal to include maxgraph package into your angular 8 application:

    npm install --save mxgraph


    3. Now add below code into your angular.json file:

    "styles": [
             ...
              "node_modules/mxgraph/javascript/mxClient.js"
             ...
          ]


    4. Add, below code into your app.component.ts file:

    import {AfterViewInit, Component, ElementRef, ViewChild} from '@angular/core';
    declare var mxGraph: any;
    declare var mxHierarchicalLayout: any;
    @Component({
      selector: 'app-root',
      templateUrl: './app.component.html',
      styleUrls: ['./app.component.css']
    })
    export class AppComponent implements AfterViewInit {
    
      @ViewChild('graphContainer') graphContainer: ElementRef;
    
      ngAfterViewInit() {
        const graph = new mxGraph(this.graphContainer.nativeElement);
    
        try {
          const parent = graph.getDefaultParent();
          graph.getModel().beginUpdate();
    
          const vertex1 = graph.insertVertex(parent, '1', 'Vertex 1', 0, 0, 200, 80);
          const vertex2 = graph.insertVertex(parent, '2', 'Vertex 2', 0, 0, 200, 80);
    
          graph.insertEdge(parent, '', '', vertex1, vertex2);
        } finally {
          graph.getModel().endUpdate();
          new mxHierarchicalLayout(graph).execute(graph.getDefaultParent());
        }
      }
    
    }


    5. Finally add below code into app.component.html file:

    <div #graphContainer id="graphContainer"></div>


    This is it and if you have any kind of query then please let me know.

    Jas

    Thank you

  • Angular 8 Sweetalert working example

    Angular 8 Sweetalert working example

    Hello to all, welcome again on therichpost.com. In this post, I will tell you, Angular 8 Sweetalert working example.

    Post Working:

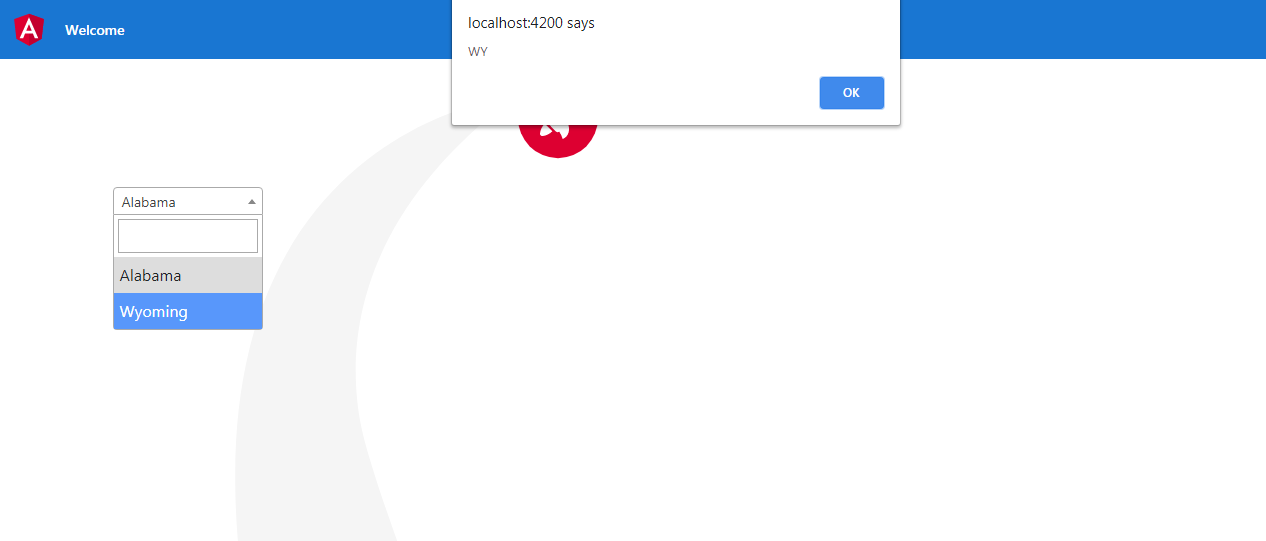
    In this post, I am showing sweetalert in Angular 8.
    Nodejs - Fullcalendar Working Example
    Angular 8 Sweetalert working example

    Here is the working code snippet and please follow carefully:

    1. Very first, here are common basics steps to add angular 8 application on your machine:

    $ npm install -g @angular/cli
    
    $ ng new angularsweetalert // Set Angular8 Application on your pc
    
    cd angularsweetalert // Go inside project folder
    
    ng serve // Run project
    
    http://localhost:4200/  //Check working Local server


    2. Now run below command into your terminal to include sweetalert package into your angular 8 application:

    npm install --save sweetalert2


    3. Now add below code into your angular.json file:

    "styles": [
      ...
      "node_modules/sweetalert2/src/sweetalert2.scss"
      
    ],
    "scripts": [
      ...
       "node_modules/sweetalert2/dist/sweetalert2.js"
      
      
    ]


    4. Finally add, below code into your app.component.ts file:

    import Swal from 'sweetalert2/dist/sweetalert2.js';
    export class AppComponent implements OnInit {
    
    ...
    opensweetalert()
      {
        Swal.fire({
            text: 'Hello!',
            icon: 'success'
          });
      }
      opensweetalertdng()
      {
       Swal.fire('Oops...', 'Something went wrong!', 'error')
      }
      
      opensweetalertcst(){
        Swal.fire({
          title: 'Are you sure?',
          text: 'You will not be able to recover this imaginary file!',
          icon: 'warning',
          showCancelButton: true,
          confirmButtonText: 'Yes, delete it!',
          cancelButtonText: 'No, keep it'
        }).then((result) => {
          if (result.value) {
          Swal.fire(
            'Deleted!',
            'Your imaginary file has been deleted.',
            'success'
          )
          // For more information about handling dismissals please visit
          // https://sweetalert2.github.io/#handling-dismissals
          } else if (result.dismiss === Swal.DismissReason.cancel) {
          Swal.fire(
            'Cancelled',
            'Your imaginary file is safe :)',
            'error'
          )
          }
        })
      }
    ...
    }


    5. Add below code into app.component.html file:

    <button class="btn btn-primary mr-2" (click)="opensweetalert()">Open Sweetalert Success</button>
     <button class="btn btn-danger  mr-2" (click)="opensweetalertdng()">Open Sweetalert Danger</button>
     <button class="btn btn-warning mr-2" (click)="opensweetalertcst()">Open Sweetalert Custom Buttons</button>


    This is it and if you have any kind of query then please let me know.

    Jas

    Thank you

  • Angular 8 Scrollspy working example

    Angular 8 Scrollspy working example

    Hello to all, welcome again on therichpost.com. In this post, I will tell you, Angular 8 Scrollspy working example.

    Post Working:

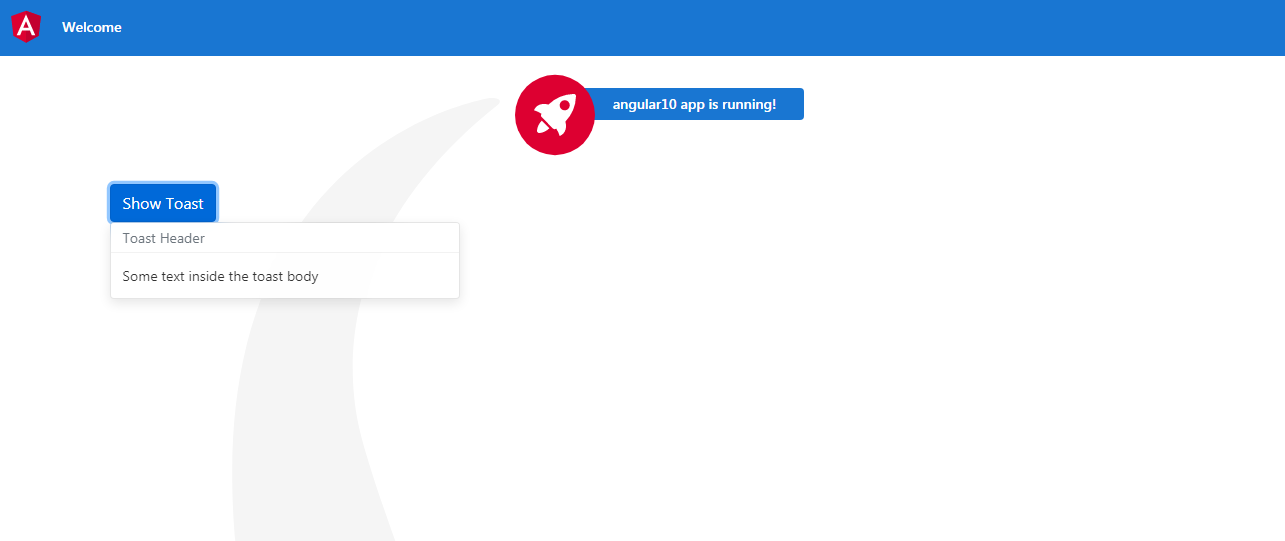
    In this post, I am showing scrollspy in Angular 8.
    Angular 8 Scrollspy
    Angular 8 Scrollspy

    Here is the working code snippet and please follow carefully:

    1. Very first, here are common basics steps to add angular 8 application on your machine:

    $ npm install -g @angular/cli
    
    $ ng new angularscrollspy // Set Angular8 Application on your pc
    
    cd angularscrollspy // Go inside project folder
    
    ng serve // Run project
    
    http://localhost:4200/  //Check working Local server


    2. Now run below command into your terminal to include bootstrap and jquery package into your angular 8 application:

    npm install --save bootstrap
    npm install jquery --save


    3. Now add below code into your angular.json file:

    "styles": [
             "src/styles.css",
              "node_modules/bootstrap/dist/css/bootstrap.min.css"
              ],
    "scripts": ["node_modules/jquery/dist/jquery.min.js", 
              "node_modules/bootstrap/dist/js/bootstrap.min.js"],


    5. Finally add, below code into your app.component.html file:

    <!DOCTYPE html>
    <html lang="en">
    <head>
      <title>Bootstrap Example</title>
      <meta charset="utf-8">
      <meta name="viewport" content="width=device-width, initial-scale=1">
      <style>
      body {
          position: relative; 
      }
      </style>
    </head>
    <body data-spy="scroll" data-target=".navbar" data-offset="50">
    
    <nav class="navbar navbar-expand-sm bg-dark navbar-dark fixed-top">  
      <ul class="navbar-nav">
        <li class="nav-item">
          <a class="nav-link" href="#section1">Section 1</a>
        </li>
        <li class="nav-item">
          <a class="nav-link" href="#section2">Section 2</a>
        </li>
        <li class="nav-item">
          <a class="nav-link" href="#section3">Section 3</a>
        </li>
        <li class="nav-item dropdown">
          <a class="nav-link dropdown-toggle" href="#" id="navbardrop" data-toggle="dropdown">
            Section 4
          </a>
          <div class="dropdown-menu">
            <a class="dropdown-item" href="#section41">Link 1</a>
            <a class="dropdown-item" href="#section42">Link 2</a>
          </div>
        </li>
      </ul>
    </nav>
    
    <div id="section1" class="container-fluid bg-success" style="padding-top:70px;padding-bottom:70px">
      <h1>Section 1</h1>
      <p>Try to scroll this section and look at the navigation bar while scrolling! Try to scroll this section and look at the navigation bar while scrolling!</p>
      <p>Try to scroll this section and look at the navigation bar while scrolling! Try to scroll this section and look at the navigation bar while scrolling!</p>
    </div>
    <div id="section2" class="container-fluid bg-warning" style="padding-top:70px;padding-bottom:70px">
      <h1>Section 2</h1>
      <p>Try to scroll this section and look at the navigation bar while scrolling! Try to scroll this section and look at the navigation bar while scrolling!</p>
      <p>Try to scroll this section and look at the navigation bar while scrolling! Try to scroll this section and look at the navigation bar while scrolling!</p>
    </div>
    <div id="section3" class="container-fluid bg-secondary" style="padding-top:70px;padding-bottom:70px">
      <h1>Section 3</h1>
      <p>Try to scroll this section and look at the navigation bar while scrolling! Try to scroll this section and look at the navigation bar while scrolling!</p>
      <p>Try to scroll this section and look at the navigation bar while scrolling! Try to scroll this section and look at the navigation bar while scrolling!</p>
    </div>
    <div id="section41" class="container-fluid bg-danger" style="padding-top:70px;padding-bottom:70px">
      <h1>Section 4 Submenu 1</h1>
      <p>Try to scroll this section and look at the navigation bar while scrolling! Try to scroll this section and look at the navigation bar while scrolling!</p>
      <p>Try to scroll this section and look at the navigation bar while scrolling! Try to scroll this section and look at the navigation bar while scrolling!</p>
    </div>
    <div id="section42" class="container-fluid bg-info" style="padding-top:70px;padding-bottom:70px">
      <h1>Section 4 Submenu 2</h1>
      <p>Try to scroll this section and look at the navigation bar while scrolling! Try to scroll this section and look at the navigation bar while scrolling!</p>
      <p>Try to scroll this section and look at the navigation bar while scrolling! Try to scroll this section and look at the navigation bar while scrolling!</p>
    </div>
    
    </body>
    </html>


    This is it and if you have any kind of query then please let me know.

    Jas

    Thank you

  • Angular 8 Google Charts working example

    Angular 8 Google Charts working example

    Hello to all, welcome again on therichpost.com. In this post, I will tell you, Angular 8 Google Charts working example.

    Post Working:

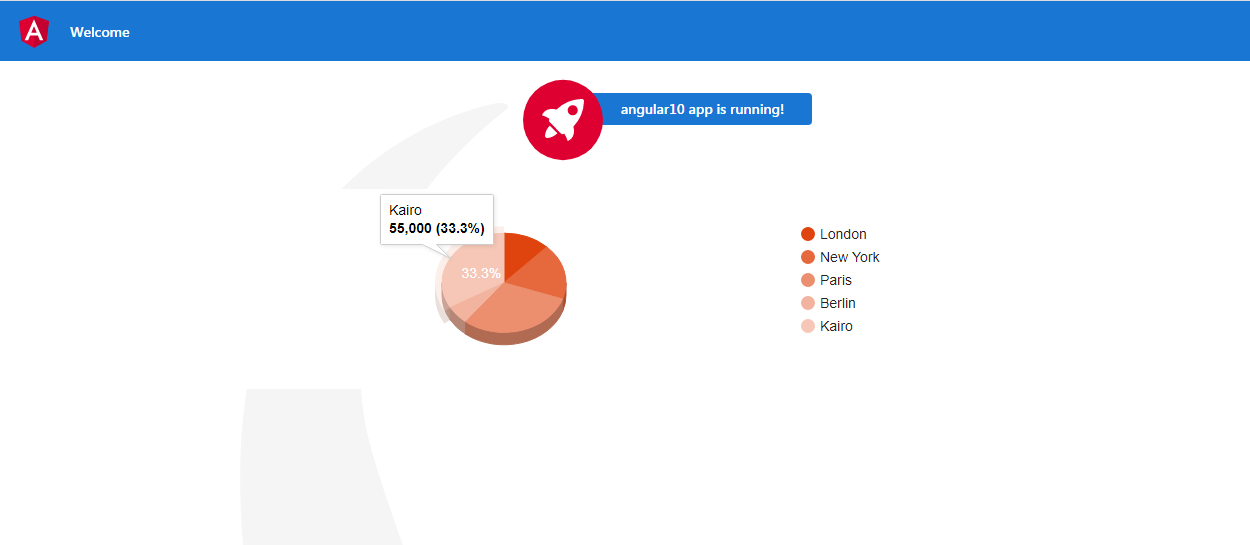
    In this post, I am showing google pie chart in Angular 8.
    angular 8 google charts
    angular 8 google charts

    Here is the working code snippet and please follow carefully:

    1. Very first, here are common basics steps to add angular 8 application on your machine:

    $ npm install -g @angular/cli
    
    $ ng new angularcharts // Set Angular8 Application on your pc
    
    cd angularcharts // Go inside project folder
    
    ng serve // Run project
    
    http://localhost:4200/  //Check working Local server


    2. Now run below command into your terminal to include google chart package into your angular 8 application:

    npm install angular-google-charts


    3. Now add below code into your app.module.ts file:

    import { GoogleChartsModule } from 'angular-google-charts';
    
       imports: [
        ...
        GoogleChartsModule.forRoot(),
      ]


    4. Now add below code into your app.component.ts file:

    myType = 'PieChart';
    myData = [
        ['London', 8136000],
        ['New York', 8538000],
        ['Paris', 2244000],
        ['Berlin', 3470000],
        ['Kairo', 19500000]
      ];


    5. Finally add, below code into your app.component.html file:

    <google-chart [type]="myType" [data]="myData" ></google-chart>


    This is it and if you have any kind of query then please let me know.

    Jas

    Thank you

  • Angular 8 owl carousel with Laravel 6 backend images

    Angular 8 owl carousel with Laravel 6 backend images

    Hello to all, welcome again on therichpost.com. In this post, I will tell you, How we can implement Owl Carousel in Angular 8 and How to show images in that Owl Carousel with Laravel 6 backend.

    Post Working:

    In this post, I am implementing Owl Carousel in Angular 8 and showing images in that slider with Laravel 6 backend.

    Here is the working video from where you can get Owl Carousel In Angular 8:

    Here is the working code snippet and please follow carefully:

    1. Very first, here are common basics steps to add angular 8 application on your machine:

    $ npm install -g @angular/cli
    
    $ ng new angularowlslider // Set Angular8 Application on your pc
    
    cd angularowlslider // Go inside project folder
    
    ng serve // Run project
    
    http://localhost:4200/  //Check working Local server


    2. Now run below command into your terminal to include owl carousel package into your angular 8 application:

    npm i ngx-owl-carousel-o


    3. Now, add below code into your angular.json file:

    ....
    "styles": [
        "node_modules/ngx-owl-carousel-o/lib/styles/prebuilt-themes/owl.carousel.min.css",
        "node_modules/ngx-owl-carousel-o/lib/styles/prebuilt-themes/owl.theme.default.min.css",
        "src/styles.css"
      ],
    ....


    4. Now add below code into your app.module.ts file:

    import { BrowserModule } from '@angular/platform-browser';
    import { NgModule } from '@angular/core';
    import { CarouselModule } from 'ngx-owl-carousel-o';
    import { AppComponent } from './app.component';
    import { HttpClientModule } from '@angular/common/http';
    import { BrowserAnimationsModule } from '@angular/platform-browser/animations';
    @NgModule({
      declarations: [
        AppComponent
      ],
      imports: [
        BrowserModule,
        CarouselModule,
        HttpClientModule,
        BrowserAnimationsModule
      ],
      providers: [],
      bootstrap: [AppComponent]
    })
    export class AppModule { }


    5. Now add below code into your app.component.ts file:

    In this, I have also made API call to get data from laravel backend:

    import { Component } from '@angular/core';
    import { HttpClient} from '@angular/common/http';
    import { OwlOptions } from 'ngx-owl-carousel-o';
    @Component({
      selector: 'app-root',
      templateUrl: './app.component.html',
      styleUrls: ['./app.component.css']
    })
    export class AppComponent {
      images:any;
      constructor(private http: HttpClient){
        this.http.get('http://localhost/laravel/public/api/get-images').subscribe(data => {
            this.images = data;
            }, error => console.error(error));
      }
      title = 'angularloadR';
      
      customOptions: OwlOptions  = {
        loop: true,
        mouseDrag: false,
        touchDrag: false,
        pullDrag: false,
        dots: false,
        navSpeed: 700,
        navText: ['', ''],
        responsive: {
          0: {
            items: 1
          },
          400: {
            items: 2
          },
          740: {
            items: 3
          },
          940: {
            items: 4
          }
        },
        nav: true
      }
    }


    6. Finally add, below code into your app.component.html file:

    In this, I am getting images data with *ngfor looping:

    <div style="text-align:center">
      <h1>
        Welcome to {{ title }}!
      </h1>
      <div>Some tags before</div>
      <owl-carousel-o [options]="customOptions">
        <ng-container *ngFor="let image of this.images;">
          <ng-template carouselSlide><img src="{{image.image}}"></ng-template> 
        </ng-container> 
      </owl-carousel-o>
    
      <div>Some tags after</div>
    </div>


    7. Here I have made custom API in Laravel 6 routes/api.php file from where I am showing images in Owl Carousel Angular 8:

    Route::get('get-images', function()
    {
    return response()->json(array ( 
          
        // Every array will be converted 
        // to an object 
        array( 
            "id" => "1", 
            "image" => "https://jaxenter.de/wp-content/uploads/2016/01/angularjs_2_0-log-500x375.jpg"
        ), 
        array( 
            "id" => "2", 
            "image" => "https://jaxenter.de/wp-content/uploads/2016/01/angularjs_2_0-log-500x375.jpg"
        ), 
        array( 
            "id" => "3", 
            "image" => "https://jaxenter.de/wp-content/uploads/2016/01/angularjs_2_0-log-500x375.jpg"
        ), 
        array( 
            "id" => "2", 
            "image" => "https://jaxenter.de/wp-content/uploads/2016/01/angularjs_2_0-log-500x375.jpg"
        ), 
        array( 
            "id" => "3", 
            "image" => "https://jaxenter.de/wp-content/uploads/2016/01/angularjs_2_0-log-500x375.jpg"
        ) 
    ));
    });


    This is it and if you have any query related to this post, then please let me know or comment below.

    Jassa

    Thank you

  • How to upload multiple images in laravel 6 with ajax?

    How to upload multiple images in laravel 6 with ajax?

    Hello to all, welcome to therichpost.com. In this post, I will tell you, How to upload multiple images in laravel 6 with ajax?

    Post Working:

    In this post, I am uploading multiple images in laravel 6 with ajax.

    Here is the working code snippet and please follow carefully:

    1. Here is the code , you need to add into your Blade template file:

    Here is the code for upload image(HTML CODE) and you can add this code any blade template file:

    @section('content')
    <div class="container">
        <div class="row justify-content-center">
            <div class="col-md-8">
                <div class="card">
                    <div class="card-header">Add Media Images : </div>
                    <div class="alert alert-success" style="display:none">
                        <p></p>
                    </div>
                    <div class="card-body">
                        <form enctype="multipart/form-data" method="post">
                            <div class="form-group">
                                <label for="image"><strong>Add Media:</strong></label>
                                <input type="file" class="form-control" id="image-upload" placeholder="Post Image" name="image_upload[]" required multiple>
                            </div>
                            <button type="button" class="btn btn-primary">Submit</button>
                        </form>
                    </div>
                </div>
            </div>
        </div>
    </div>
    <script src="https://ajax.googleapis.com/ajax/libs/jquery/3.4.1/jquery.min.js"></script>
    <script>
        jQuery("document").ready(function($) {
            // Full Ajax request
            $(".btn").click(function(e) {
                // Stops the form from reloading
                e.preventDefault();
    
                $.ajaxSetup({
                    headers: {
                        'X-CSRF-TOKEN': "{{ csrf_token() }}"
                    }
                });
                let image_upload = new FormData();
                let TotalImages = $('#image-upload')[0].files.length; //Total Images
                let images = $('#image-upload')[0];
                for (let i = 0; i < TotalImages; i++) {
                    image_upload.append('images' + i, images.files[i]);
                }
                image_upload.append('TotalImages', TotalImages);
                $.ajax({
                    url: "{{ url('addmedia') }}",
    type: 'POST', contentType: false, processData: false, data: image_upload, success: function(result) { $("div.alert").show(); $("div.alert p").text(result.message); $('#image-upload').val(""); setTimeout(function() { $("div.alert").hide(); }, 3000); // 5 secs } }); }); }); </script> @endsection


    2. Here is code for route/web.php file:

    This code will connect form data to controller file:

    Route::post('/addmedia', 'HomeController@createmedia')->middleware('ajax');


    3. Here is the controller file code app\Http\Controllers\HomeController.php file:

    This code will save images into folder and database and I have created images table into my database :

    public function createmedia(Request $request)
        {
    if($request->TotalImages > 0)
             {
           
            //Loop for getting files with index like image0, image1
                for ($x = 0; $x < $request->TotalImages; $x++) {
           
                if ($request->hasFile('images'.$x)) {
                 
                $file      = $request->file('images'.$x);
                $filename  = $file->getClientOriginalName();
                $extension = $file->getClientOriginalExtension();
                $picture   = date('His').'-'.$filename;
          
          //Save files in below folder path, that will make in public folder
                $file->move(public_path('pages/'), $picture);
          $postArray = ['image' => $picture,];
                DB::table('images')->insert($postArray);
                 }
             }
         $images = DB::table('images')->orderBy('id', "desc")->get();
             return response()->json(["message" => "Media added successfully.", "images" => $images]);
         
        }
      else
      {
        return response()->json(["message" => "Media missing."]);
      }
            
        }


    4. I have used Ajax Middleware and for creating ajax middleware, you have to check below link and do that functionality:

    Ajax Middleware Laravel

    This is it and if you have any kind of query then please do comment below.

    Jassa,

    Thank you

  • How to upload multiple images in laravel 6?

    How to upload multiple images in laravel 6?

    Hello to all, welcome to therichpost.com. In this post, I will tell you, How to upload multiple images in laravel 6?

    Post Working:

    In this post, I am uploading multiple images in laravel 6.

    Here is the working code snippet and please follow carefully:

    1. Here is the code , you need to add into your Blade template file:

    Here is the code for upload image(HTML CODE) and you can add this code any blade template file:

    @extends('layouts.app') @section('content')
    <div class="container">
        <div class="row justify-content-center">
            <div class="col-md-8">
                <div class="card">
                    <div class="card-header">Add Media Images : </div>
                    @if(session()->has("message"))
                    <div class="alert alert-success">
                        <p> {{session("message")}} </p>
                    </div>
                    @endif
                    <div class="card-body">
                        <form action="{{ url('addmedia') }}" enctype="multipart/form-data" method="post">
                            {{ csrf_field() }}
                            <div class="form-group">
                                <label for="image"><strong>Add Media:</strong></label>
                                <input type="file" class="form-control" id="image" placeholder="Post Image" name="image[]" required multiple>
                            </div>
                            <button type="submit" class="btn btn-primary">Publish</button>
                        </form>
                    </div>
                </div>
            </div>
        </div>
    </div>
    @endsection

    2. Here is code for route/web.php file:

    This code will connect form data to controller file:

    Route::post('/addmedia', 'HomeController@createmedia');

    3. Here is the controller file code app\Http\Controllers\HomeController.php file:

    This code will save images into folder and database and I have created images table into my database :

    public function createmedia(Request $request)
        {
            if (!$request->hasFile('image')) {
          return Redirect::to('add-post')->with("message","Missing image!");
            }
            if ($request->file('image')) {
          foreach ($request->file('image') as $photo) {
                $file      = $photo;
                $filename  = $file->getClientOriginalName();
                $extension = $file->getClientOriginalExtension();
                $picture     = date('His').'-'.$filename;
                $pictures[]   = $picture;
          
          //Save files in below folder path, that will make in public folder
                $file->move(public_path('pages/'), $picture);
          $postArray = ['image' => $picture,];
                DB::table('images')->insert($postArray);
                }
            
            return Redirect::to('add-post')->with("message","Media added successfully.");
        }
            
        }

    This is it and if you have any kind of query then please do comment below.

    Jassa,

    Thank you

  • Redirect uppercase to lowercase urls in WordPress

    Redirect uppercase to lowercase urls in WordPress

    Hello to all, welcome to therichpost.com. In this post, I will tell you how to Redirect uppercase to lowercase urls in WordPress?

    Post Working:

    In this post, I am doing, wordpress urls redirect uppercase to lowercase(wordpress case sensitive urls) with the help of jquery.

    Here is the working code and you can add this into your wordpress theme’s header.php or footer.php file:

    <script>
    function isLower(character) {
      return (character === character.toLowerCase()) && (character !== character.toUpperCase());
    }
    
        $(document).ready(function(){
            var url = window.location.href;
            if(isLower(window.location.href))
            {
                //true condition
            }
            else
            {
                url = url.toLowerCase();
                window.location.href = url;
            }
           
    
        })
    </script>


    If you have any query related to this post then please do comment below.

    Jassa

  • Solved Laravel Angular cors issue

    Solved Laravel Angular cors issue

    Hello to all, welcome to therichpost.com. In this post, I will tell you, Solved Laravel Angular cors issue.

    Solved Laravel Angular cors issue
    Solved Laravel Angular cors issue

    Post Working:

    In this post, I will make laravel cors middleware, which will remove the cors issue during Angular laravel API call to get the data in Angular Application from laravel. I am doing this in Laravel 6 and Angular 8.

    Here is the complete working steps and please follow carefully:

    1. Here is the below php artisan command you need to run into your terminal to create Cors middleware into your Laravel Application:

    php artisan make:middleware Cors

    2. After run above command,  you will see app\Http\Middleware\Cors.php file with below code into your middleware folder:

    <?php
    namespace App\Http\Middleware;
    
    use Closure;
    
    class Cors
    {
        /**
         * Handle an incoming request.
         *
         * @param  \Illuminate\Http\Request  $request
         * @param  \Closure  $next
         * @return mixed
         */
    
        public function handle($request, Closure $next)
        {
            // ## This is custom code for remove cors issue ##
            return $next($request)
            ->header('Access-Control-Allow-Origin', '*')
            ->header('Access-Control-Allow-Methods', 'GET, POST, PUT, DELETE, OPTIONS');
        }
    }

    3. Now you have to run below code into your app\Http\kernel.php file:

    protected $routeMiddleware = [
        ...
       'cors' => \App\Http\Middleware\Cors::class,
    ];

    4. Here is the code you need to routes/api.php file:

    Route::get('/get-data','HomeController@getdata')->middleware("cors");

    Here come to Angular component code in which I make API call to get data from laravel

    1. Here is the code, which I wrote into my app.component.ts file:

    ...
    import { HttpClient} from '@angular/common/http';
    ...
    export class HomeComponent implements OnInit {
      data: any;
      constructor(private http: HttpClient) {
        
        this.http.get('http://locahost/Laravel/PROJECTNAME/public/api/get-data').subscribe(data => {
            this.data = data;
            console.log("Data is coming.");
           
            }, error => console.error(error));
       }
    }

    This is it. If you have any kind of query related to this post then do comment below.

    The main purpose of this post is to solve cors issue into Angular Laravel API calls.

    Jassa

    Thank you