Author: therichpost

  • WordPress User Registration Frontend

    WordPress User Registration Frontend

    Hello to all, welcome to therichpost.com. In this post, I will tell, WordPress User Registration Frontend.

    WordPress is the best CMS because it is complete user friendly and WordPress gives us complete flexibility.

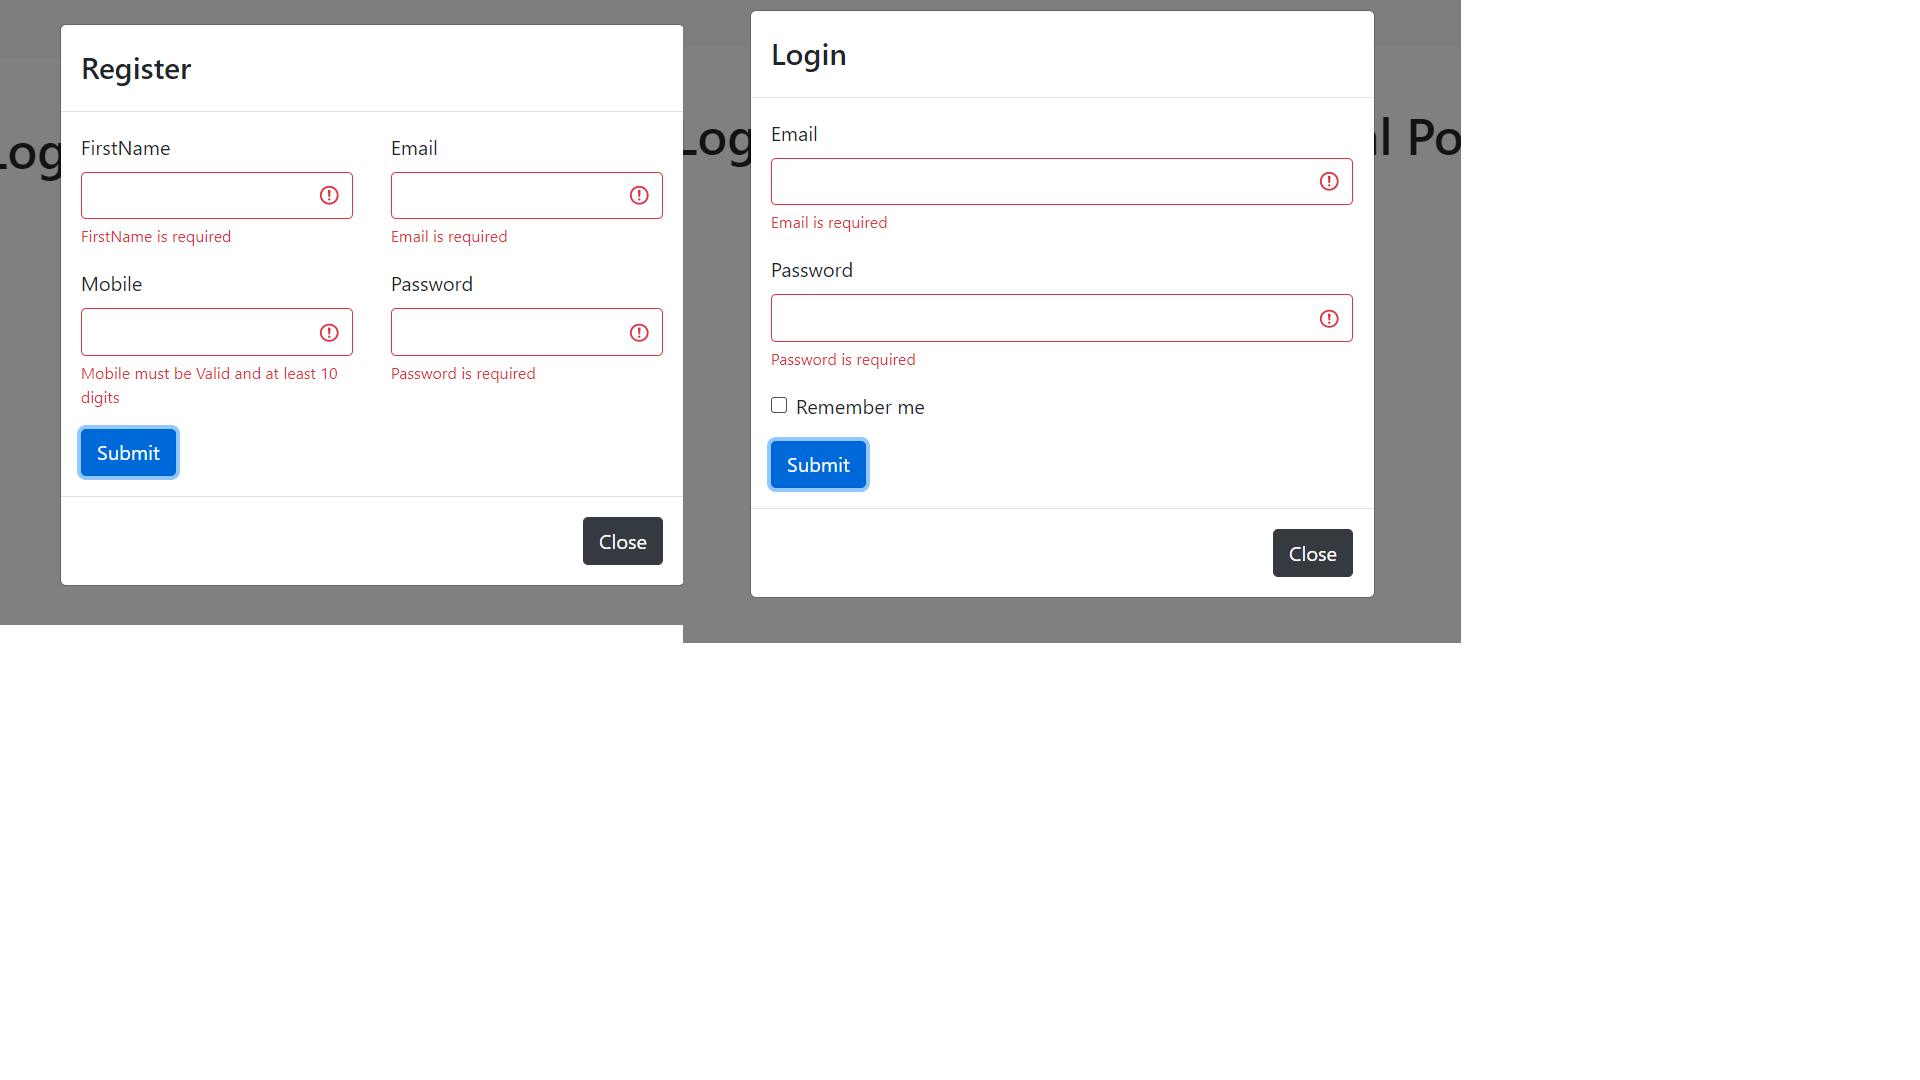
    Here are some working screenshots:

    wordpress user registration frontend
    wordpress user registration frontend
    wordpress user registration frontend error wp
    wordpress user registration frontend error wp

    Post Working:

    In this post, I am sharing code for two files, First for footer.php file, In that file, I have added html and jquery code. Second file for functions.php, In that file, I have added wordpress add_action hook for user login.

    Here is the working code and please use this carefully:

    1. Here is the code, that I have used in theme’s footer.php file:

    <!-- Modal -->
    <div id="myModal" class="modal fade" role="dialog">
    <div class="modal-dialog">
    <!-- Modal content-->
    <div class="modal-content">
    <div class="modal-header">
    <h4 class="modal-title">Register Here</h4>
    <button type="button" class="close" data-dismiss="modal">&times;</button>
    </div>
    <div class="modal-body">
    <?php if(@$_SESSION['error']): ?>
    <div class="alert alert-danger">
    <strong>Danger!</strong> <?php echo $_SESSION['error'];?>
    </div>
    <?php endif; ?>
    <form method="post" id="userlogin">
    <div class="form-group">
    <label for="email">Username:</label>
    <input type="text" class="form-control" id="username" name="username">
    </div>
    <div class="form-group">
    <label for="pwd">Password:</label>
    <input type="password" class="form-control" id="pwd" name="pass">
    <input type="hidden" name="userregister" value="userregister">
    </div>
    
    <button type="submit" class="btn btn-danger modal-btn">Register Here</button>
    </form>
    </div>
    </div>
    </div>
    </div>
    <!-- Modal End-->    
    
    <link rel="stylesheet" href="https://maxcdn.bootstrapcdn.com/bootstrap/4.4.1/css/bootstrap.min.css">
    <script src="https://ajax.googleapis.com/ajax/libs/jquery/3.4.1/jquery.min.js"></script>
    <script src="https://cdnjs.cloudflare.com/ajax/libs/popper.js/1.16.0/umd/popper.min.js"></script>
    <script src="https://maxcdn.bootstrapcdn.com/bootstrap/4.4.1/js/bootstrap.min.js"></script>
    <script>
    jQuery(document).ready(function($){
    if(!$("body").hasClass("logged-in"))
    {
    $("#myModal").modal("show");
    }
    
    
    $(".modal-btn").click(function(){
    var username = $("#username").val();
    var pwd = $("#pwd").val();
    
    var a = 0;
    var b = 0; 
    
    
    if(username == "")
    {
    a = 1;
    $("#username").css("border", "1px solid red");
    }
    else
    {
    a = 0;
    $("#username").removeAttr("style");
    }
    
    if(pwd == "")
    {
    b = 1;
    $("#pwd").css("border", "1px solid red");
    }
    else
    {
    b = 0;
    $("#pwd").removeAttr("style");
    }
    
    
    if(a==0 && b ==0)
    {
    //alert("pass");
    $("#userlogin").submit();
    }
    else
    {
    return false;
    }
    })
    });
    </script>

    2. Here is the code for theme’s functions.php file:

    add_action('init', 'process_register');
    function process_register()
    {
      
    if($_POST["userregister"])
    {
      
      
      $WP_array = array (
            'user_login'    =>  $_POST['username'],
            'user_pass'     =>  $_POST['pass']
        ) ;
      $id = wp_insert_user( $WP_array ) ;
        if ( is_wp_error($id) )
       {
       session_start();
         $_SESSION['error'] = $id->get_error_message();
       }
       else
       {
        wp_update_user( array ('ID' => $id, 'role' => 'subscriber') ) ;
        $creds['user_login'] = $_POST["username"];
        $creds['user_password'] = $_POST["pass"];
        $creds['remember'] = true;
        $user = wp_signon( $creds, false );
          $url = admin_url();
          wp_redirect($url);
          exit();
       }
        
      
    }
    
    }
    

    This is it and if you have any kind of query then feel free to comment below and In old post you can see WordPress User login from Frontend.

    Jassa

    Thank you

  • WordPress User Login Frontend

    WordPress User Login Frontend

    Hello to all, welcome to therichpost.com. In this post, I will tell, WordPress User Login Frontend.

    WordPress is the best CMS because it is complete user friendly and WordPress gives us complete flexibility.

    Here are some working screenshots:

    wordpress user login frontend
    wordpress user login frontend
    wordpress user login frontend error shows
    wordpress user login frontend error shows

    Post Working:

    In this post, I am sharing code for two files, First for footer.php file, In that file, I have added html and jquery code. Second file for functions.php, In that file, I have added wordpress add_action hook for user login.

    Here is the working code and please use this carefully:

    1. Here is the code, that I have used in theme’s footer.php file:

    <!--- Login POPUP--->
    
    <!-- Modal -->
    <div id="myModal" class="modal fade" role="dialog">
    <div class="modal-dialog">
    <!-- Modal content-->
    <div class="modal-content">
    <div class="modal-header">
    <h4 class="modal-title">Login Here</h4>
    <button type="button" class="close" data-dismiss="modal">&times;</button>
    </div>
    <div class="modal-body">
    
    <!-- error message -->
    <?php if(@$_SESSION['error']): ?>
    <div class="alert alert-danger">
    <strong>Danger!</strong> <?php echo $_SESSION['error'];?>
    </div>
    <?php endif; ?>
    
    <form method="post" id="userlogin">
    <div class="form-group">
    <label for="email">User Name or Email address:</label>
    <input type="text" class="form-control" id="email" name="email">
    </div>
    <div class="form-group">
    <label for="pwd">Password:</label>
    <input type="password" class="form-control" id="pwd" name="pass">
    </div>
    
    <button type="submit" class="btn btn-danger modal-btn">Login Here</button>
    </form>
    </div>
    </div>
    </div>
    </div>
    <!-- Modal End-->    
    
    <link rel="stylesheet" href="https://maxcdn.bootstrapcdn.com/bootstrap/4.4.1/css/bootstrap.min.css">
    <script src="https://ajax.googleapis.com/ajax/libs/jquery/3.4.1/jquery.min.js"></script>
    <script src="https://cdnjs.cloudflare.com/ajax/libs/popper.js/1.16.0/umd/popper.min.js"></script>
    <script src="https://maxcdn.bootstrapcdn.com/bootstrap/4.4.1/js/bootstrap.min.js"></script>
    <script>
    jQuery(document).ready(function($){
    
    if(!$("body").hasClass("logged-in"))
    {
    $("#myModal").modal("show");
    }
    
    
    $(".modal-btn").click(function(){
    var email = $("#email").val();
    var pwd = $("#pwd").val();
    
    var a = 0;
    var b = 0; 
    
    
    if(email == "")
    {
    a = 1;
    $("#email").css("border", "1px solid red");
    }
    else
    {
    a = 0;
    $("#email").removeAttr("style");
    }
    
    if(pwd == "")
    {
    b = 1;
    $("#pwd").css("border", "1px solid red");
    }
    else
    {
    b = 0;
    $("#pwd").removeAttr("style");
    }
    
    
    if(a==0 && b ==0)
    {
    //alert("pass");
    $("#userlogin").submit();
    }
    else
    {
    return false;
    }
    })
    });
    </script>
    <!--- Login POPUP--->

    2. Here is the code for theme’s functions.php file:

    add_action('init', 'process_login');
    function process_login()
    {
    if($_POST["email"])
    {
       $creds['user_login'] = $_POST["email"];
       $creds['user_password'] = $_POST["pass"];
       $creds['remember'] = true;
       $user = wp_signon( $creds, false );
       if ( is_wp_error($user) )
       {
         session_start();
         $_SESSION['error'] = $user->get_error_message();
       }
       else
       {
         $url = admin_url();
         wp_redirect($url);
         exit();
       }
    }
    }

    This is it and if you have any kind of query then feel free to comment below and In next post I will show WordPress User Registration from Frontend.

    Jassa

    Thank you

  • Angular 9 Datatable with PHP Mysql Database

    Angular 9 Datatable with PHP Mysql Database

    Hello to all, welcome to therichpost.com. In this post, I will tell you, Angular 9 Datatable with PHP Mysql Database.

    Angular 9 has just launched and it is in very high in demand. Angular 9 increased his performance speed. I am showing the data in Datatables with custom json data and also for giving good look to datatable, I have used bootstrap in it, here is the working picture and don’t forget to install latest node version.

    Angular 9 Datatables Working Example
    Angular 9 Datatable Working Example

    Here is the complete working code and use this carefully:

    1. Here are the basics commands, you need to run for latest angular 9 setup and environment:

    $ npm install -g @angular/cli
    
    $ ng new angulardatatables
    
    $ cd angulardatatables
    
    $ ng serve
    
    //Here is the url, you need to run into your browser and see working angular test project
    http://localhost:4200/


    2. Here are the basics commands, you need to run into your terminal for datatable and its dependencies:

    npm install jquery --save
    
    npm install datatables.net --save
    
    npm install datatables.net-dt --save
    
    npm install angular-datatables --save
    
    npm install @types/jquery --save-dev
    
    npm install @types/datatables.net --save-dev
    
    npm install ngx-bootstrap bootstrap --save


    3. After done with commands add below code into you angular.json file:

    ...
    "styles": [
                  "src/styles.css",
                  "node_modules/datatables.net-dt/css/jquery.dataTables.css",
                  "node_modules/bootstrap/dist/css/bootstrap.min.css",
                ],
                "scripts": [
                "node_modules/jquery/dist/jquery.js",
                "node_modules/datatables.net/js/jquery.dataTables.js",
                "node_modules/bootstrap/dist/js/bootstrap.js",
                ]
    ...


    4. Now add below code into your app.module.ts file:

    import { BrowserModule } from '@angular/platform-browser';
    import { NgModule } from '@angular/core';
    import {DataTablesModule} from 'angular-datatables';
    import { AppComponent } from './app.component';
    import { HttpClientModule } from '@angular/common/http';
    @NgModule({
      declarations: [
        AppComponent
      ],
      imports: [
        BrowserModule,
        DataTablesModule,
        HttpClientModule
      ],
      providers: [],
      bootstrap: [AppComponent]
    })
    export class AppModule { }


    5. Now add below code into app.component.ts file:

    In this, I have made API call from where I am getting data from php backend:

    import { Component, OnInit } from '@angular/core';
    import { HttpClient } from '@angular/common/http';
    @Component({
      selector: 'app-root',
      templateUrl: './app.component.html',
      styleUrls: ['./app.component.css']
    })
    export class AppComponent {
      
    
      title = 'angulardatatables';
      dtOptions: DataTables.Settings = {};
      
      data = [];
      constructor(private http: HttpClient) {
        this.http.get('http://localhost/employee.php').subscribe(data => {
        this.data = data[0];


        }, error => console.error(error));
      }
      
      ngOnInit() {
        this.dtOptions = {
          pagingType: 'full_numbers',
          pageLength: 5,
          processing: true
        };
    }
    }


    6. Now add below code into app.component.html file:

    <table class="table table-striped table-bordered table-sm row-border hover" datatable [dtOptions]="dtOptions">
      <thead>
        <tr>
          <th>Name</th>
          <th>Email</th>
          <th>Website</th>
        </tr>
      </thead>
      <tbody>
       <tr *ngFor="let group of data">
             <td>{{group.name}}</td>
             <td>{{group.email}}</td>
             <td>{{group.website}}</td>
         </tr>
      </tbody>
    </table>


    6. Finally for mysql data, please add below code into employee.php file into your htdocs folder and don’t forget to start your XAMPP:

    Also make employee database and employeedata table in your phpmyadmin:

    <?php
    header("Access-Control-Allow-Origin: *");
    $servername = "localhost";
    $username   = "root";
    $password   = "";
    $dbname     = "employee";
    
    // Create connection
    $conn = new mysqli($servername, $username, $password, $dbname);
    
    // Check connection
    if ($conn->connect_error) {
        die("Connection failed: " . $conn->connect_error);
    } 
    
      //echo "Connected successfully";
    $sql = "SELECT * FROM employeedata";
    $result = mysqli_query($conn,$sql); 
    $myArray = array();
    if ($result->num_rows > 0) {
    // output data of each row
        while($row = $result->fetch_assoc()) {
            $myArray[] = $row;
        }
        echo json_encode($myArray);
    } 
    else 
    {
        echo "0 results";
    }
    ?>


    Don’t forget to run ng serve command to see final output.

    Jassa Jatt

    Thank you

  • Angular 9 Datatables with custom checkbox selection

    Angular 9 Datatables with custom checkbox selection

    Hello to all, welcome to therichpost.com. In this post, I will tell you, Angular 9 Datatables with custom checkbox selection.

    Angular 9 has just launched and it is in very high in demand. Angular 9 increased his performance speed. I am showing the data in Datatables with custom json data and also for giving good look to datatable, I have used bootstrap in it, here is the working picture and don’t forget to install latest node version.


    angular 9 datatables with custom checkbox selection
    angular 9 datatables with custom checkbox selection

    Here is the complete working code and use this carefully:

    1. Here are the basics commands, you need to run for latest angular 9 setup and environment:

    $ npm install -g @angular/cli
    
    $ ng new angulardatatables
    
    $ cd angulardatatables
    
    $ ng serve
    
    //Here is the url, you need to run into your browser and see working angular test project
    http://localhost:4200/


    2. Here are the basics commands, you need to run into your terminal for datatable and its dependencies:

    npm install jquery --save
    
    npm install datatables.net --save
    
    npm install datatables.net-dt --save
    
    npm install angular-datatables --save
    
    npm install @types/jquery --save-dev
    
    npm install @types/datatables.net --save-dev
    
    npm install ngx-bootstrap bootstrap --save


    3. After done with commands add below code into you angular.json file:

    ...
    "styles": [
                  "src/styles.css",
                  "node_modules/datatables.net-dt/css/jquery.dataTables.css",
                  "node_modules/bootstrap/dist/css/bootstrap.min.css",
                ],
                "scripts": [
                "node_modules/jquery/dist/jquery.js",
                "node_modules/datatables.net/js/jquery.dataTables.js",
                "node_modules/bootstrap/dist/js/bootstrap.js",
                ]
    ...


    4. Now add below code into your app.module.ts file:

    import { BrowserModule } from '@angular/platform-browser';
    import { NgModule } from '@angular/core';
    import {DataTablesModule} from 'angular-datatables';
    import { AppComponent } from './app.component';
    
    @NgModule({
      declarations: [
        AppComponent
      ],
      imports: [
        BrowserModule,
        DataTablesModule
      ],
      providers: [],
      bootstrap: [AppComponent]
    })
    export class AppModule { }


    5. Now add below code into app.component.ts file:

    import { Component, OnInit } from '@angular/core';
    
    @Component({
      selector: 'app-datatables',
      templateUrl: './datatables.component.html',
      styleUrls: ['./datatables.component.css']
    })
    export class DatatablesComponent implements OnInit {
     public data = [
        {name: 'therichpost', email: 'therichpost@gmail.com', website:'therichpost.com'},
        {name: 'therichpost', email: 'therichpost@gmail.com', website:'therichpost.com'},
        {name: 'therichpost', email: 'therichpost@gmail.com', website:'therichpost.com'},
        {name: 'therichpost', email: 'therichpost@gmail.com', website:'therichpost.com'},
      {name: 'therichpost', email: 'therichpost@gmail.com', website:'therichpost.com'},
      {name: 'therichpost', email: 'therichpost@gmail.com', website:'therichpost.com'},
      {name: 'therichpost', email: 'therichpost@gmail.com', website:'therichpost.com'},
        {name: 'ajay', email: 'therichpost@gmail.com', website:'therichpost.com'},
        {name: 'therichpost', email: 'therichpost@gmail.com', website:'therichpost.com'},
        {name: 'therichpost', email: 'therichpost@gmail.com', website:'therichpost.com'},
      {name: 'therichpost', email: 'therichpost@gmail.com', website:'therichpost.com'},
      {name: 'therichpost', email: 'therichpost@gmail.com', website:'therichpost.com'},
      {name: 'therichpost', email: 'therichpost@gmail.com', website:'therichpost.com'},
        {name: 'therichpost', email: 'therichpost@gmail.com', website:'therichpost.com'},
        {name: 'therichpost', email: 'therichpost@gmail.com', website:'therichpost.com'},
        {name: 'therichpost', email: 'therichpost@gmail.com', website:'therichpost.com'},
      {name: 'therichpost', email: 'therichpost@gmail.com', website:'therichpost.com'},
      {name: 'therichpost', email: 'therichpost@gmail.com', website:'therichpost.com'},
    ];
    dtOptions: DataTables.Settings = {};
    
      constructor() { }
      isChecked = false;
      checkuncheckall()
      {
        if(this.isChecked == true)
      {
      this.isChecked = false;
      }
      else
      {
      this.isChecked = true;
      }
      
      }
    
      ngOnInit(): void {
      this.dtOptions = {
          pagingType: 'full_numbers',
          pageLength: 10,
          processing: true
        };
      }
    
    }


    6. Now add below code into app.component.html file:

    <!-- Begin Page Content -->
            <div class="container-fluid">
    
              <!-- Page Heading -->
              <div class="d-sm-flex align-items-center justify-content-between mb-4">
                <h1 class="h3 mb-0 text-gray-800">Datatables</h1>
              </div>    
    
    
              <!-- Content Row -->
    
              <div class="row">
          
          <table width="100%" class="table table-striped table-bordered table-sm row-border hover" datatable [dtOptions]="dtOptions" style="width:100%">
            <thead>
            <tr>
              <th>Name</th>
              <th>Email</th>
              <th>Website</th>
              <th><input type="checkbox" name="websitecheck" (click) = "checkuncheckall()"> select All</th>
            </tr>
            </thead>
            <tbody>
             <tr *ngFor="let group of data">
               <td>{{group.name}}</td>
               <td>{{group.email}}</td>
               <td>{{group.website}}</td>
               <td><input type="checkbox" name="websitecheck" [checked]="isChecked" value="{{group.website}}"></td>
             </tr>
            </tbody>
          </table>
          </div>
             
            </div>
            <!-- /.container-fluid -->
        <style>
        .dataTables_wrapper{width:100%;}
        </style>


    Don’t forget to run ng serve command to see final output.

    Jassa Jatt

    Thank you

  • Jquery Isotope Tabs Filter with Load More Button

    Jquery Isotope Tabs Filter with Load More Button

    Hello to all, welcome to therichpost.com. In this post, I will do, Jquery Isotope Tabs Filter with Load More Button.

    Jquery Isotope Tabs Filter with Load More Button
    Jquery Isotope Tabs Filter with Load More Button

    Here is the working code and please use this carefully:

    1. Here is the complete HTML code:

    <!DOCTYPE html>
    <html lang="en">
       <head>
          <meta charset="UTF-8">
          <meta http-equiv="X-UA-Compatible" content="IE=edge">
          <meta name="viewport" content="width=device-width, initial-scale=1">
          <title>Filter Tabs</title>
      </head>
       <style>
    
    @import url('https://stackpath.bootstrapcdn.com/font-awesome/4.7.0/css/font-awesome.min.css');
    
    .portfolioFilter {
      padding: 15px 0 40px 0;
    }
    
    .portfolioFilter a {
      margin-right: 6px;
      color: #666;
      text-decoration: none;
      border: 1px solid #ccc;
      padding: 4px 15px;
      border-radius: 50px;
      display: inline-block;
    }
    
    .portfolioFilter a.current {
      background: #1e1e1e;
      border: 1px solid #1e1e1e;
      color: #f9f9f9;
    }
    
    img {
      max-width:100%;
      width:100%;
    }
    
    .isotope-item {
      z-index: 2;
    }
    .filterTabs { max-width: 1080px; width:100%; padding:0px 15px; margin:0px auto; }
    .isotope-hidden.isotope-item {
      pointer-events: none;
      z-index: 1;
    }
    
    .isotope,
    .isotope .isotope-item {
      /* change duration value to whatever you like */
      -webkit-transition-duration: 0.8s;
      -moz-transition-duration: 0.8s;
      transition-duration: 0.8s;
    }
    
    .isotope {
      -webkit-transition-property: height, width;
      -moz-transition-property: height, width;
      transition-property: height, width;
    }
    
    .isotope .isotope-item {
      -webkit-transition-property: -webkit-transform, opacity;
      -moz-transition-property: -moz-transform, opacity;
      transition-property: transform, opacity;
    }
    .col-4 {width: 33.33%; float: left; padding:0px 15px; box-sizing: border-box; margin-bottom: 20px; }
    .whiteBox {background-color: #fff; padding:15px; height:400px;}
    .greyBg { background-color: #e7e7e7; padding:40px 0; }
    .w-70 { width: 70px;  }
    .d-flex { display: flex; }
    .totalHome h6 { margin:0; font-size: 15px; float: left; color:#144564;}
    .totalHome .fa { color:#144564; float:left; margin-right: 7px; }
    .viewPlan { margin-top:30px; text-align:center; }
    .viewPlan a { padding:12px 25px; text-decoration: none; background-color:#d5b681; color:#fff; font-size: 16px; border-radius: 30px; }
    .viewPlan a:hover { background-color: #aa9165 !important; }
    </style>
       <body>
        <div class="greyBg">
          <div class="filterTabs">
            <div class="row">
              <div class="portfolioFilter clearfix">
                <a href="#" data-filter="*" class="current">All Categories</a>
                <a href="#" data-filter=".angular">Angular</a>
                <a href="#" data-filter=".laravel">Laravel</a>
                <a href="#" data-filter=".wordpress">Wordpress</a>
              </div> 
              <div class="portfolioContainer">    
                  <div class="col-4 angular isotope-item">
                    <div class="whiteBox">
                      <img src="https://cdn.searchenginejournal.com/wp-content/uploads/2019/04/the-seo-guide-to-angular-760x400.png" alt="image">
                      <h4>Narrabeen</h4>
                      <div class="totalHome d-flex">
                        <div class="bed w-70">
                          <i class="fa fa-bed" aria-hidden="true"></i>
                          <h6>3</h6>
                        </div>
                        <div class="bed w-70">
                          <i class="fa fa-shower" aria-hidden="true"></i>
                          <h6>2</h6>
                        </div>
                        <div class="bed w-70">
                          <i class="fa fa-car" aria-hidden="true"></i>
                          <h6>2</h6>
                        </div>
                      </div>
                      <div class="viewPlan">
                        <a href="#" class="">View Floor Plan</a>
                      </div>
                    </div>
                  </div>
                  <div class="col-4 laravel isotope-item">
                    <div class="whiteBox">
                      <img src="https://www.lovelyfamilymm.com/blog/sites/default/files/styles/single_post_image/public/2020-03/laravel7_0.jpg" alt="image">
                      <h4>Narrabeen</h4>
                      <div class="totalHome d-flex">
                        <div class="bed w-70">
                          <i class="fa fa-bed" aria-hidden="true"></i>
                          <h6>3</h6>
                        </div>
                        <div class="bed w-70">
                          <i class="fa fa-shower" aria-hidden="true"></i>
                          <h6>2</h6>
                        </div>
                        <div class="bed w-70">
                          <i class="fa fa-car" aria-hidden="true"></i>
                          <h6>2</h6>
                        </div>
                      </div>
                      <div class="viewPlan">
                        <a href="#" class="">View Floor Plan</a>
                      </div>
                    </div>
                  </div>
                  <div class="col-4 angular isotope-item">
                    <div class="whiteBox">
                      <img src="https://cdn.searchenginejournal.com/wp-content/uploads/2019/04/the-seo-guide-to-angular-760x400.png" alt="image">
                      <h4>Narrabeen</h4>
                      <div class="totalHome d-flex">
                        <div class="bed w-70">
                          <i class="fa fa-bed" aria-hidden="true"></i>
                          <h6>3</h6>
                        </div>
                        <div class="bed w-70">
                          <i class="fa fa-shower" aria-hidden="true"></i>
                          <h6>2</h6>
                        </div>
                        <div class="bed w-70">
                          <i class="fa fa-car" aria-hidden="true"></i>
                          <h6>2</h6>
                        </div>
                      </div>
                      <div class="viewPlan">
                        <a href="#" class="">View Floor Plan</a>
                      </div>
                    </div>
                  </div>
                  <div class="col-4 wordpress isotope-item"> 
                    <div class="whiteBox">
                      <img src="https://appliedparticletechnology.com/wp-content/uploads/2016/03/wordpress-logo.png" alt="image">
                      <h4>Narrabeen</h4>
                      <div class="totalHome d-flex">
                        <div class="bed w-70">
                          <i class="fa fa-bed" aria-hidden="true"></i>
                          <h6>3</h6>
                        </div>
                        <div class="bed w-70">
                          <i class="fa fa-shower" aria-hidden="true"></i>
                          <h6>2</h6>
                        </div>
                        <div class="bed w-70">
                          <i class="fa fa-car" aria-hidden="true"></i>
                          <h6>2</h6>
                        </div>
                      </div>
                      <div class="viewPlan">
                        <a href="#" class="">View Floor Plan</a>
                      </div>
                    </div>
                  </div>
                  <div class="col-4 angular isotope-item">
                    <div class="whiteBox">
                      <img src="https://cdn.searchenginejournal.com/wp-content/uploads/2019/04/the-seo-guide-to-angular-760x400.png" alt="image">
                      <h4>Narrabeen</h4>
                      <div class="totalHome d-flex">
                        <div class="bed w-70">
                          <i class="fa fa-bed" aria-hidden="true"></i>
                          <h6>3</h6>
                        </div>
                        <div class="bed w-70">
                          <i class="fa fa-shower" aria-hidden="true"></i>
                          <h6>2</h6>
                        </div>
                        <div class="bed w-70">
                          <i class="fa fa-car" aria-hidden="true"></i>
                          <h6>2</h6>
                        </div>
                      </div>
                      <div class="viewPlan">
                        <a href="#" class="">View Floor Plan</a>
                      </div>
                    </div>
                  </div>
                  <div class="col-4 wordpress isotope-item">
                    <div class="whiteBox">
                      <img src="https://appliedparticletechnology.com/wp-content/uploads/2016/03/wordpress-logo.png" alt="image">
                      <h4>Narrabeen</h4>
                      <div class="totalHome d-flex">
                        <div class="bed w-70">
                          <i class="fa fa-bed" aria-hidden="true"></i>
                          <h6>3</h6>
                        </div>
                        <div class="bed w-70">
                          <i class="fa fa-shower" aria-hidden="true"></i>
                          <h6>2</h6>
                        </div>
                        <div class="bed w-70">
                          <i class="fa fa-car" aria-hidden="true"></i>
                          <h6>2</h6>
                        </div>
                      </div>
                      <div class="viewPlan">
                        <a href="#" class="">View Floor Plan</a>
                      </div>
                    </div>
                  </div>
                  <div class="col-4 angular isotope-item">
                    <div class="whiteBox">
                      <img src="https://cdn.searchenginejournal.com/wp-content/uploads/2019/04/the-seo-guide-to-angular-760x400.png" alt="image">
                      <h4>Narrabeen</h4>
                      <div class="totalHome d-flex">
                        <div class="bed w-70">
                          <i class="fa fa-bed" aria-hidden="true"></i>
                          <h6>3</h6>
                        </div>
                        <div class="bed w-70">
                          <i class="fa fa-shower" aria-hidden="true"></i>
                          <h6>2</h6>
                        </div>
                        <div class="bed w-70">
                          <i class="fa fa-car" aria-hidden="true"></i>
                          <h6>2</h6>
                        </div>
                      </div>
                      <div class="viewPlan">
                        <a href="#" class="">View Floor Plan</a>
                      </div>
                    </div>
                  </div>
                  <div class="col-4 laravel isotope-item">
                    <div class="whiteBox">
                      <img src="https://www.lovelyfamilymm.com/blog/sites/default/files/styles/single_post_image/public/2020-03/laravel7_0.jpg" alt="image">
                      <h4>Narrabeen</h4>
                      <div class="totalHome d-flex">
                        <div class="bed w-70">
                          <i class="fa fa-bed" aria-hidden="true"></i>
                          <h6>3</h6>
                        </div>
                        <div class="bed w-70">
                          <i class="fa fa-shower" aria-hidden="true"></i>
                          <h6>2</h6>
                        </div>
                        <div class="bed w-70">
                          <i class="fa fa-car" aria-hidden="true"></i>
                          <h6>2</h6>
                        </div>
                      </div>
                      <div class="viewPlan">
                        <a href="#" class="">View Floor Plan</a>
                      </div>
                    </div>
                  </div>
                  <div class="col-4 angular isotope-item">
                    <div class="whiteBox">
                      <img src="https://cdn.searchenginejournal.com/wp-content/uploads/2019/04/the-seo-guide-to-angular-760x400.png" alt="image">
                      <h4>Narrabeen</h4>
                      <div class="totalHome d-flex">
                        <div class="bed w-70">
                          <i class="fa fa-bed" aria-hidden="true"></i>
                          <h6>3</h6>
                        </div>
                        <div class="bed w-70">
                          <i class="fa fa-shower" aria-hidden="true"></i>
                          <h6>2</h6>
                        </div>
                        <div class="bed w-70">
                          <i class="fa fa-car" aria-hidden="true"></i>
                          <h6>2</h6>
                        </div>
                      </div>
                      <div class="viewPlan">
                        <a href="#" class="">View Floor Plan</a>
                      </div>
                    </div>
                  </div>            
              </div>
              
            </div>
          </div>
        </div>
         <style>
        .grid-sizer {
        float: left;
        }
        .isotope-item {
        width: 30%;
        padding: 10px;
        color:#fff;
        }
        .box {
        width: 100%;
        padding-bottom: 65%; 
        background-color: black; 
        }
        .text-box .box {
        background-color: green; 
        }
        .hidden {
        display: none;
        }
    </style>
          <!-- JQUERY LIBRARY -->
          <script src="https://cdnjs.cloudflare.com/ajax/libs/jquery/2.2.2/jquery.min.js"></script>
          <script src="https://unpkg.com/isotope-layout@3.0.1/dist/isotope.pkgd.min.js"></script>
          <script>
               jQuery(document).ready(function($){
        
                var $container = $('.portfolioContainer');
                $container.isotope({
                    itemSelector: '.isotope-item',
                    filter: '*',
                    animationOptions: {
                        duration: 750,
                        easing: 'linear',
                        queue: false
                    }
                });
                
                
                $('.portfolioFilter a').click(function(){
                    $('.portfolioFilter .current').removeClass('current');
                    $(this).addClass('current');
             
                    var selector = $(this).attr('data-filter');
                    $container.isotope({
                        filter: selector,
                        animationOptions: {
                            duration: 750,
                            easing: 'linear',
                            queue: false
                        }
                     });
                     return false;
                }); 
                
                
                //****************************
                // Isotope Load more button
                //****************************
                 
                var initShow = 3; //number of images loaded on init & onclick load more button
                var counter = initShow; //counter for load more button
                var iso = $container.data('isotope'); // get Isotope instance
                //console.log(iso.elemCount);
                 
                loadMore(initShow); //execute function onload
               
                function loadMore(toShow) {
                    
                    $container.find(".hidden").removeClass("hidden");
                    
                    var hiddenElems = iso.filteredItems.slice(toShow, iso.filteredItems.length).map(function(item) {
                        //console.log(item.element);
                    return item.element;
                    });
                    $(hiddenElems).addClass('hidden');
                    $container.isotope('layout');
                    
                    //when no more to load, hide show more button
                    if (hiddenElems.length == 0) {
                    $("#load-more").hide();
                    } 
                    else {
                    $("#load-more").show();
                    };
                
                }
                
                
                //append load more button
                $container.after('<div class="viewPlan"><a href="#" id="load-more">Load More</a></div>');
                
                //when load more button clicked
                 $(document).on("click", "#load-more", function(e) {
                    e.preventDefault();
                    
                    if ($('#filters').data('clicked')) {
                    //when filter button clicked, set initial value for counter
                    counter = initShow;
                    j$('#filters').data('clicked', false);
                    } else {
                    counter = counter;
                    };
                    
                    counter = counter + initShow;
                    
                    loadMore(counter);
                });
            });
          </script>   
       </body>
    </html>

  • Laravel 7 Custom Access Token API Authentication

    Laravel 7 Custom Access Token API Authentication

    Hello to all, welcome to therichpost.com. In this post, I will tell you, Laravel 7 Custom Access Token API Authentication.

    Post Working:

    In this post, I am creating custom access token during auth login and auth registration. I am doing this in Laravel 7.

    Here is the working image from Passport:

    laravel 7 create custom access token
    laravel 7 create custom access token
    1. Here is the link from where you can get the laravel 7 setup and Laravel 7 auth:
      Laravel 7 setup and Laravel 7 Auth:

    2. We need to create our API’S Routes with below code in routes/api.php:

    Route::post('login', 'API\AuthController@login');
    Route::post('register', 'API\AuthController@register');


    3. We need to create API Folder Into our app\Http\Controllers:

    api folder

    4. In app\Http\Controllers\API Folder, we need to create new file named AuthController.php file and add below code into this file:

    <?php
    namespace App\Http\Controllers\API;
    use Illuminate\Http\Request; 
    use App\Http\Controllers\Controller; 
    use Illuminate\Support\Facades\Auth; 
    use App\User; 
    use Validator;
    use Illuminate\Support\Str;
    class AuthController extends Controller 
    {
      /** 
       * Login API 
       * 
       * @return \Illuminate\Http\Response 
       */ 
       private $apiToken;
       public function __construct()
        {
        $this->apiToken = uniqid(base64_encode(Str::random(40)));
        }
      public function login(Request $request){ 
        if(Auth::attempt(['email' => $request->email, 'password' => $request->password])){ 
          $user = Auth::user(); 
         
        $success['token'] = $this->apiToken;
        $success['name'] =  $user->name;
          return response()->json([
            'status' => 'success',
            'data' => $success
          ]); 
        } else { 
          return response()->json([
            'status' => 'error',
            'data' => 'Unauthorized Access'
          ]); 
        } 
      }
        
      /** 
       * Register API 
       * 
       * @return \Illuminate\Http\Response 
       */ 
      public function register(Request $request) 
      { 
        $validator = Validator::make($request->all(), [ 
          'name' => 'required', 
          'email' => 'required|email', 
          'password' => 'required', 
          'c_password' => 'required|same:password', 
        ]);
        if ($validator->fails()) { 
          return response()->json(['error'=>$validator->errors()]);
        }
        $postArray = $request->all(); 
        $postArray['password'] = bcrypt($postArray['password']); 
        $user = User::create($postArray); 
        
        $success['token'] = $this->apiToken;	
        $success['name'] =  $user->name;
        return response()->json([
          'status' => 'success',
          'data' => $success,
        ]); 
      }
    }


    5. Here you can check the working login example in Postman:

    laravel 7 create custom access token
    laravel 7 create custom access token

    If you have any kind of query then please do comment below.

    Jassa

    Thank you.

  • Angular 9 Laravel 7 Auth Login working tutorial Part 3

    Angular 9 Laravel 7 Auth Login working tutorial Part 3

    Hello to all, welcome to therichpost.com. In this post, I will continue with Angular 9 Laravel 7 Auth Login working tutorial Part 3.

    Here you can check the first and second part of this post from where, you can get the information regarding:

    1. How to install and run Angular 9: Part1
    2. How to install Laravel 7 and Laravel 7 auth setup: Part2

    Post Working:

    In this post, I will continue with laravel and I am adding Laravel Passport module because During API connection with Laravel and Angular, we will also need security with proper authentication and for this I am using laravel Passport and it will give us access token which will help us to check login user authentication.

    In this post, I will use Laravel Passport Package to create api auth and here is the full and easy process:

    1. Very first, we need to install Laravel 7 Passport Package by run below command into your terminal:
    composer require laravel/passport
    2. After run above command, you need to add below code into your config/app.php file:
    'providers' => [
                    .... 
                    Laravel\Passport\PassportServiceProvider::class,
                    ....
                   ],
    3. We need to run migration command to add Passport package table in our database:
    php artisan migrate
    4. After successfully run above command, you can see below tables in your database:
    laravel migration tables
    5. Next, we need to install passport with run below command into your terminal:

    This will create security token keys:

    php artisan passport:install
    6. After run above command, we need to update app/User.php file with below code:
    <?php
    
    ...
    use Laravel\Passport\HasApiTokens;
    
    class User extends Authenticatable
    {
        ...
        use HasApiTokens, Notifiable;
    
        ...
    }
    
    7.  After, update your app/Providers/AuthServiceProvider.php file with below code:
    <?php
    
    ...
    use Laravel\Passport\Passport;
    ...
    
    class AppServiceProvider extends ServiceProvider
    {
        ...
        public function boot()
        {
            Schema::defaultStringLength(191);
            Passport::routes();
        }
    
        ...
    }
    8.  After it, above your config/auth.php with below code:
    return [ 
            ..... 
            'guards' => 
                     [ 'web' => 
                             [ 'driver' => 'session',
                               'provider' => 'users', 
                             ], 
                       'api' => 
                              [ 'driver' => 'passport', 
                                'provider' => 'users', 
                              ], 
                     ], 
             .....
          ]
    9.  Finally, we need to create our API’S Routes with below code in routes/api.php:
    <?php
    
    use Illuminate\Http\Request;
    
    /*
    |--------------------------------------------------------------------------
    | API Routes
    |--------------------------------------------------------------------------
    |
    | Here is where you can register API routes for your application. These
    | routes are loaded by the RouteServiceProvider within a group which
    | is assigned the "api" middleware group. Enjoy building your API!
    |
    */
    
    Route::post('login', 'API\AuthController@login');
    Route::post('register', 'API\AuthController@register');
    10.  We need to create API Folder Into our app\Http\Controllers:
    api folder
    11. In app\Http\Controllers\API Folder, we need to create new file named AuthController.php file and add below code into this file:
    <?php
    namespace App\Http\Controllers\API;
    use Illuminate\Http\Request; 
    use App\Http\Controllers\Controller; 
    use Illuminate\Support\Facades\Auth; 
    use App\User; 
    use Validator;
    class AuthController extends Controller 
    {
      /** 
       * Login API 
       * 
       * @return \Illuminate\Http\Response 
       */ 
      public function login(Request $request){ 
        if(Auth::attempt(['email' => $request->email, 'password' => $request->password])){ 
          $user = Auth::user(); 
          $success['token'] =  $user->createToken('LaraPassport')->accessToken; 
          return response()->json([
            'status' => 'success',
            'data' => $success
          ]); 
        } else { 
          return response()->json([
            'status' => 'error',
            'data' => 'Unauthorized Access'
          ]); 
        } 
      }
    
      /** 
       * Register API 
       * 
       * @return \Illuminate\Http\Response 
       */ 
      public function register(Request $request) 
      { 
        $validator = Validator::make($request->all(), [ 
          'name' => 'required', 
          'email' => 'required|email', 
          'password' => 'required', 
          'c_password' => 'required|same:password', 
        ]);
        if ($validator->fails()) { 
          return response()->json(['error'=>$validator->errors()]);
        }
        $postArray = $request->all(); 
        $postArray['password'] = bcrypt($postArray['password']); 
        $user = User::create($postArray); 
        $success['token'] =  $user->createToken('LaraPassport')->accessToken; 
        $success['name'] =  $user->name;
        return response()->json([
          'status' => 'success',
          'data' => $success,
        ]); 
      }
    }
    1. After all this, we need to test our’s api’s by downloading the postman software:
    https://www.getpostman.com/apps
    16.  Here I tested Register Api by enter name, email, password, and c_password. c_password details:
    register api laravel
    17. Here, I tested Login Api:
    login laravel api

    Now, we are done with Rest Api Authentication in Laravel 7 Using Passport Package . If you have any query related to this post, then do comment below or ask questions.

    After this, I will also tell you, how we can create custom token without passport.

    Jassa

    Thank you

  • Angular 9 Laravel 7 Auth Login working tutorial Part 2

    Angular 9 Laravel 7 Auth Login working tutorial Part 2

    Hello to all, welcome to therichpost.com. In this post, I will continue with , Angular 9 Laravel 7 Auth Login working tutorial Part 2.

    Here is the Part 1 link of this tutorial: Angular 9 Laravel 7 Auth Login Working Tutorial Part 1.

    Laravel 7 has been launched recently and Laravel 7 has many good features and in this post, I will share laravel 7 auth feature.

    Laravel is the best PHP MVC framework.

    Here are the commands and code for Laravel 7 auth and please use this carefully.


    1. Here are the basic commands to set laravel 7 working environment:

    First don’t forget to install nodejs latest version and then below commands into your terminal(GIT BASH) or command command prompt:
    composer global require laravel/installer
    
    composer create-project --prefer-dist laravel/laravel laravel7auth
    
    cd laravel7auth


    2. After run the above commands, run below command provides a quick way to scaffold all of the routes and views you need for authentication using a few simple commands:

    composer require laravel/ui --dev


    3. After above command below command should be used on fresh applications and will install a layout view, registration and login views, as well as routes for all authentication end-points:

    php artisan ui vue --auth


    4. Now these two commands will be use to styling view layouts like login form, registration etc:

    npm install
    
    npm run dev


    5. Now run below command and you will see below two images kind of screens:

    php artisan serve


    6. After above please check below post link to set laravel database with laravel migrate command:

    laravel migrate

    If you have any query related to this post, then please do comment below.

    After this post, In third of this tutorial series, I will connect Angular and Laravel via Rest API.

    jassa Jatt

    Thank you.

  • Angular 9 Laravel 7 Auth Login working tutorial Part 1

    Angular 9 Laravel 7 Auth Login working tutorial Part 1

    Hello to all, welcome to therichpost.com. In this post, I will tell you, Angular 9 Laravel 7 Auth Login working tutorial Part 1.

    Angular & laravel both are in very high demand and according to popularity both are on same level.

    If you are new in Angular and laravel, then please check my olds posts related to Angular and laravel.

    I am making Angular laravel Auth Login into two parts. In first part means in this part, I will make login form in Angular and applied validations on it and make it ready for interact with Laravel Auth.


    Form is ready to fill:

    Angular Laravel Auth Login working example Part 1

    Form With validation:

    Angular Laravel Auth Login form validation

    Here I am going to give you working coding snippets for
    Angular Laravel Auth Login working example Part 1 :


    1. Very first, you need to run common below commands to add Angular 9 project on your machine:

    $ npm install -g @angular/cli 
    
    $ ng new angularlaravelauth //Install Angular Project
    
    $ cd angularlaravelauth // Go to project folder
    
    $ ng serve //Run Project
    
    http://localhost:4200/ //Run On local server

    2. Also check below reference link to add bootstrap into your Angular 9 App:

    Add Bootstrap in Angular


    3. After done with above setting, add below code into your app.module.ts file:

    import { BrowserModule } from '@angular/platform-browser';
    import { NgModule } from '@angular/core';
    import { FormsModule, ReactiveFormsModule } from '@angular/forms';
    import { AppComponent } from './app.component';
    
    @NgModule({
      declarations: [
        AppComponent
      ],
      imports: [
        BrowserModule,
        FormsModule,
        ReactiveFormsModule
      ],
      providers: [],
      bootstrap: [AppComponent]
    })
    export class AppModule { }

    4. Now add below code into app.component.ts file:

    This is the component file and in this file, we will interact with form and form data and form validation and in second past of this post, I will send form data to Laravel :

    import { Component, OnInit } from '@angular/core';
    import { FormGroup, FormControl, Validators} from '@angular/forms';
    @Component({
      selector: 'app-root',
      templateUrl: './app.component.html',
      styleUrls: ['./app.component.css']
    })
    export class AppComponent {
      formdata;
      title = 'angularlaravelauth';
       onClickSubmit(data) {
       	 if(this.formdata.invalid)
       	{
      		this.formdata.get('email').markAsTouched();
        this.formdata.get('password').markAsTouched();
      	}
      	else
      	{
      		alert("Now you are done with angularauthlign Part 1.");
      }
      }
    
      ngOnInit() {
      	  /*Login form validation*/
      	  this.formdata = new FormGroup({
             email: new FormControl("", Validators.compose([
                Validators.required,
                Validators.pattern("[^ @]*@[^ @]*")
             ])),
            password: new FormControl("", this.passwordvalidation)
            
          });
      }
    
      passwordvalidation(formcontrol) {
          if (formcontrol.value.length < 5) {
             return {"password" : true};
          }
       }
    }

    5. Add below code into app.component.html file:

    In this, I have used Bootstrap form and applied angular form data binding:

    <div class="jumbotron text-center">
      <h1>{{ title }}!</h1>
      <p>{{ title }}</p> 
    </div>
    
    <div class="container">
        <form [formGroup] = "formdata" (ngSubmit) = "onClickSubmit(formdata.value)">
          <div class="form-group">
            <label for="email">Email address:</label>
            <input type="email" class="form-control" id="email" formControlName = "email">
            <div *ngIf="formdata.controls.email.errors && formdata.controls.email.touched" class="error">Email not valid</div>
          </div>
          <div class="form-group">
            <label for="pwd">Password:</label>
            <input type="password" class="form-control" id="pwd" formControlName="password">
            <div *ngIf="formdata.controls.password.errors && formdata.controls.password.touched" class="error">Minimum length 5</div>
          </div>
          <button type="submit" class="btn btn-primary">Submit</button>
        </form>
    </div>


    6. Add Below code into src/styles.css file:

    .error{color: #b45b59;background: #f2dede;padding: 5px;border-radius: 0 0 5px 5px;}

    Now this is all done with Angular 9 Laravel 7 Auth Login working example Part 1 and if you have some improvement tips for me or you have any query then you can comment below.

    Thank you,

    Harjas,

    TheRichPost

  • Angular 9 Laravel 6 Auth Login working tutorial Part 1

    Angular 9 Laravel 6 Auth Login working tutorial Part 1

    Hello to all, welcome to therichpost.com. In this post, I will tell you, Angular 9 Laravel 6 Auth Login working tutorial Part 1.

    Angular & laravel both are in very high demand and according to popularity both are on same level.

    If you are new in Angular and laravel, then please check my olds posts related to Angular and laravel.

    I am making Angular laravel Auth Login into two parts. In first part means in this part, I will make login form in Angular and applied validations on it and make it ready for interact with Laravel Auth.


    Form is ready to fill:

    Angular Laravel Auth Login working example Part 1

    Form With validation:

    Angular Laravel Auth Login form validation

    Here I am going to give you working coding snippets for
    Angular Laravel Auth Login working example Part 1 :


    1. Very first, you need to run common below commands to add Angular 9 project on your machine:

    $ npm install -g @angular/cli 
    
    $ ng new angularlaravelauth //Install Angular Project
    
    $ cd angularlaravelauth // Go to project folder
    
    $ ng serve //Run Project
    
    http://localhost:4200/ //Run On local server

    2. Also check below reference link to add bootstrap into your Angular 9 App:

    Add Bootstrap in Angular


    3. After done with above setting, add below code into your app.module.ts file:

    import { BrowserModule } from '@angular/platform-browser';
    import { NgModule } from '@angular/core';
    import { FormsModule, ReactiveFormsModule } from '@angular/forms';
    import { AppComponent } from './app.component';
    
    @NgModule({
      declarations: [
        AppComponent
      ],
      imports: [
        BrowserModule,
        FormsModule,
        ReactiveFormsModule
      ],
      providers: [],
      bootstrap: [AppComponent]
    })
    export class AppModule { }

    4. Now add below code into app.component.ts file:

    This is the component file and in this file, we will interact with form and form data and form validation and in second past of this post, I will send form data to Laravel :

    import { Component, OnInit } from '@angular/core';
    import { FormGroup, FormControl, Validators} from '@angular/forms';
    @Component({
      selector: 'app-root',
      templateUrl: './app.component.html',
      styleUrls: ['./app.component.css']
    })
    export class AppComponent {
      formdata;
      title = 'angularlaravelauth';
       onClickSubmit(data) {
       	 if(this.formdata.invalid)
       	{
      		this.formdata.get('email').markAsTouched();
        this.formdata.get('password').markAsTouched();
      	}
      	else
      	{
      		alert("Now you are done with angularauthlign Part 1.");
      }
      }
    
      ngOnInit() {
      	  /*Login form validation*/
      	  this.formdata = new FormGroup({
             email: new FormControl("", Validators.compose([
                Validators.required,
                Validators.pattern("[^ @]*@[^ @]*")
             ])),
            password: new FormControl("", this.passwordvalidation)
            
          });
      }
    
      passwordvalidation(formcontrol) {
          if (formcontrol.value.length < 5) {
             return {"password" : true};
          }
       }
    }

    5. Add below code into app.component.html file:

    In this, I have used Bootstrap form and applied angular form data binding:

    <div class="jumbotron text-center">
      <h1>{{ title }}!</h1>
      <p>{{ title }}</p> 
    </div>
    
    <div class="container">
        <form [formGroup] = "formdata" (ngSubmit) = "onClickSubmit(formdata.value)">
          <div class="form-group">
            <label for="email">Email address:</label>
            <input type="email" class="form-control" id="email" formControlName = "email">
            <div *ngIf="formdata.controls.email.errors && formdata.controls.email.touched" class="error">Email not valid</div>
          </div>
          <div class="form-group">
            <label for="pwd">Password:</label>
            <input type="password" class="form-control" id="pwd" formControlName="password">
            <div *ngIf="formdata.controls.password.errors && formdata.controls.password.touched" class="error">Minimum length 5</div>
          </div>
          <button type="submit" class="btn btn-primary">Submit</button>
        </form>
    </div>


    6. Add Below code into src/styles.css file:

    .error{color: #b45b59;background: #f2dede;padding: 5px;border-radius: 0 0 5px 5px;}

    Now this is all done with Angular 9 Laravel Auth Login working example Part 1 and if you have some improvement tips for me or you have any query then you can comment below.

    Thank you,

    Harjas,

    TheRichPost