
Hello to all, welcome again on therichpost.com. In this post, I will tell you, Angular 9 Php Mysql Database Crud Part 2 – Add User.
In this post, I am adding new user with Angular 9 to php mysql database.
Note:
You just need to replace all the files code with my below code to get proper working. For php, you need to create database into phpmyadmin name user and table name will be userdata.
Here is the part 1 post link: Angular 9 php mysql crud part 1
Here is the proper code snippet and commands and please use carefully:
1. Here are the basics commands to set angular 9 your system:
npm install -g @angular/cli

ng new angularcrud //Create new Angular Project

$ cd angularcrud // Go inside the Angular Project Folder

ng serve --open // Run and Open the Angular Project

http://localhost:4200/ // Working Angular Project Url
2. Here are the command to install bootstrap 4 and angular 9 new components into your angular 9 application:
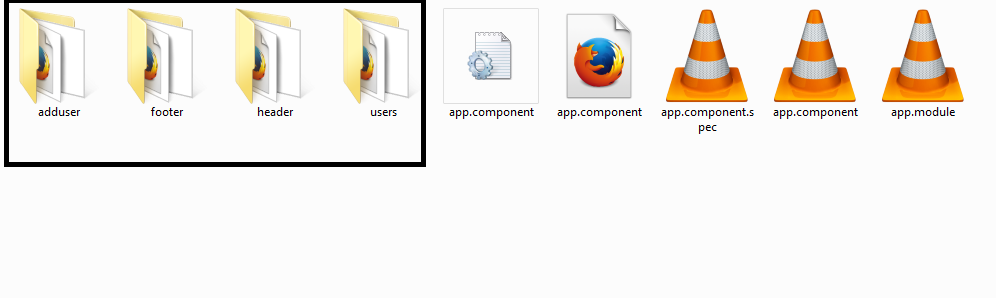
npm install --save bootstrap

// add new components

ng g c header

ng g c footer

ng g c users

ng g c adduser
After run the above create component commands, you will see below folders into your Angular 9 application app folder:
3. Now you need to add below bootstrap files path into your angular.json file:
"styles": [
        ...
        "node_modules/bootstrap/dist/css/bootstrap.min.css"
        ...
         ],
"scripts": [
       ...
      "node_modules/bootstrap/dist/js/bootstrap.min.js"
      ...
       ]
4. Here is the html code, you need to add into your src\app\header\header.component.html file:
<div class="jumbotron text-center" style="margin-bottom:0">
  <h1>Angular 9 Php Mysql Database Crud Part 2</h1>
   <h3>Add User</h3>
</div>

<nav class="navbar navbar-expand-md bg-dark navbar-dark">
  <a class="navbar-brand" routerLink="/users">Home</a>
  <button class="navbar-toggler" type="button" data-toggle="collapse" data-target="#collapsibleNavbar">
    <span class="navbar-toggler-icon"></span>
  </button>
  <div class="collapse navbar-collapse" id="collapsibleNavbar">
    <ul class="navbar-nav">

      <li class="nav-item">
        <a class="nav-link" routerLink="/adduser">Add User</a>
      </li>
      <li class="nav-item">
        <a class="nav-link" routerLink="/users">Users</a>
      </li>
    </ul>
  </div>
</nav>
5. Here is the html code, you need to add into your src\app\footer\footer.component.html file:
<div class="jumbotron text-center" style="margin-bottom:0">
  <p>Footer</p>
</div>
6. Now you need to add below code into your app.module.ts file:
you can just replace the complete code with below code
import { BrowserModule } from '@angular/platform-browser';
import { NgModule } from '@angular/core';
import { FormsModule, ReactiveFormsModule } from '@angular/forms';
import { AppComponent } from './app.component';
import { HeaderComponent } from './header/header.component';
import { FooterComponent } from './footer/footer.component';
import { HttpClientModule } from '@angular/common/http';
import { AdduserComponent } from './adduser/adduser.component';
import { Routes, RouterModule } from '@angular/router';
import { UsersComponent } from './users/users.component';
const appRoutes: Routes = [
    { path: '', component: UsersComponent },
  { path: 'users', component: UsersComponent },
    { path: 'adduser', component: AdduserComponent }
];


@NgModule({
  declarations: [
    AppComponent,
    HeaderComponent,
    FooterComponent,
    AdduserComponent,
    UsersComponent
  ],
  imports: [
    BrowserModule,
  FormsModule,
  HttpClientModule,
  ReactiveFormsModule,
  RouterModule.forRoot(
      appRoutes,
      { enableTracing: true } // <-- debugging purposes only
    ),
  ],
  providers: [],
  bootstrap: [AppComponent]
})
export class AppModule { }
7. Now you need to add below code into your app.component.html file:
<app-header></app-header>
<div class="container">
<router-outlet></router-outlet>
</div>
<app-footer></app-footer>
Start with Show users section:
1. Here is the code, you need to add your app\users\users.component.ts file:
Here I am getting data from my php mysql backend:
import { Component, OnInit } from '@angular/core';
import { HttpClient } from '@angular/common/http';
@Component({
  selector: 'app-users',
  templateUrl: './users.component.html',
  styleUrls: ['./users.component.css']
})
export class UsersComponent implements OnInit {

  data = [];
  constructor(private http: HttpClient) {
    this.http.get('http://localhost/mypage.php').subscribe(data => {

    this.data.push(data);
    console.log(this.data);


    }, error => console.error(error));

  }

  ngOnInit(): void {
  }

}
2. Here is the code, you need to add your app/users/users.component.html file:
Here I am showing all users data:
<table class="table table-striped">
    <thead>
      <tr>
        <th>ID</th>
        <th>Name</th>
        <th>Email</th>
    <th>Phone</th>
      </tr>
    </thead>
    <tbody>
      <tr *ngFor="let mydata of data[0]">
        <td>{{mydata.id}}</td>
        <td>{{mydata.firstname}}</td>
    <td>{{mydata.email}}</td>
    <td>{{mydata.mobile}}</td>
      </tr>
    </tbody>
  </table>
Start with Add user section:
1. Here is the code, you need to add into your app/adduser/app.component.ts file:
Here you see the adduser api and angular reactive form validation code also
import { Component, OnInit } from '@angular/core';
import { HttpClient, HttpParams, HttpHeaders } from '@angular/common/http';
import { FormBuilder, FormGroup, FormControl, Validators} from '@angular/forms';
import { Router } from '@angular/router';
@Component({
  selector: 'app-adduser',
  templateUrl: './adduser.component.html',
  styleUrls: ['./adduser.component.css']
})
export class AdduserComponent implements OnInit {
  registerForm: FormGroup;
  submitted = false;
  constructor(private http: HttpClient, private formBuilder: FormBuilder, private router: Router) { }
  get f() { return this.registerForm.controls; }
  onSubmit() {
  this.submitted = true;
        // stop here if form is invalid
        if (this.registerForm.invalid) {

              return;
        }
    else
    {
    // Initialize Params Object
    var myFormData = new FormData();
    const headers = new HttpHeaders();
    // Begin assigning parameters
    myFormData.append('name', this.registerForm.value.name);
    myFormData.append('email', this.registerForm.value.email);
    myFormData.append('phone', this.registerForm.value.phone);
    return this.http.post('http://localhost/mypage.php/'
      , myFormData).subscribe((res: Response) => {
      this.router.navigateByUrl('users');


    });
    }
    }
  ngOnInit(): void {
  this.registerForm = this.formBuilder.group({
            name: ['', Validators.required],
            phone: ['', Validators.required],
            email: ['', [Validators.required, Validators.email]]
        });
  }

}
2. Here is the code, you need to add into app/adduser/app.component.html file:
Here is the code for add user form and also angular 9 reactive form validation code:
<h2 class="mt-3 mb-3">Add User</h2>
<form [formGroup]="registerForm" (ngSubmit)="onSubmit()">
  <div class="form-group">
    <label for="name">Name:</label>
    <input type="text" class="form-control" placeholder="Enter name" id="name" formControlName="name" [ngClass]="{ 'is-invalid': submitted && f.name.errors }">
  <div *ngIf="submitted && f.name.errors" class="invalid-feedback">
      <div *ngIf="f.name.errors.required">Name is required</div>
  </div>
  </div>
  <div class="form-group">
    <label for="pwd">Email:</label>
    <input type="email" class="form-control" placeholder="Enter email" id="email" formControlName="email" [ngClass]="{ 'is-invalid': submitted && f.email.errors }">
  <div *ngIf="submitted && f.email.errors" class="invalid-feedback">
    <div *ngIf="f.email.errors.required">Email is required</div>
      <div *ngIf="f.email.errors.email">Email must be a valid email address</div>
   </div>
  </div>
  <div class="form-group">
    <label for="phone">Phone:</label>
    <input type="text" class="form-control" placeholder="Enter phone" id="phone" formControlName="phone" [ngClass]="{ 'is-invalid': submitted && f.phone.errors }">
  <div *ngIf="submitted && f.phone.errors" class="invalid-feedback">
      <div *ngIf="f.phone.errors.required">Phone is required</div>
  </div>
  </div>

  <button type="submit" class="btn btn-primary mb-3">Submit</button>
</form>
Here is the php code myphp.php for add and get user data and also please xampp control panel and this file will me in htdocs folder:
1. Code for php file(mypage.php):
<?php
header("Access-Control-Allow-Origin: *");
header("Access-Control-Allow-Methods: PUT, GET, POST");
header("Access-Control-Allow-Headers: Origin, X-Requested-With, Content-Type, Accept");
$conn = new mysqli('localhost','root','','user');
if(isset($_POST['name']))
{
        // Add User
  $sql = "INSERT INTO userdata (firstname, email, mobile)
  VALUES ('".$_POST['name']."', '".$_POST['email']."', ".$_POST['phone'].")";

  if ($conn->query($sql) === TRUE) {
    $myJSON = json_encode("New user created successfully");
  } else {
    echo "Error: " . $sql . "<br>" . $conn->error;
  }
}
else
{
// Get User
$sql = "SELECT * FROM userdata";
$result = $conn->query($sql);
$myArr = array();
if ($result->num_rows > 0) {
// output data of each row
while($row = $result->fetch_assoc()) {
$myArr[] = $row;
}
} else {
echo "0 results";
}

$myJSON = json_encode($myArr);
echo $myJSON;
}
This is it and please run ng serve and check the proper process. If you have any kind of query then please comment below.
Jassa
Thank you
Leave a Reply