Hello to all, welcome to therichpost.com. In this post, I will tell you, Angular 18 Datatable with Export Buttons working demo.
Guy’s Angular 18 came and if you are new in Angular 18 then please check below links:
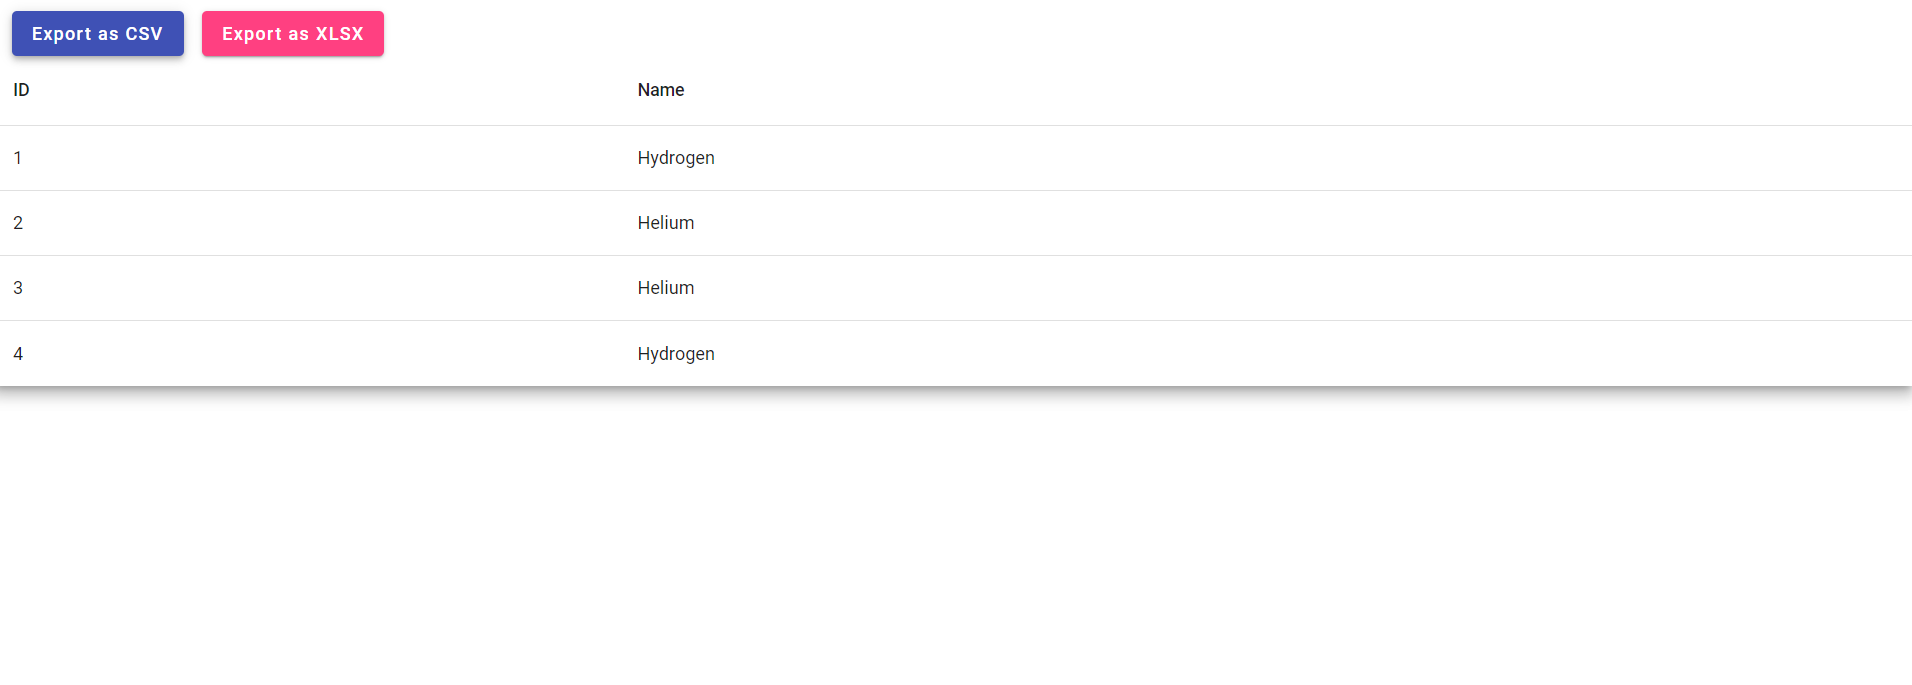
Here is the working code snippet for Angular 18 Datatable with Export Buttons working demo and please follow carefully:
To implement a data table with export buttons in Angular 18, you can use the Angular Material library along with a library like ngx-datatable or mat-table-exporter for export functionality. Below is a step-by-step guide to setting this up:
Step 1: Install Angular Material and Mat-Table-Exporter
First, install Angular Material and Mat-Table-Exporter:
ng add @angular/material
npm install mat-table-exporter --force
Step 2: Implement the Data Table in the Component
Update your app.component.html to include the table and export buttons:
<div class="mat-elevation-z8">
  <div class="buttons">
    <button mat-raised-button (click)="exporter.exportTable('csv')" color="primary">Export as CSV</button>
    <button mat-raised-button (click)="exporter.exportTable('xlsx')" color="accent">Export as XLSX</button>

  </div>
  <table mat-table [dataSource]="dataSource" matTableExporter #exporter="matTableExporter">

    <!-- Define columns -->
    <ng-container matColumnDef="id">
      <th mat-header-cell *matHeaderCellDef> ID </th>
      <td mat-cell *matCellDef="let element"> {{element.id}} </td>
    </ng-container>

    <ng-container matColumnDef="name">
      <th mat-header-cell *matHeaderCellDef> Name </th>
      <td mat-cell *matCellDef="let element"> {{element.name}} </td>
    </ng-container>

    <!-- Header and Row Declarations -->
    <tr mat-header-row *matHeaderRowDef="displayedColumns"></tr>
    <tr mat-row *matRowDef="let row; columns: displayedColumns;"></tr>
  </table>


</div>
Step 3: Populate the Table with Data
Update your app.component.ts:
import { Component } from '@angular/core';
import { CommonModule } from '@angular/common';
import { RouterOutlet } from '@angular/router';
import { MatTableModule } from '@angular/material/table';
import { MatButtonModule } from '@angular/material/button';
import { MatIconModule } from '@angular/material/icon';
import { MatTableExporterModule } from 'mat-table-exporter';
import { MatTableDataSource } from '@angular/material/table';
export interface PeriodicElement {
  id: number;
  name: string;
}

const ELEMENT_DATA: PeriodicElement[] = [
  { id: 1, name: 'Hydrogen' },
  { id: 2, name: 'Helium' },
  { id: 3, name: 'Helium' },
  { id: 4, name: 'Hydrogen' },
  // Add more data as needed
];
@Component({
  selector: 'app-root',
  standalone: true,
  imports: [CommonModule, RouterOutlet, MatTableModule, MatButtonModule, MatIconModule, MatTableExporterModule],
  templateUrl: './app.component.html',
  styleUrl: './app.component.css'
})
export class AppComponent {
  title = 'angular18';
  displayedColumns: string[] = ['id', 'name'];
  dataSource = new MatTableDataSource(ELEMENT_DATA);
}
Step 4: Styling the Component
You can add some basic styles to app.component.css:
table {
  width: 100%;
}

.buttons {
  margin-top: 10px;
  display: flex;
  justify-content: space-around;
}
Step 4: Serve the Application
ng serve
This setup will give you a basic data table with export buttons for Excel and CSV. Make sure to replace the URL in the ngOnInit method with your actual data source.
Note: Friends, I just tell the basic setup and things, you can change the code according to your requirements. For better understanding please watch the above video.
I will appreciate that if you will tell your views for this post. Nothing matters if your views will be good or bad.
Jassa
Thank you.
Leave a Reply
You must be logged in to post a comment.