
Hello to all, welcome to therichpost.com. In this post, I will tell you, Angular 10 Laravel 7 User Registration Tutorial.
In addition, I have made the video for better working understating:
Post Working:
Hi friends, In this post, I am doing Laravel 7 user registration with Angular 10 frontend. I have used bootstrap and sweetalert modules also into my Angular 10 application for good looks.
Angular10 came and if you are new then you must check below links:
Here is the code snippet for Angular 10 Laravel 7 User Registration Tutorial:
1. Firstly, we need to get laravel 7 fresh setup and for that, we need to run below commands into our terminal and you must have composer latest version installed into your xmapp or you can download the composer from this https://getcomposer.org/:
composer create-project --prefer-dist laravel/laravel therichpost

//after run above then run below command

cd therichpost
2. Now you need to run below commands to have laravel 7 auth login registration functionality:
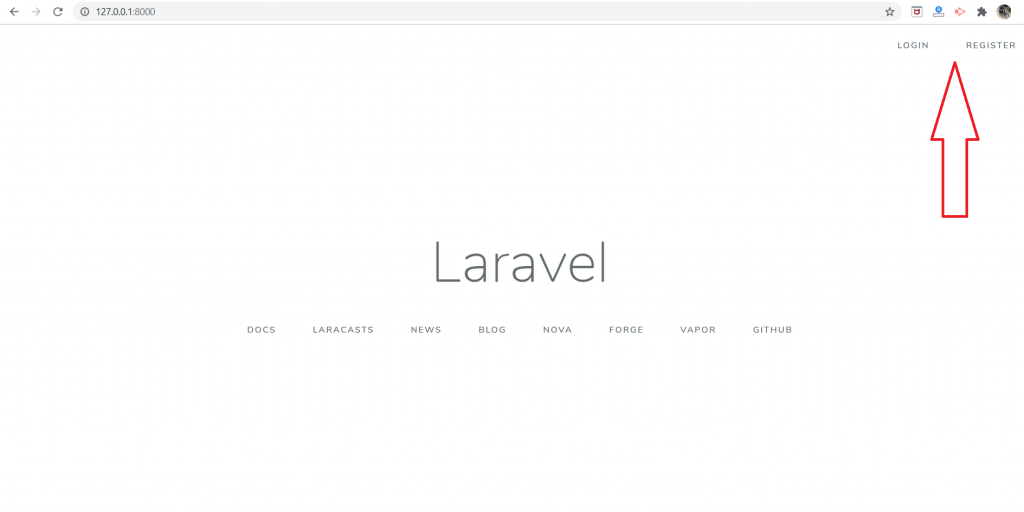
composer require laravel/ui

php artisan ui vue --auth

npm install

npm run dev

php artisan serve //check the working on browser
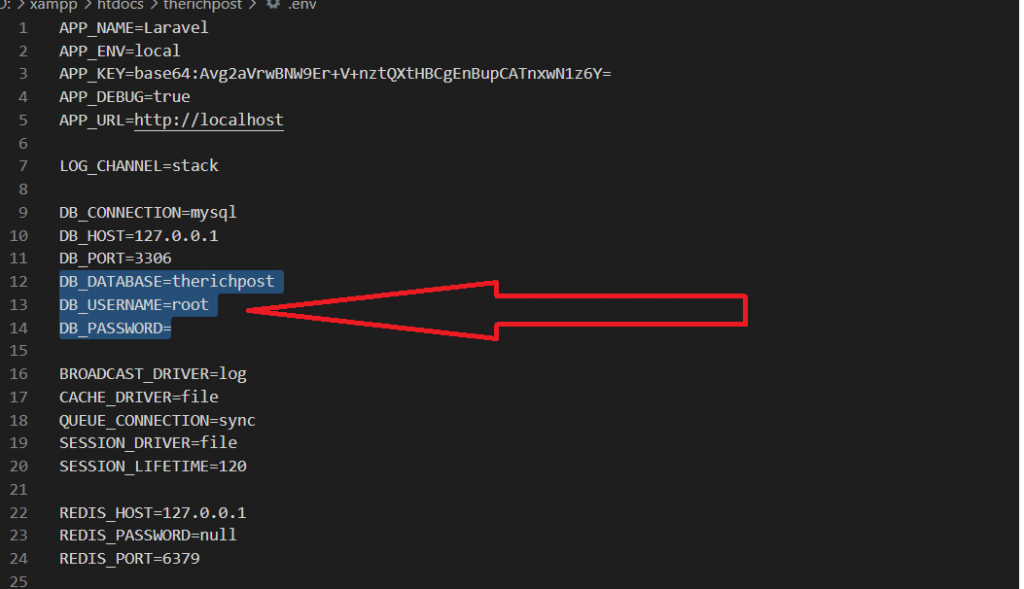
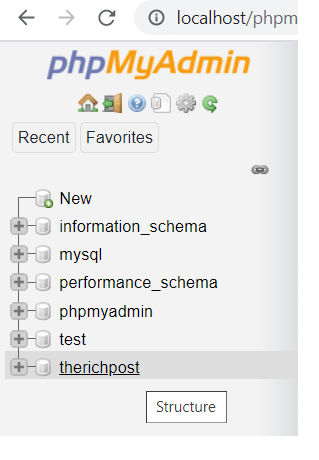
3. Now come to the PHP MySQL database section, create new database inside phpadmin and add that database name, phpmyadmin username and phpmyadmin password into your laravel project .env file.
4. Now add below code inside your app/Providers/AppServiceProvider.php file and this code will resolve your error which will come on migrate time:
...
use Illuminate\Support\Facades\Schema;
...
class AppServiceProvider extends ServiceProvider
{

    ...
    public function boot()
    {
        ...
        Schema::defaultStringLength(191);
    }
}
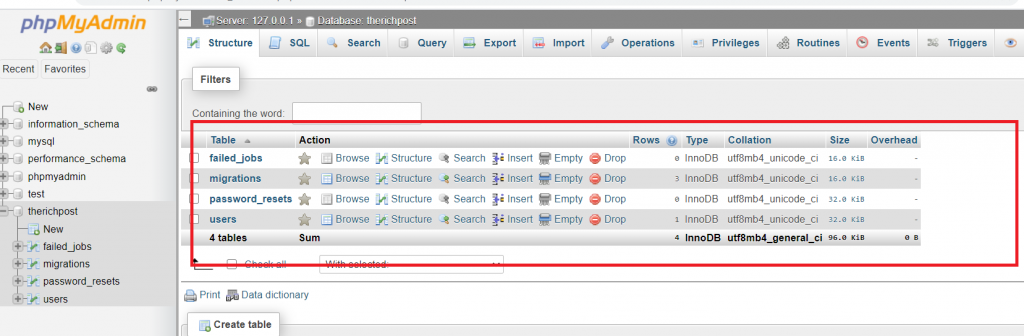
5. Now run below command into your terminal to create database default auth tables like users:
php artisan migrate

6. Now we need to create new folder ‘API’ inside app/Http/Controllers folders and after that, we need to create AuthController.php file inside app/Http/Controllers/API folder and below code into it:
<?php
namespace App\Http\Controllers\API;
use Illuminate\Http\Request;
use App\Http\Controllers\Controller;
use Illuminate\Support\Facades\Auth;
use App\User;
use Validator;
use Illuminate\Support\Str;
class AuthController extends Controller
{

   private $apiToken;
   public function __construct()
    {
    $this->apiToken = uniqid(base64_encode(Str::random(40)));
    }
  /**
   * Register API
   *
   * @return \Illuminate\Http\Response
   */
  public function register(Request $request)
  {

    $validator = Validator::make($request->all(), [
      'name' => 'required',
      'email' => 'required|email',
      'password' => 'required',

    ]);
    if ($validator->fails()) {
      return response()->json(['error'=>$validator->errors()]);
    }
    $postArray = $request->all();

    $postArray['password'] = bcrypt($postArray['password']);
    $user = User::create($postArray);

    $success['token'] = $this->apiToken;
    $success['name'] =  $user->name;
    return response()->json([
      'status' => 'success',
      'data' => $success,
    ]);
  }
}
7. Now we need to add below code inside routes/api.php:
...
Route::post('register', 'API\AuthController@register');
1. Now we need to get Angular 10 fresh setup and for this, we need to run below commands inside terminal:
npm install -g @angular/cli //Setup Angular10 atmosphere

ng new angular10 //Install New Angular App

/**You need to update your Nodejs also for this verison**/

cd angular10 //Go inside the Angular 10 Project
2. Now you need to run below commands to get bootstrap and sweetalert module to make angular app looks good:
npm install bootstrap --save

npm install --save sweetalert2
3. Now add below code inside your angular.json file to get styles and scripts of bootstrap and sweetalert:
"styles": [
  ...
  "node_modules/bootstrap/dist/css/bootstrap.min.css",
  "node_modules/sweetalert2/src/sweetalert2.scss"

],
"scripts": [
  ...
  "node_modules/sweetalert2/dist/sweetalert2.js"
  "node_modules/bootstrap/dist/js/bootstrap.min.js",

]
4. Now add below code into your src/app/app.module.ts file:
...
import { ReactiveFormsModule } from '@angular/forms';
import { HttpClientModule } from '@angular/common/http';
...

imports: [
    ...
  ReactiveFormsModule,
  HttpClientModule
  ],
5. Now add below code inside your src/app/component.ts file to set form action and set api for sending and getting data:
...
import { FormBuilder, FormGroup, Validators } from '@angular/forms';
import { HttpClient,HttpHeaders } from '@angular/common/http';
import Swal from 'sweetalert2/dist/sweetalert2.js';
...

export class AppComponent {
...
  //Forms
  successdata:any;
  registerForm: FormGroup;
  submitted = false;

  constructor(private http: HttpClient, private formBuilder: FormBuilder){}

//Register form actions
get f() { return this.registerForm.controls; }
onSubmit() {
    this.submitted = true;
    // stop here if form is invalid
    if (this.registerForm.invalid) {
        return;
    }
    //True if all the fields are filled
    if(this.submitted)
    {

      // Initialize Params Object
      var myFormData = new FormData();

    // Begin assigning parameters

    myFormData.append('name', this.registerForm.value.firstname);
    myFormData.append('email', this.registerForm.value.email);
    myFormData.append('password', this.registerForm.value.password);
    return this.http.post('http://localhost/therichpost/public/api/register'
      , myFormData).subscribe((res: Response) => {
        this.successdata = res;

        if(this.successdata['status'] == "success")
        {
          //sweetalert message popup
          Swal.fire({
          title: 'Hurray!!',
          text:   this.successdata['data']['name']+" has been registered successfully",
          icon: 'success'
        });
        }


    });
    }

}

ngOnInit(){
//Register form validations
  this.registerForm = this.formBuilder.group({
  email: ['', [Validators.required, Validators.email]],
  password: ['', [Validators.required, Validators.minLength(6)]],
  firstname: ['', [Validators.required]]
  });
}

}
6. Finally add below code inside your src/app/app.component.html file to get final output on browser:
<!--Forms-->
<div class="container">
  <h1 class="mt-5 mb-5 text-center" style=" background: #fa4444; color: #fff; padding: 10px 0; ">Angular 10 Laravel 7 User Registration</h1>
  <div style="padding: 10px;border: 2px solid #eeeeee;">
    <form [formGroup]="registerForm" (ngSubmit)="onSubmit()">
      <div class="row">
         <div class="col-sm-6">
            <div class="form-group">
                  <label>Name</label>
                  <input type="text" formControlName="firstname" class="form-control" [ngClass]="{ 'is-invalid': submitted && f.firstname.errors }" />
                  <div *ngIf="submitted && f.firstname.errors" class="invalid-feedback">
                        <div *ngIf="f.firstname.errors.required">Name is required</div>
                  </div>
               </div>
         </div>
         <div class="col-sm-6">
            <div class="form-group">
               <label>Email</label>
               <input type="text" formControlName="email" class="form-control" [ngClass]="{ 'is-invalid': submitted && f.email.errors }" />
               <div *ngIf="submitted && f.email.errors" class="invalid-feedback">
                  <div *ngIf="f.email.errors.required">Email is required</div>
                  <div *ngIf="f.email.errors.email">Email must be a valid email address</div>
               </div>
            </div>
         </div>
         <div class="col-sm-6">
            <div class="form-group">
               <label>Password</label>
               <input type="password" formControlName="password" class="form-control" [ngClass]="{ 'is-invalid': submitted && f.password.errors }" />
               <div *ngIf="submitted && f.password.errors" class="invalid-feedback">
                  <div *ngIf="f.password.errors.required">Password is required</div>
                  <div *ngIf="f.password.errors.minlength">Password must be at least 6 characters</div>
               </div>
            </div>
         </div>

     </div>
     <button type="submit" class="btn btn-primary">Submit</button>
   </form>
  </div>
</div>
This is it friends and don’t forget to run ng serve command in the end. If you have any doubt then please watch above top video if still have any kind of query then please do comment below.
Next tutorial will be Angular 10 Laravel 7 user login.
Jassa
Thanks
Leave a Reply