Year: 2018

  • Reactjs router tutorial simple and easy

    Reactjs router tutorial simple and easy

    Hello, welcome to therichpost.com. In this post, I will tell you, Reactjs router tutorial simple and easy. Reactjs is a Javascript Library to build user interface.

    Reactjs also named as single page application. In this post, I am doing reactjs routing and this is very important part of every reactjs single page application.

    reactjs_routing

    In my old posts, I already told you, how to install  and setup reactjs and you can check that all posts in this page below section.

    For reactjs routing, first we need to install react router package in our application and you just need to run below command for this:
    $ npm install --save react-router-dom
    After this, here is the complete react js routing working and tested code:

    I am showing you my reactjs app scr folder for better understanding:

    reactjs_folder_structure


    Here is the complete code:
    Index.js file code:
    import React, { Component } from 'react';
    import ReactDOM from 'react-dom';
    import axios from 'axios';
    import { BrowserRouter as Router, Switch, Route, Link } from 'react-router-dom';
    import About from './about';
    import Home from './home';
    import { Collapse,
      Navbar,
      NavbarToggler,
      NavbarBrand,
      Nav,
      NavItem,
      NavLink,Container, Row, Col, Jumbotron, Button, Modal, ModalHeader, ModalBody, ModalFooter } from 'reactstrap';
    import 'bootstrap/dist/css/bootstrap.min.css';
    class Hello extends React.Component{
      render() {
        return (
      <Router>
                <Container>
          <Navbar color="light" light expand="md">
              <NavbarBrand><h2>Therichpost</h2></NavbarBrand>
          <Nav className="ml-auto" navbar>
                  <NavItem>
                    <Link to={'/home'}>Home</Link>
                  </NavItem>
            <NavItem>
                    <Link to={'/about'}>About</Link>
                  </NavItem>
            </Nav>
          </Navbar>
          
              <Col xs="12">
          <Switch>
                      <Route exact path='/' component={Home} />
              <Route exact path='/home' component={Home} />
                      <Route exact path='/about' component={About} />
                   </Switch>
          </Col>
          
                   <footer class="container-fluid">
            <center><p>Therichpost</p></center>
          </footer>
             
                </Container>
          
             </Router>
        );
      }
      }
    
      ReactDOM.render(<Hello />, document.getElementById('root'));
     about.js file code:
    import React, { Component } from 'react';
    class About extends React.Component{
      render() {
        return (
      
        <h6><p>About Us</p> Lorem ipsum dolor sit amet, consectetur adipiscing elit, sed do eiusmod tempor incididunt ut labore et dolore magna aliqua. Ut enim ad minim veniam, quis nostrud exercitation ullamco laboris nisi ut aliquip ex ea commodo consequat. Excepteur sint occaecat cupidatat non proident, sunt in culpa qui officia deserunt mollit anim id est laborum consectetur adipiscing elit, sed do eiusmod tempor incididunt ut labore et dolore magna aliqua. Ut enim ad minim veniam, quis nostrud exercitation ullamco laboris nisi ut aliquip ex ea commodo consequat.</h6>
      
        );
      }
      }
      export default About;
     home.js file code:
    import React, { Component } from 'react';
    class Home extends React.Component{
      render() {
        return (
      
        <h6><p>Home</p> Lorem ipsum dolor sit amet, consectetur adipiscing elit, sed do eiusmod tempor incididunt ut labore et dolore magna aliqua. Ut enim ad minim veniam, quis nostrud exercitation ullamco laboris nisi ut aliquip ex ea commodo consequat. Excepteur sint occaecat cupidatat non proident, sunt in culpa qui officia deserunt mollit anim id est laborum consectetur adipiscing elit, sed do eiusmod tempor incididunt ut labore et dolore magna aliqua. Ut enim ad minim veniam, quis nostrud exercitation ullamco laboris nisi ut aliquip ex ea commodo consequat.</h6>
      
        );
      }
      }
      export default Home;

     This is all and if you have any query related to reactjs routing, then please let me know.


  • How to add the product image to Woocommerce my account order view?

    How to add the product image to Woocommerce my account order view?

    Hello, welcome to therichpost.com. In this post, I will tell you, How to add the product image to Woocommerce my account order view?  WordPress is the best cms and Woocommerce is the best Ecommerce plugin. WordPress hooks(add_action, add_filter) give us the power to edit or change the code without interruption into the files and this is the best thing about wordpress. Now I am going to tell you how the hooks work.

    Here is the working to add the product image to Woocommerce my account order view and you need to add this code into your theme’s functions.php file:
    // Display the product thumbnail in order view pages
    add_filter( 'woocommerce_order_item_name', 'display_product_image_in_order_item', 20, 3 );
    function display_product_image_in_order_item( $item_name, $item, $is_visible ) {
        // Targeting view order pages only
        if( is_wc_endpoint_url( 'view-order' ) ) {
            $product       = $item->get_product(); // Get the WC_Product object (from order item)
            $product_image = $product->get_image(array( 36, 36)); // Get the product thumbnail (from product object)
            $item_name     = '<div class="item-thumbnail">' . $product_image . '</div>' . $item_name;
        }
        return $item_name;
    }

     There are so many hooks in wordpress and i will let you know all. Please do comment if you any query related to this post. Thank you. Therichpost.com


  • How to add backgroundColor to full calendar event with php mysql?

    How to add backgroundColor to full calendar event with php mysql?

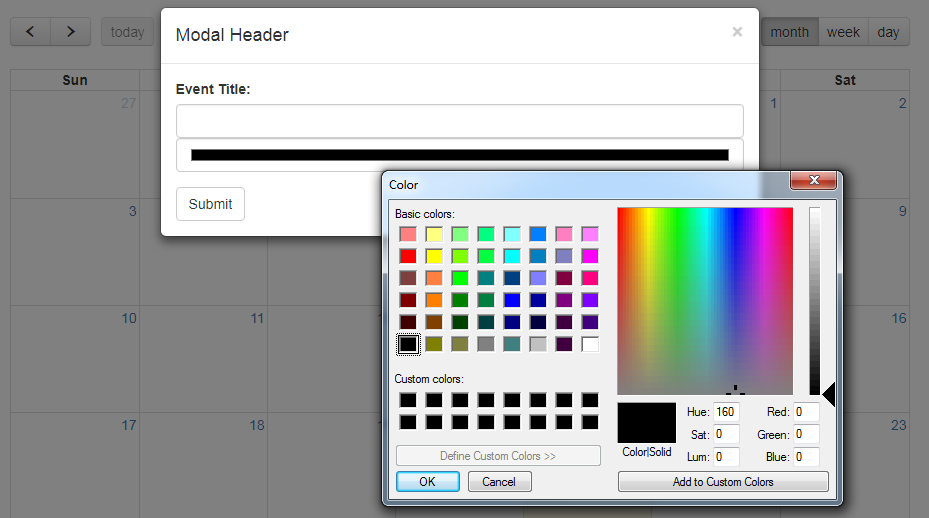
    Hello to all, welcome to therichpost.com. In this post, I will tell you, How to add backgroundColor to full calendar event with php mysql?  fullcalendar is the best A JavaScript event calendar. Customizable and open source.

    In this post, we will get or fetch fullcalendar events with background color from php mysql database.

    In this, on day click, bootstrap popup will open including add event title form and with the help of this form, will insert the event title, event backgroundColor and date in mysql database.

    Here is the complete working code:

    Very first, you need to create event table in phpmyadmin and I am also inserting some test data and here is table structure:
    CREATE TABLE events (
    id int(11) NOT NULL AUTO_INCREMENT PRIMARY KEY,
    title varchar(250) NULL,
    backgroundColor varchar(250) NULL,
    event_date timestamp NULL
    );
    INSERT INTO `events` (`id`, `title`, `backgroundColor`, `event_date`) VALUES
    (1, 'Walk-In', '#000000', '2018-06-5 11:07:27'),
    (2, 'Online Booking', '#000000', '2018-06-6 02:37:05'),
    (3, 'Facebook Booking', '#000000', '2018-06-7 04:01:00')
     Here is the complete code to Add backgroundColor to full calendar event with php mysql and you can paste that code into your php file:
    <?php
    $servername = "localhost";
    $username   = "root";
    $password   = "root";
    $dbname     = "calendar";
    
    // Create connection
    $conn = new mysqli($servername, $username, $password, $dbname);
    
    // Check connection
    if ($conn->connect_error) {
        die("Connection failed: " . $conn->connect_error);
    } 
    if(isset($_POST["submit"]) == "submit" && isset($_POST["eventTitle"]) != "")
      {
        $sql = "INSERT INTO events (title, event_date, backgroundColor)
            VALUES ('".$_POST['eventTitle']."', '".$_POST['eventDate']."', '".$_POST['eventColor']."')";
        if (mysqli_query($conn,$sql)) {
            echo "New event added successfully";
        } else {
            echo "Error: " . $sql . "<br>" . $conn->error;
        }
    
      }
      //echo "Connected successfully";
    $sql = "SELECT title, event_date as start, backgroundColor FROM events";
    $result = mysqli_query($conn,$sql); 
    $myArray = array();
    if ($result->num_rows > 0) {
    // output data of each row
        while($row = $result->fetch_assoc()) {
            $myArray[] = $row;
        }
    
    } 
    else 
    {
        echo "0 results";
    }
    ?>
    <!DOCTYPE html>
    <html>
    <head>
    <meta charset='utf-8' />
    <link href='https://fullcalendar.io/releases/fullcalendar/3.9.0/fullcalendar.min.css' rel='stylesheet' />
    <link rel='stylesheet' href='https://maxcdn.bootstrapcdn.com/bootstrap/3.3.7/css/
    bootstrap.min.css'>
    <link href='https://fullcalendar.io/releases/fullcalendar/3.9.0/fullcalendar.print.min.css' rel='stylesheet' media='print' />
    <script src='https://fullcalendar.io/releases/fullcalendar/3.9.0/lib/moment.min.js'></script>
    <script src='https://fullcalendar.io/releases/fullcalendar/3.9.0/lib/jquery.min.js'></script>
    <script src='https://fullcalendar.io/releases/fullcalendar/3.9.0/fullcalendar.min.js'></script>
    <script src='https://maxcdn.bootstrapcdn.com/bootstrap/3.3.7/js/bootstrap.min
    .js'></script>
    <script>
    
      $(document).ready(function() {
        $('#calendar').fullCalendar({
          header: {
            left: 'prev,next today',
            center: 'title',
            right: 'month,basicWeek,basicDay'
          },
          defaultDate: new Date(),
          navLinks: true, // can click day/week names to navigate views
          editable: true,
          eventLimit: true, // allow "more" link when too many events
          dayClick: function(date, jsEvent, view) {
    
            $("#successModal").modal("show");
            $("#eventDate").val(date.format());
    
          },
          events: <?php echo json_encode($myArray); ?>
        });
    
      });
    
    </script>
    <style>
    
      body {
        margin: 40px 10px;
        padding: 0;
        font-family: "Lucida Grande",Helvetica,Arial,Verdana,sans-serif;
        font-size: 14px;
      }
    
      #calendar {
        max-width: 900px;
        margin: 0 auto;
      }
    
    </style>
    </head>
    <body>
    
      <div id='calendar'></div>
      <div class="modal fade" id="successModal" role="dialog" aria-labelledby="successModalLabel" aria-hidden="true">
    <div class="modal-dialog" role="document">
    <div class="modal-content">
      <div class="modal-header">
            <button type="button" class="close" data-dismiss="modal">&times;</button>
            <h4 class="modal-title">Modal Header</h4>
      </div>
      <div class="modal-body">
        <form action="#" method="post">
        <div class="form-group">
          <label for="eventtitle">Event Title:</label>
          <input type="text" name="eventTitle" class="form-control" id="eventTitle" required="">
          <input type="color" name="eventColor" class="form-control" id="eventColor" required="">
          <input type="hidden" name="eventDate" class="form-control" id="eventDate">
        </div>
        <button type="submit" value="submit" name="submit" class="btn btn-default">Submit</button>
      </form>
      </div>
    </div>
    </div>
    </div>
    
    </body>
    </html>

     If you have any query related to this post then please let me know with your comments and I will come with more fullcalendar posts.

  • How to hide wordpress content from non logged in users?

    How to hide wordpress content from non logged in users?

    Hello, welcome to therichpost.com. In this post, I will tell you, How to hide wordpress content from non logged in users? WordPress is the best cms. WordPress hooks(add_action, add_filter) give us the power to edit or change the code without interruption into the files and this is the best thing about wordpress. Now I am going to tell you how the hooks work.

    I have made shortcode to hide content from non logged in users.
    Here is the working wordpress hook  to hide wordpress content from non logged in users and you need to add this into your theme’s functions.php file:
    // functions.php file code
    add_shortcode( 'member', 'member_check_shortcode' );
    function member_check_shortcode( $atts, $content = null ) {
         if ( is_user_logged_in() && !is_null( $content ) && !is_feed() )
         return $content;
         return '';
    }
    
    //Here you can use this hook into wordpress dashboard post or pages :
    [member]
    Plugin Code
    [/member]
    
    //if you want to use it in a PHP template file, you can do it like this:
    echo do_shortcode( '[member]' . $youcodetext. '[/member]' );

     Now you are done and if you have query related to this post or you want to do some more with this code then please do comment below and I will come with wordpress hooks.

  • How to update woocommerce cart if maximum items limit reached?

    How to update woocommerce cart if maximum items limit reached?

    Hello, welcome to therichpost.com. In this post, I will tell you, How to update woocommerce cart if maximum items limit reached?  WordPress is the best cms and Woocommerce is the best Ecommerce plugin. WordPress hooks(add_action, add_filter) give us the power to edit or change the code without interruption into the files and this is the best thing about wordpress. Now I am going to tell you how the hooks work.

    In this post, I am doing, if woocommerce cart item quantity is 2 and we will add more items then previous 2
      items will me remove because I set the woocommerce maximum item limit is 2.
    Here is the working woocommerce hook for update woocommerce cart if maximum items limit reached and you need to add this hook into your theme’s functions.pgp file:
    add_filter( 'woocommerce_add_to_cart_validation', 'therichpost_in_cart', 99, 2 );
    
    function therichpost_in_cart( $passed, $added_product_id ) {
    
    global $woocommerce;
    
    // empty cart: new item will replace previous
    
    $_cartQty = count( $woocommerce->cart->get_cart() );
    if($_cartQty >= 2){
        $woocommerce->cart->empty_cart();   
    }
    
    // display a message if you like
    wc_add_notice( 'Product added to cart!', 'notice' );
    
    return $passed;
    }
     There are so many hooks in wordpress and i will let you know all. Please do comment if you any query related to this post. Thank you. Therichpost.com


  • How to add Enqueue Script and Style for Single page,  Archive Page and Page Templates?

    How to add Enqueue Script and Style for Single page, Archive Page and Page Templates?

    Hello, welcome to therichpost.com. In this post, I will tell you, How to add Enqueue Script and Style for Single page,  Archive Page and Page Templates? WordPress is the best cms. WordPress hooks(add_action, add_filter) give us the power to edit or change the code without interruption into the files and this is the best thing about wordpress. Now I am going to tell you how the hooks work.

    In this post,  we will add conditional scripts or styles for particular page template,  
    custom post type single pages or archive pages and this is very useful.
    Here is the working wordpress hook  for How to add Enqueue Script and Style for Single page,  Archive Page and Page Templates, and you need to add this into your theme’s functions.php file:
    add_action( 'wp_enqueue_scripts', 'so_50916971_enqueue_scripts' );
    function so_50916971_enqueue_scripts(){
        /**For single of archive page */
        if( is_singular( 'movies' ) || is_post_type_archive( 'movies' ) ){
            wp_enqueue_style( 'my-movie-style', /* src to .css file */ );
            wp_enqueue_script( 'my-movie-script', /* src to .js file */ );
        }
    
       /** For page templates */
       if ( is_page( 'landing-page-template-one' ) ) {
        //you style
        } 
    }

     Now you are done and if you have query related to this post or you want to do some more with this code then please do comment below and I will come with wordpress hooks.


  • How to add class to event title in fullcalendar?

    How to add class to event title in fullcalendar?

    Hello to all, welcome to therichpost.com. In this post, I will tell you, How to add class to event title in fullcalendar? fullcalendar is the best A JavaScript event calendar. Customizable and open source. 

    Here is the complete working and tested  to add class to event title in fullcalendar and you can add this into your html file:
    <!DOCTYPE html>
    <html>
    <head>
    <meta charset='utf-8' />
    <link href='https://fullcalendar.io/releases/fullcalendar/3.9.0/fullcalendar.min.css' rel='stylesheet' />
    <link rel='stylesheet' href='https://maxcdn.bootstrapcdn.com/bootstrap/3.3.7/css/
    bootstrap.min.css'>
    <link href='https://fullcalendar.io/releases/fullcalendar/3.9.0/fullcalendar.print.min.css' rel='stylesheet' media='print' />
    <script src='https://fullcalendar.io/releases/fullcalendar/3.9.0/lib/moment.min.js'></script>
    <script src='https://fullcalendar.io/releases/fullcalendar/3.9.0/lib/jquery.min.js'></script>
    <script src='https://fullcalendar.io/releases/fullcalendar/3.9.0/fullcalendar.min.js'></script>
    <script src='https://maxcdn.bootstrapcdn.com/bootstrap/3.3.7/js/bootstrap.min
    .js'></script>
    <script>
    
      $(document).ready(function() {
    
        $('#calendar').fullCalendar({
          header: {
            left: 'prev,next today',
            center: 'title',
            right: 'month,basicWeek,basicDay'
          },
          defaultDate: '2018-03-12',
          navLinks: true, // can click day/week names to navigate views
          editable: true,
          eventLimit: true, // allow "more" link when too many events
        events: [
            {
              title: 'All Day Event',
              start: '2018-03-01',
    
            },
            {
              title: 'Long Event',
              start: '2018-03-07'
              
            },
            {
              id: 999,
              title: 'Repeating Event',
              start: '2018-03-09'
            },
            {
              id: 999,
              title: 'Repeating Event',
              start: '2018-03-16'
            },
            {
              title: 'Conference',
              start: '2018-03-11'
              
            },
            {
              title: 'Meeting',
              start: '2018-03-12'
              
            },
            {
              title: 'Lunch',
              start: '2018-03-12'
            },
            {
              title: 'Meeting',
              start: '2018-03-12'
            },
            {
              title: 'Happy Hour',
              start: '2018-03-12'
            },
            {
              title: 'Dinner',
              start: '2018-03-12'
            },
            {
              title: 'Birthday Party',
              start: '2018-03-13'
            },
            {
              title: 'Click for Google',
              url: 'http://google.com/',
              start: '2018-03-28'
            }
          ],
    
                eventRender: function(event, element, view) {
                              element.find('span.fc-title').addClass('yourClass');     
                 }
        });
    
      });
    
    </script>
    <style>
    
      body {
        margin: 40px 10px;
        padding: 0;
        font-family: "Lucida Grande",Helvetica,Arial,Verdana,sans-serif;
        font-size: 14px;
      }
    
      #calendar {
        max-width: 900px;
        margin: 0 auto;
      }
      .hoverEffect {
        font-size: 29px;
        position: absolute;
        margin: 30px 55px;
        cursor: pointer;
    }
    </style>
    </head>
    <body>
    
      <div id='calendar'></div>
    
    </body>
    </html>

     If you have any query related to this post then please do comment below and i will do most posts for fullcalendar.

  • How to upload image in Laravel?

    How to upload image in Laravel?

    Hello to all, welcome to therichpost.com. In this post, I will tell you, How to upload image in Laravel? I am doing with laravel first time in my website. Laravel is one of the top php mvc framework.

    In this post, I am uploading the image public folder by form post.

    Here is the working and tested code to upload image in laravel to public folder:
    f($request->hasFile('image'))
    {
    $fileName = 'null';
    if(Input::file('image')->isValid()){
    $destinationPath = public_path('/posts');
    $extension = Input::file('image')->getClientOriginalExtension();
    if($extension=='png' || $extension=='jpg' || $extension=='jpeg' || $extension=='gif' || $extension == 'mp4'){
    
    $fileName = uniqid().'.'.$extension;
    $data['image']=$fileName;
    
    Input::file('mage')->move($destinationPath, $fileName);
    }else{
    return $response=array('error' => 'Uploaded File type not allowed');
    }
    }
    }

     I am just showing image upload to public folder and if you have any query related to this post, then please comment below.


  • How to show plus icon on day hover in fullcalendar?

    How to show plus icon on day hover in fullcalendar?

    Hello to all, welcome to therichpost.com. In this post, I will tell you, How to show plus icon on day hover in fullcalendar? fullcalendar is the best A JavaScript event calendar. Customizable and open source. In this post, we will show plus icon on day hover.

    fullcalendar-show-plus-icon-ondayhover

    Here is the working and tested code and you can add this complete html file and enjoy the  Show plus icon on day hover in fullcalendar code:
    <!DOCTYPE html>
    <html>
    <head>
    <meta charset='utf-8' />
    <link href='https://fullcalendar.io/releases/fullcalendar/3.9.0/fullcalendar.min.css' rel='stylesheet' />
    <link rel='stylesheet' href='https://maxcdn.bootstrapcdn.com/bootstrap/3.3.7/css/
    bootstrap.min.css'>
    <link href='https://fullcalendar.io/releases/fullcalendar/3.9.0/fullcalendar.print.min.css' rel='stylesheet' media='print' />
    <script src='https://fullcalendar.io/releases/fullcalendar/3.9.0/lib/moment.min.js'></script>
    <script src='https://fullcalendar.io/releases/fullcalendar/3.9.0/lib/jquery.min.js'></script>
    <script src='https://fullcalendar.io/releases/fullcalendar/3.9.0/fullcalendar.min.js'></script>
    <script src='https://maxcdn.bootstrapcdn.com/bootstrap/3.3.7/js/bootstrap.min
    .js'></script>
    <script>
    
      $(document).ready(function() {
    
        $('#calendar').fullCalendar({
          header: {
            left: 'prev,next today',
            center: 'title',
            right: 'month,basicWeek,basicDay'
          },
          defaultDate: '2018-03-12',
          navLinks: true, // can click day/week names to navigate views
          editable: true,
          eventLimit: true, // allow "more" link when too many events
    
                 dayRender: function (date, cell) {
    
    
                      cell.append("<span class='hoverEffect' style='display:none;'>+</span>");
    
                      cell.mouseenter(function() {
                          cell.find(".hoverEffect").show();
                          cell.css("background", "rgba(0,0,0,.1)");
                      }).mouseleave(function() {
                          $(".hoverEffect").hide();
                          cell.removeAttr('style');
                      });
                  }
    
    
        });
    
      });
    
    </script>
    <style>
    
      body {
        margin: 40px 10px;
        padding: 0;
        font-family: "Lucida Grande",Helvetica,Arial,Verdana,sans-serif;
        font-size: 14px;
      }
    
      #calendar {
        max-width: 900px;
        margin: 0 auto;
      }
      .hoverEffect {
        font-size: 29px;
        position: absolute;
        margin: 30px 55px;
        cursor: pointer;
    }
    </style>
    </head>
    <body>
    
      <div id='calendar'></div>
    
    </body>
    </html>

    Hope you like this post and give me reviews on this post and I will come with more fullcalendar tricks.

  • How to disable WordPress admin dashboard for non-admin users?

    How to disable WordPress admin dashboard for non-admin users?

    Hello, welcome to therichpost.com. In this post, I will tell you, How to disable WordPress admin dashboard for non-admin users?  WordPress is the best cms. WordPress hooks(add_action, add_filter) give us the power to edit or change the code without interruption into the files and this is the best thing about wordpress. Now I am going to tell you how the hooks work.

    Here is working and tested code to Disable WordPress admin dashboard for non-admin users and you need to add this code into your theme’s functions.php file:
    function disable_wp_admin() {
      if ( is_user_logged_in() && is_admin() && !current_user_can( 'manage_options' ) ) {
        wp_redirect( home_url() );
        exit;
      }
    }
    add_action( 'init', 'disable_wp_admin' ); 

     Now you are done and if you have query related to this post or you want to do some more with this code then please do comment below and I will come with wordpress hooks.