
Hello friends, welcome back to my blog. Today in this blog post, I am going to show you, Reactjs Material Admin Dashboard Template Free Download.
For reactjs new comers, please check the below link:
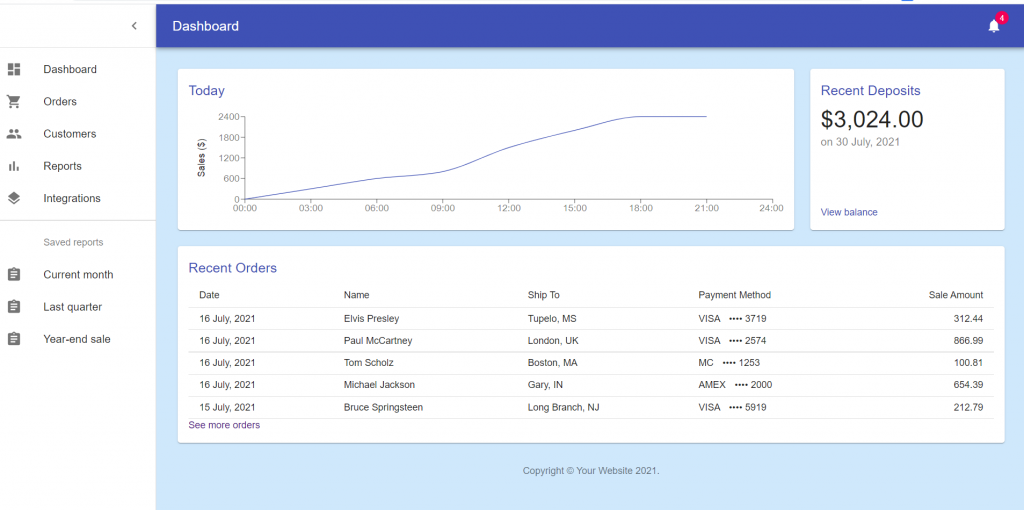
Friends now I proceed onwards and here is the working code snippet and please use this carefully to avoid the mistakes:
1. Firstly, we need fresh reactjs setup and for that, we need to run below commands into out terminal and also we should have latest node version installed on our system:
npx create-react-app reactdemo

cd reactdemo

npm start
2. Now we need to run below commands into our project terminal to get materials and charts modules in our react project:
npm install @material-ui/core

npm install @material-ui/icons

npm install @material-ui/lab

npm install recharts

npm start
3. Finally for the main output, we need to add below code into our reactdemo/src/App.js file
import React from 'react';
import clsx from 'clsx';
import { makeStyles } from '@material-ui/core/styles';
import CssBaseline from '@material-ui/core/CssBaseline';
import Drawer from '@material-ui/core/Drawer';
import Box from '@material-ui/core/Box';
import AppBar from '@material-ui/core/AppBar';
import Toolbar from '@material-ui/core/Toolbar';
import List from '@material-ui/core/List';
import Typography from '@material-ui/core/Typography';
import Divider from '@material-ui/core/Divider';
import IconButton from '@material-ui/core/IconButton';
import Badge from '@material-ui/core/Badge';
import Container from '@material-ui/core/Container';
import Grid from '@material-ui/core/Grid';
import Paper from '@material-ui/core/Paper';
import Link from '@material-ui/core/Link';
import MenuIcon from '@material-ui/icons/Menu';
import ChevronLeftIcon from '@material-ui/icons/ChevronLeft';
import NotificationsIcon from '@material-ui/icons/Notifications';
import { mainListItems, secondaryListItems } from './listItems';
import Chart from './Chart';
import Deposits from './Deposits';
import Orders from './Orders';

function Copyright() {
  return (
    <Typography variant="body2" color="textSecondary" align="center">
      {'Copyright © '}
      <Link color="inherit" href="https://therichpost.com/">
        Your Website
      </Link>{' '}
      {new Date().getFullYear()}
      {'.'}
    </Typography>
  );
}

const drawerWidth = 240;

const useStyles = makeStyles((theme) => ({
  root: {
    display: 'flex',
  },
  toolbar: {
    paddingRight: 24, // keep right padding when drawer closed
  },
  toolbarIcon: {
    display: 'flex',
    alignItems: 'center',
    justifyContent: 'flex-end',
    padding: '0 8px',
    ...theme.mixins.toolbar,
  },
  appBar: {
    zIndex: theme.zIndex.drawer + 1,
    transition: theme.transitions.create(['width', 'margin'], {
      easing: theme.transitions.easing.sharp,
      duration: theme.transitions.duration.leavingScreen,
    }),
  },
  appBarShift: {
    marginLeft: drawerWidth,
    width: `calc(100% - ${drawerWidth}px)`,
    transition: theme.transitions.create(['width', 'margin'], {
      easing: theme.transitions.easing.sharp,
      duration: theme.transitions.duration.enteringScreen,
    }),
  },
  menuButton: {
    marginRight: 36,
  },
  menuButtonHidden: {
    display: 'none',
  },
  title: {
    flexGrow: 1,
  },
  drawerPaper: {
    position: 'relative',
    whiteSpace: 'nowrap',
    width: drawerWidth,
    transition: theme.transitions.create('width', {
      easing: theme.transitions.easing.sharp,
      duration: theme.transitions.duration.enteringScreen,
    }),
  },
  drawerPaperClose: {
    overflowX: 'hidden',
    transition: theme.transitions.create('width', {
      easing: theme.transitions.easing.sharp,
      duration: theme.transitions.duration.leavingScreen,
    }),
    width: theme.spacing(7),
    [theme.breakpoints.up('sm')]: {
      width: theme.spacing(9),
    },
  },
  appBarSpacer: theme.mixins.toolbar,
  content: {
    flexGrow: 1,
    height: '100vh',
    overflow: 'auto',
  },
  container: {
    paddingTop: theme.spacing(4),
    paddingBottom: theme.spacing(4),
  },
  paper: {
    padding: theme.spacing(2),
    display: 'flex',
    overflow: 'auto',
    flexDirection: 'column',
  },
  fixedHeight: {
    height: 240,
  },
}));

export default function Dashboard() {
  const classes = useStyles();
  const [open, setOpen] = React.useState(true);
  const handleDrawerOpen = () => {
    setOpen(true);
  };
  const handleDrawerClose = () => {
    setOpen(false);
  };
  const fixedHeightPaper = clsx(classes.paper, classes.fixedHeight);

  return (
    <div className={classes.root}>
      <CssBaseline />
      <AppBar position="absolute" className={clsx(classes.appBar, open && classes.appBarShift)}>
        <Toolbar className={classes.toolbar}>
          <IconButton
            edge="start"
            color="inherit"
            aria-label="open drawer"
            onClick={handleDrawerOpen}
            className={clsx(classes.menuButton, open && classes.menuButtonHidden)}
          >
            <MenuIcon />
          </IconButton>
          <Typography component="h1" variant="h6" color="inherit" noWrap className={classes.title}>
            Dashboard
          </Typography>
          <IconButton color="inherit">
            <Badge badgeContent={4} color="secondary">
              <NotificationsIcon />
            </Badge>
          </IconButton>
        </Toolbar>
      </AppBar>
      <Drawer
        variant="permanent"
        classes={{
          paper: clsx(classes.drawerPaper, !open && classes.drawerPaperClose),
        }}
        open={open}
      >
        <div className={classes.toolbarIcon}>
          <IconButton onClick={handleDrawerClose}>
            <ChevronLeftIcon />
          </IconButton>
        </div>
        <Divider />
        <List>{mainListItems}</List>
        <Divider />
        <List>{secondaryListItems}</List>
      </Drawer>
      <main className={classes.content}>
        <div className={classes.appBarSpacer} />
        <Container maxWidth="lg" className={classes.container}>
          <Grid container spacing={3}>
            {/* Chart */}
            <Grid item xs={12} md={8} lg={9}>
              <Paper className={fixedHeightPaper}>
                <Chart />
              </Paper>
            </Grid>
            {/* Recent Deposits */}
            <Grid item xs={12} md={4} lg={3}>
              <Paper className={fixedHeightPaper}>
                <Deposits />
              </Paper>
            </Grid>
            {/* Recent Orders */}
            <Grid item xs={12}>
              <Paper className={classes.paper}>
                <Orders />
              </Paper>
            </Grid>
          </Grid>
          <Box pt={4}>
            <Copyright />
          </Box>
        </Container>
      </main>
    </div>
  );
}
4. Now guy’s we need to create `listItems.js` file inside reactdemo/src folder and add below code inside it:
import React from 'react';
import ListItem from '@material-ui/core/ListItem';
import ListItemIcon from '@material-ui/core/ListItemIcon';
import ListItemText from '@material-ui/core/ListItemText';
import ListSubheader from '@material-ui/core/ListSubheader';
import DashboardIcon from '@material-ui/icons/Dashboard';
import ShoppingCartIcon from '@material-ui/icons/ShoppingCart';
import PeopleIcon from '@material-ui/icons/People';
import BarChartIcon from '@material-ui/icons/BarChart';
import LayersIcon from '@material-ui/icons/Layers';
import AssignmentIcon from '@material-ui/icons/Assignment';

export const mainListItems = (
  <div>
    <ListItem button>
      <ListItemIcon>
        <DashboardIcon />
      </ListItemIcon>
      <ListItemText primary="Dashboard" />
    </ListItem>
    <ListItem button>
      <ListItemIcon>
        <ShoppingCartIcon />
      </ListItemIcon>
      <ListItemText primary="Orders" />
    </ListItem>
    <ListItem button>
      <ListItemIcon>
        <PeopleIcon />
      </ListItemIcon>
      <ListItemText primary="Customers" />
    </ListItem>
    <ListItem button>
      <ListItemIcon>
        <BarChartIcon />
      </ListItemIcon>
      <ListItemText primary="Reports" />
    </ListItem>
    <ListItem button>
      <ListItemIcon>
        <LayersIcon />
      </ListItemIcon>
      <ListItemText primary="Integrations" />
    </ListItem>
  </div>
);

export const secondaryListItems = (
  <div>
    <ListSubheader inset>Saved reports</ListSubheader>
    <ListItem button>
      <ListItemIcon>
        <AssignmentIcon />
      </ListItemIcon>
      <ListItemText primary="Current month" />
    </ListItem>
    <ListItem button>
      <ListItemIcon>
        <AssignmentIcon />
      </ListItemIcon>
      <ListItemText primary="Last quarter" />
    </ListItem>
    <ListItem button>
      <ListItemIcon>
        <AssignmentIcon />
      </ListItemIcon>
      <ListItemText primary="Year-end sale" />
    </ListItem>
  </div>
);
5. Now guy’s we need to create `Chart.js` file inside reactdemo/src folder and add below code inside it:
import React from 'react';
import { useTheme } from '@material-ui/core/styles';
import { LineChart, Line, XAxis, YAxis, Label, ResponsiveContainer } from 'recharts';
import Title from './Title';

// Generate Sales Data
function createData(time, amount) {
  return { time, amount };
}

const data = [
  createData('00:00', 0),
  createData('03:00', 300),
  createData('06:00', 600),
  createData('09:00', 800),
  createData('12:00', 1500),
  createData('15:00', 2000),
  createData('18:00', 2400),
  createData('21:00', 2400),
  createData('24:00', undefined),
];

export default function Chart() {
  const theme = useTheme();

  return (
    <React.Fragment>
      <Title>Today</Title>
      <ResponsiveContainer>
        <LineChart
          data={data}
          margin={{
            top: 16,
            right: 16,
            bottom: 0,
            left: 24,
          }}
        >
          <XAxis dataKey="time" stroke={theme.palette.text.secondary} />
          <YAxis stroke={theme.palette.text.secondary}>
            <Label
              angle={270}
              position="left"
              style={{ textAnchor: 'middle', fill: theme.palette.text.primary }}
            >
              Sales ($)
            </Label>
          </YAxis>
          <Line type="monotone" dataKey="amount" stroke={theme.palette.primary.main} dot={false} />
        </LineChart>
      </ResponsiveContainer>
    </React.Fragment>
  );
}
6. Now guy’s we need to create `Orders.js` file inside reactdemo/src folder and add below code inside it:
import React from 'react';
import Link from '@material-ui/core/Link';
import { makeStyles } from '@material-ui/core/styles';
import Table from '@material-ui/core/Table';
import TableBody from '@material-ui/core/TableBody';
import TableCell from '@material-ui/core/TableCell';
import TableHead from '@material-ui/core/TableHead';
import TableRow from '@material-ui/core/TableRow';
import Title from './Title';

// Generate Order Data
function createData(id, date, name, shipTo, paymentMethod, amount) {
  return { id, date, name, shipTo, paymentMethod, amount };
}

const rows = [
  createData(0, '16 July, 2021', 'Elvis Presley', 'Tupelo, MS', 'VISA ⠀•••• 3719', 312.44),
  createData(1, '16 July, 2021', 'Paul McCartney', 'London, UK', 'VISA ⠀•••• 2574', 866.99),
  createData(2, '16 July, 2021', 'Tom Scholz', 'Boston, MA', 'MC ⠀•••• 1253', 100.81),
  createData(3, '16 July, 2021', 'Michael Jackson', 'Gary, IN', 'AMEX ⠀•••• 2000', 654.39),
  createData(4, '15 July, 2021', 'Bruce Springsteen', 'Long Branch, NJ', 'VISA ⠀•••• 5919', 212.79),
];

function preventDefault(event) {
  event.preventDefault();
}

const useStyles = makeStyles((theme) => ({
  seeMore: {
    JulyginTop: theme.spacing(3),
  },
}));

export default function Orders() {
  const classes = useStyles();
  return (
    <React.Fragment>
      <Title>Recent Orders</Title>
      <Table size="small">
        <TableHead>
          <TableRow>
            <TableCell>Date</TableCell>
            <TableCell>Name</TableCell>
            <TableCell>Ship To</TableCell>
            <TableCell>Payment Method</TableCell>
            <TableCell align="right">Sale Amount</TableCell>
          </TableRow>
        </TableHead>
        <TableBody>
          {rows.map((row) => (
            <TableRow key={row.id}>
              <TableCell>{row.date}</TableCell>
              <TableCell>{row.name}</TableCell>
              <TableCell>{row.shipTo}</TableCell>
              <TableCell>{row.paymentMethod}</TableCell>
              <TableCell align="right">{row.amount}</TableCell>
            </TableRow>
          ))}
        </TableBody>
      </Table>
      <div className={classes.seeMore}>
        <Link color="priJulyy" href="#" onClick={preventDefault}>
          See more orders
        </Link>
      </div>
    </React.Fragment>
  );
}
7. Now guy’s we need to create `Deposits.js` file inside reactdemo/src folder and add below code inside it:
import React from 'react';
import Link from '@material-ui/core/Link';
import { makeStyles } from '@material-ui/core/styles';
import Typography from '@material-ui/core/Typography';
import Title from './Title';

function preventDefault(event) {
  event.preventDefault();
}

const useStyles = makeStyles({
  depositContext: {
    flex: 1,
  },
});

export default function Deposits() {
  const classes = useStyles();
  return (
    <React.Fragment>
      <Title>Recent Deposits</Title>
      <Typography component="p" variant="h4">
        $3,024.00
      </Typography>
      <Typography color="textSecondary" className={classes.depositContext}>
        on 30 July, 2021
      </Typography>
      <div>
        <Link color="primary" href="#" onClick={preventDefault}>
          View balance
        </Link>
      </div>
    </React.Fragment>
  );
}
8. Now guy’s we need to create `Title.js` file inside reactdemo/src folder and add below code inside it:
import React from 'react';
import PropTypes from 'prop-types';
import Typography from '@material-ui/core/Typography';

export default function Title(props) {
  return (
    <Typography component="h2" variant="h6" color="primary" gutterBottom>
      {props.children}
    </Typography>
  );
}

Title.propTypes = {
  children: PropTypes.node,
};
Now we are done friends. If you have any kind of query or suggestion or any requirement then feel free to comment below.
Note: Friends, I just tell the basic setup and things, you can change the code according to your requirements.
I will appreciate that if you will tell your views for this post. Nothing matters if your views will be good or bad.
Jassa
Thanks
Leave a Reply