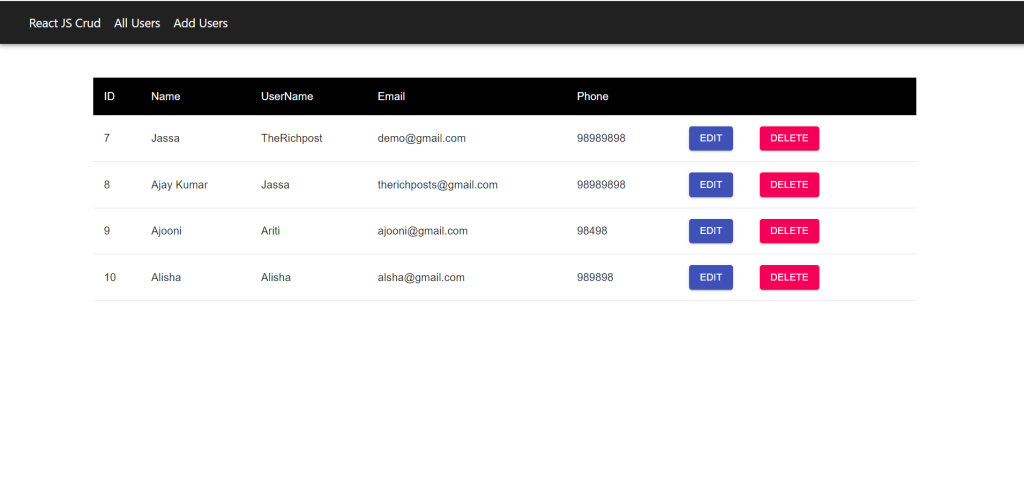
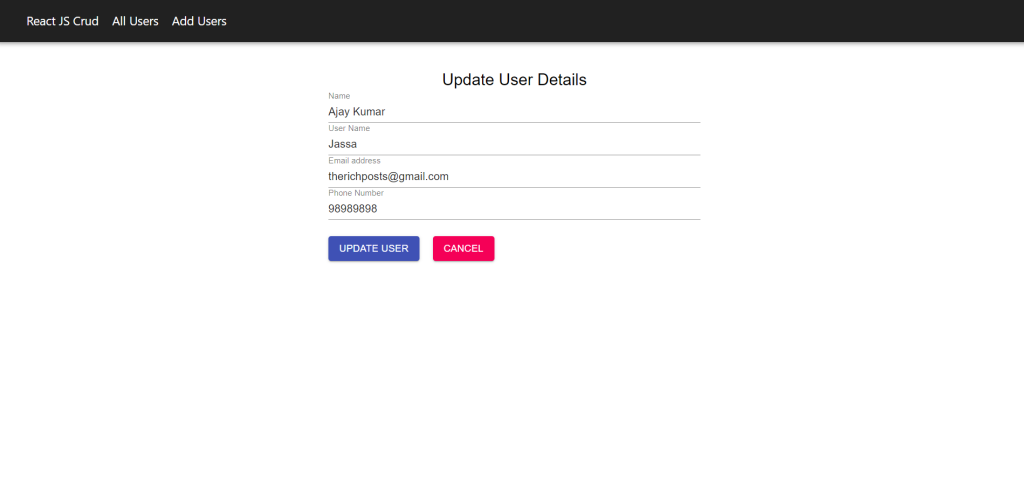
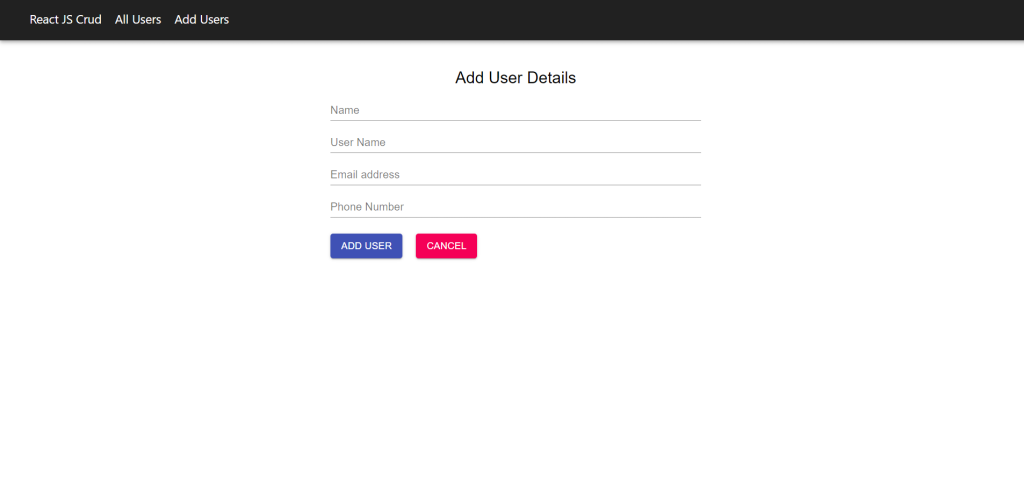
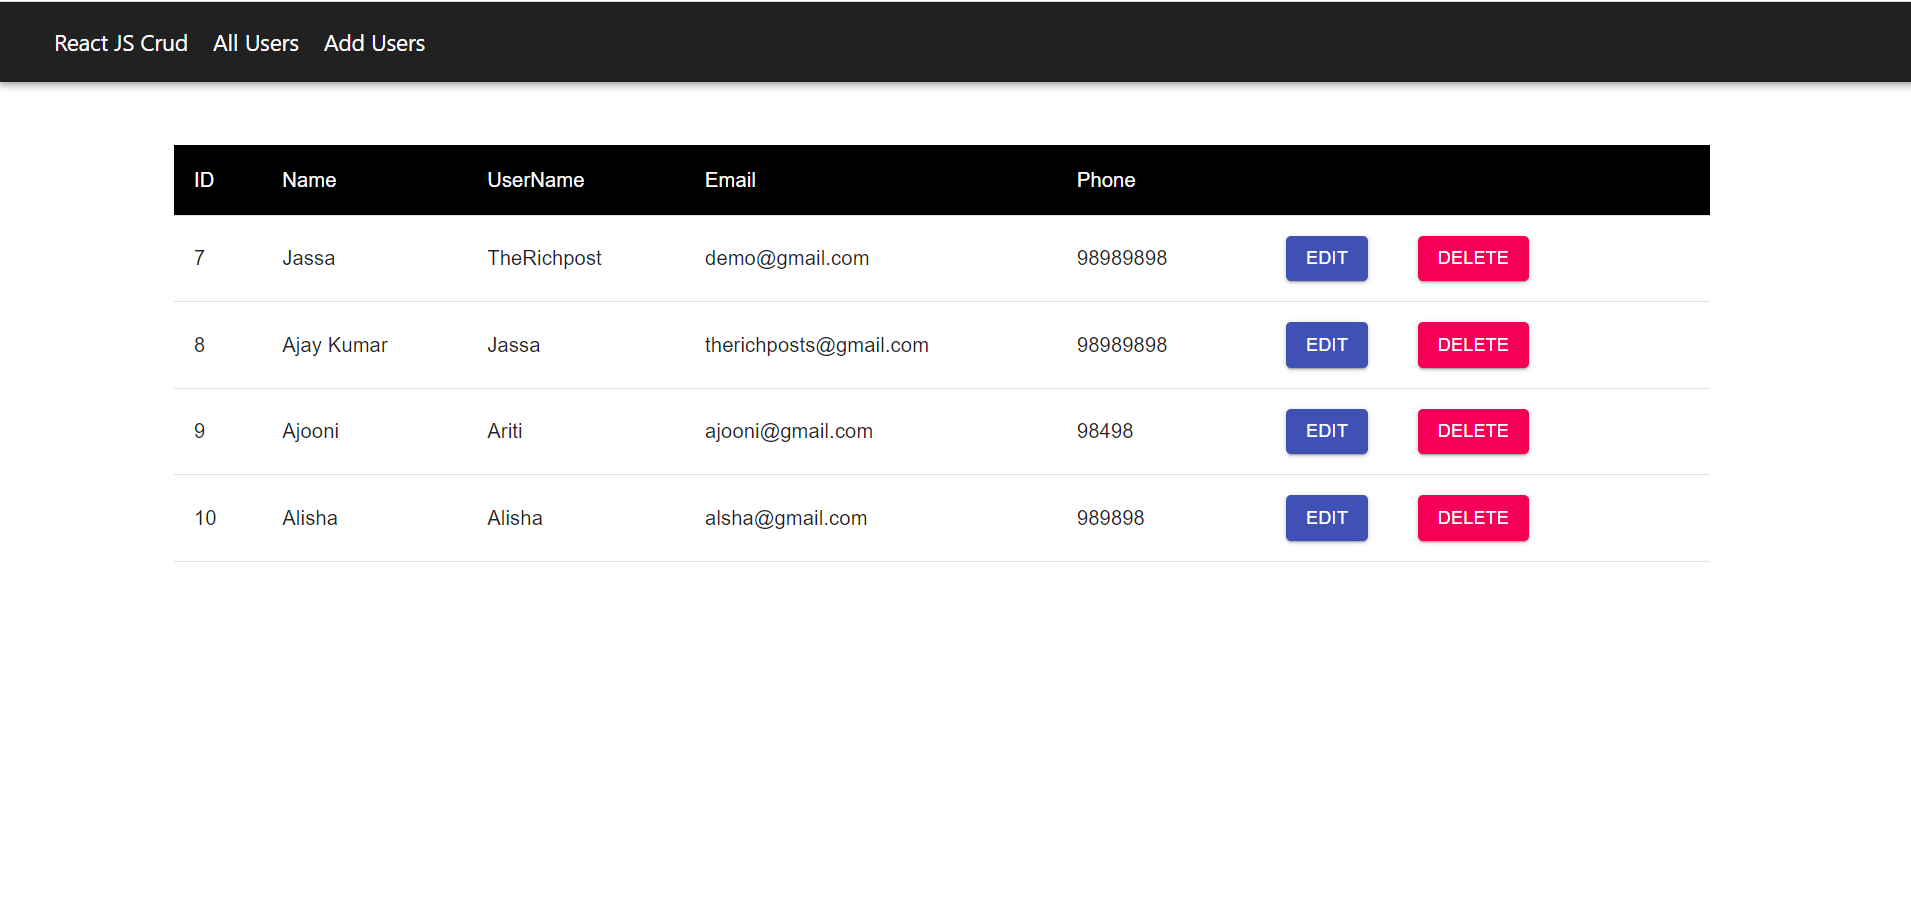
Hello friends, welcome back to my blog. Today this blog post will tell you React Crud Using Json Server & Material UI Working Example.
Key Features:
- Reactjs + Material Ui
- Json Server
- React Routing
- Axios APi Service
- React Crud
For React new comers, please check the below link:


Friends here is the code snippet for How to upload, preview and save image inside folder in react js? and please use this code snippet carefully to avoid the mistakes:
1. Firstly friends we need fresh reactjs setup and for that we need to run below commands into our terminal and also w should have latest node version installed on our system:
npx create-react-app reactdemo

cd reactdemo

npm i react-router-dom

npm i react-axios

npm i @material-ui/core

npm i json-server

npm start // run the project
2. Now guys create `Components` folder inside src folder and create below files:
AddUser.jsx

AllUsers.jsx

EditUser.jsx

Home.jsx

Navbar.jsx

NotFound.jsx
3. Now guys add below code inside src/Components/AddUser.jsx file:
import React, { useState } from 'react';
import { Container, Typography, FormControl, InputLabel, Input, Box, FormGroup, Button } from '@material-ui/core';
import { addUser } from '../service/api';
import { useHistory } from 'react-router-dom';

const initialValue = {
    name: "",
    username : "",
    email: "",
    phone: "",
}

const AddUser = () => {

    const [user, setUser] = useState(initialValue);
    const {name, username, email, phone} = user;

    const history = useHistory();

    const onValueChange = (e) =>
    {
      //  console.log(e);
      // console.log(e.target.value);
        setUser({...user, [e.target.name]: e.target.value});
       console.log(user);
    }

    const addUserDetails = async () =>{
       await addUser(user);
       history.push('/all');
    }

    return (
        <Container maxWidth="sm">
            <Box my={5}>
            <Typography variant="h5" align="center">Add User Details</Typography>
            <FormGroup>
                <FormControl>
                    <InputLabel>Name</InputLabel>
                    <Input onChange={(e) => onValueChange(e)} name="name" value={name} />
                </FormControl>
                <FormControl>
                    <InputLabel>User Name</InputLabel>
                    <Input onChange={(e) => onValueChange(e)} name="username" value={username} />
                </FormControl>
                <FormControl>
                    <InputLabel>Email address</InputLabel>
                    <Input onChange={(e) => onValueChange(e)} name="email" value={email} />
                </FormControl>
                <FormControl>
                    <InputLabel>Phone Number</InputLabel>
                    <Input onChange={(e) => onValueChange(e)} name="phone" value={phone} />
                </FormControl>
                <Box my={3}>
                    <Button variant="contained" onClick={() => addUserDetails() } color="primary" align="center">Add User</Button>
                    <Button onClick={()=> history.push("/all")} variant="contained" color="secondary" align="center" style={{margin: '0px 20px'}}>Cancel</Button>
                </Box>
            </FormGroup>
            </Box>
        </Container>
    )
}


export default AddUser;
4. Now guys add below code inside src/Components/AllUsers.jsx file:
import React, { useEffect, useState } from 'react';
import { Table, TableCell, TableRow, TableHead, TableBody, makeStyles, Button } from '@material-ui/core';
import { deleteUser ,getallUsers } from '../service/api';
import { Link } from 'react-router-dom';

const useStyle = makeStyles({
    table: {
        width: '80%',
        margin: '50px 100px 100px 140px',
    },
    thead:{
        '& > *':{
            background: '#000000',
            color:'#FFFFFF',
            fontSize: '16px'
        }
    },
    trow:{
        '& > *':{
            fontSize: '16px'
        }
    }
})

const AllUsers = () => {

    const classes = useStyle();

    const [user, setUser] = useState([]);
    useEffect(() => {
        getUsers();
    }, [])

    const getUsers = async () =>{
        const response = await getallUsers();
        console.log(response);
        setUser(response.data);
    }

    const deleteData = async (id) => {
        await deleteUser(id);
        getUsers();
    }

    return (
        <Table className={classes.table}>
            <TableHead>
                <TableRow className={classes.thead}>
                    <TableCell>ID</TableCell>
                    <TableCell>Name</TableCell>
                    <TableCell>UserName</TableCell>
                    <TableCell>Email</TableCell>
                    <TableCell>Phone</TableCell>
                    <TableCell></TableCell>
                </TableRow>
            </TableHead>
            <TableBody>
            {
                user.map((data) => (
                    <TableRow className={classes.trow}>
                        <TableCell>{data.id}</TableCell>
                        <TableCell>{data.name}</TableCell>
                        <TableCell>{data.username}</TableCell>
                        <TableCell>{data.email}</TableCell>
                        <TableCell>{data.phone}</TableCell>
                        <TableCell>
                            <Button variant="contained" color="primary" style={{margin: '0px 20px'}} component={Link} to={`/edit/${data.id}`}>Edit</Button>
                            <Button variant="contained" color="secondary" style={{margin: '0px 20px'}} onClick={() => deleteData(data.id)}>Delete</Button>
                        </TableCell>
                    </TableRow>
                ))
            }
            </TableBody>
        </Table>
    )
}

export default AllUsers;
5. Now guys add below code inside src/Components/EditUser.jsx file:
import React, { useEffect, useState } from 'react';
import { Container, Typography, FormControl, InputLabel, Input, Box, FormGroup, Button } from '@material-ui/core';
import { editUser, getallUsers } from '../service/api';
import { useHistory, useParams } from 'react-router-dom';

const initialValue = {
    name: "",
    username : "",
    email: "",
    phone: "",
}

const EditUser = () => {

    const [user, setUser] = useState(initialValue);
    const {name, username, email, phone} = user;

    const { id } = useParams();

    useEffect(() => {
        loadUserData();
    },[]);

    const loadUserData = async () =>{
        const response = await getallUsers(id);
        setUser(response.data);
    }

    const history = useHistory();

    const onValueChange = (e) =>
    {
      //  console.log(e);
      // console.log(e.target.value);
        setUser({...user, [e.target.name]: e.target.value});
        console.log(user);
    }

    const editUserDetails = async () =>{
       await editUser(id,user);
       history.push('/all');
    }

    return (
        <Container maxWidth="sm">
            <Box my={5}>
            <Typography variant="h5" align="center">Update User Details</Typography>
            <FormGroup>
                <FormControl>
                    <InputLabel>Name</InputLabel>
                    <Input onChange={(e) => onValueChange(e)} name="name" value={name} />
                </FormControl>
                <FormControl>
                    <InputLabel>User Name</InputLabel>
                    <Input onChange={(e) => onValueChange(e)} name="username" value={username} />
                </FormControl>
                <FormControl>
                    <InputLabel>Email address</InputLabel>
                    <Input onChange={(e) => onValueChange(e)} name="email" value={email} />
                </FormControl>
                <FormControl>
                    <InputLabel>Phone Number</InputLabel>
                    <Input onChange={(e) => onValueChange(e)} name="phone" value={phone} />
                </FormControl>
                <Box my={3}>
                    <Button variant="contained" onClick={() => editUserDetails() } color="primary" align="center">Update User</Button>
                    <Button onClick={()=> history.push("/all")} variant="contained" color="secondary" align="center" style={{margin: '0px 20px'}}>Cancel</Button>
                </Box>
            </FormGroup>
            </Box>
        </Container>
    )
}


export default EditUser;
6. Now guys add below code inside src/Components/Home.jsx file:
import React from 'react';
import { Container, Typography, Box } from '@material-ui/core';


const Home = () => {
    return (
        <Container maxWidth="lg">
            <Box my={5}>
            <Typography variant="h3" component="h2" align="center">React JS Crud</Typography>
            <Typography component="h2" align="center">Using Json Server</Typography>
            </Box>
        </Container>
    )
}

export default Home;
7. Now guys add below code inside src/Components/Navbar.jsx file:
import React from 'react';
import { AppBar, makeStyles, Toolbar } from '@material-ui/core';
import { NavLink } from 'react-router-dom';

const useStyles = makeStyles({
    header: {
        backgroundColor: '#212121',
    },
    spacing :{
        paddingLeft: 20,
        color: '#fff',
        fontSize: '18px',
        textDecoration: 'none',
    }
  });

const Navbar = () => {
    const classes = useStyles();
    return (
        <AppBar className={classes.header} position="static">
            <Toolbar >
                <NavLink to="/" className={classes.spacing}> React JS Crud</NavLink>
                <NavLink to="all" className={classes.spacing}> All Users</NavLink>
                <NavLink to="add" className={classes.spacing}> Add Users</NavLink>
            </Toolbar>
        </AppBar>
    )
}

export default Navbar;
8. Now guys add below code inside src/Components/NotFound.jsx file:
import React from 'react';
import { makeStyles } from '@material-ui/core';
import notfound from './../Assets/Images/pngegg.png';
const useStyles = makeStyles({
    error: {
        textAlign: 'center',
        marginTop: '20px',
        marginBottom: '20px',
    },
  });

const NotFound = () => {
    const classes = useStyles();
    return (
        <div className={classes.error}>
            <img src={notfound} style={{width:'800px',height:'550px'}} alt="not found"/>
        </div>
    )
}

export default NotFound;
9. Now guys create `Database` folder inside src folder and create db.json file and add below code inside it:
{
  "user": [
    {
      "name": "Jassa",
      "username": "TheRichpost",
      "email": "demo@gmail.com",
      "phone": "98989898",
      "id": 7
    },
    {
      "name": "Ajay Kumar",
      "username": "Jassa",
      "email": "therichposts@gmail.com",
      "phone": "98989898",
      "id": 8
    },
    {
      "name": "Ajooni",
      "username": "Ariti",
      "email": "ajooni@gmail.com",
      "phone": "98498",
      "id": 9
    },
    {
      "name": "Alisha",
      "username": "Alisha",
      "email": "alsha@gmail.com",
      "phone": "989898",
      "id": 10
    }
  ]
}
10. Now guys create `service` folder inside src folder and create api.js file and add below code inside it:
import axios from 'axios';


const url = "http://127.0.0.1:3003/user";

export const getallUsers = async (id) => {
    id = id || '';
    return await axios.get(`${url}/${id}`);
}

export const addUser = async (user) => {
    return await axios.post(url,user);
}

export const editUser = async (id, user) => {
    return await axios.put(`${url}/${id}`,user);
}


export const deleteUser = async (id) => {
    return await axios.delete(`${url}/${id}`);
}
11. Now guys add below code inside src/App.css file:
.App {
  text-align: center;
}

.App-logo {
  height: 40vmin;
  pointer-events: none;
}

@media (prefers-reduced-motion: no-preference) {
  .App-logo {
    animation: App-logo-spin infinite 20s linear;
  }
}

.App-header {
  background-color: #282c34;
  min-height: 100vh;
  display: flex;
  flex-direction: column;
  align-items: center;
  justify-content: center;
  font-size: calc(10px + 2vmin);
  color: white;
}

.App-link {
  color: #61dafb;
}

@keyframes App-logo-spin {
  from {
    transform: rotate(0deg);
  }
  to {
    transform: rotate(360deg);
  }
}
12. Now guys add below code inside src/App.js file:
import './App.css';
import Navbar from  './Components/Navbar';
import Home from './Components/Home';
import AllUsers from './Components/AllUsers';
import AddUser from './Components/AddUser';
import EditUser from './Components/EditUser';
import NotFound from './Components/NotFound';
import { BrowserRouter as Router, Route, Switch } from 'react-router-dom';

function App() {
  return (
    <Router>
      <Navbar />
      <Switch>
        <Route path="/" component={Home} exact />
        <Route path="/all" component={AllUsers} exact />
        <Route path="/add" component={AddUser} exact />
        <Route path="/edit/:id" component={EditUser} exact />
        <Route component={NotFound} />
      </Switch>
    </Router>
  );
}

export default App;
13. Now guys add below code inside project/package.json file:
...
scripts": {
   ...
    "json-server": "json-server --watch src/Database/db.json --host 127.0.0.1 --port 3003",

  },
...
14. Now guys create Assets folder inside src folder and then create Images folder src/Assetts folder and add images from below git repo link:
15. Guys to run json server please run below command inside your terminal as well:
yarn json-server
Now we are done friends. If you have any kind of query or suggestion or any requirement then feel free to comment below.
Note: Friends, I just tell the basic setup and things, you can change the code according to your requirements. For better understanding must watch video above.
I will appreciate that if you will tell your views for this post. Nothing matters if your views will good or bad.
Jassa
Thanks

Leave a Reply
You must be logged in to post a comment.