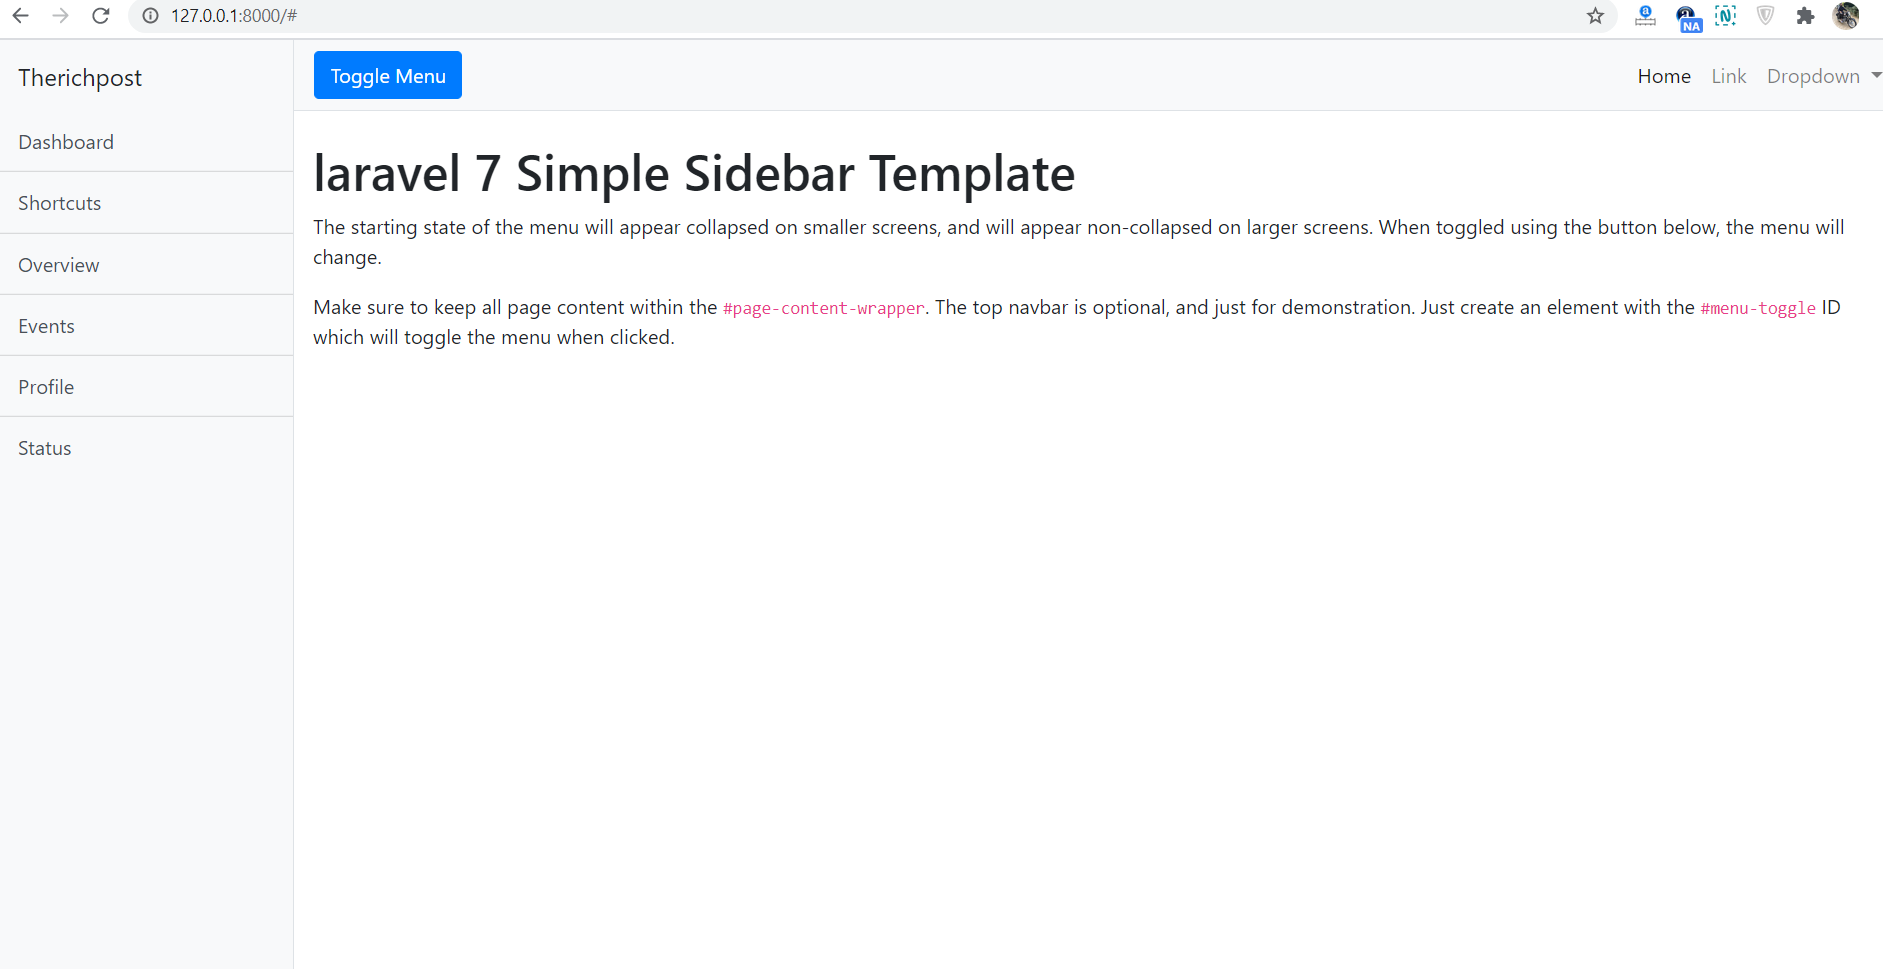
Hello friends, welcome back to my blog. Today in this blog post, I am going to show you, Laravel 8 Sidebar Responsive Template.
Guys please check below link for more laravel 8 posts:
Friends now I proceed onwards and here is the working code snippet and please use this carefully to avoid the mistakes:
1. Now friends, here is the complete working code snippet and I have added inside my laravel 8 projectname/resources/views/ welcome.blade.php file for showing you working example but you can add according to your requirement:
I have added bootstrap and jquery cdn’s for template working
<!DOCTYPE html>
<html lang="{{ str_replace('_', '-', app()->getLocale()) }}">
    <head>
        <meta charset="utf-8">
        <meta name="viewport" content="width=device-width, initial-scale=1">

        <title>Laravel</title>

        <!-- Fonts -->
        <link href="https://fonts.googleapis.com/css?family=Nunito:200,600" rel="stylesheet">

        <link rel="stylesheet" href="https://maxcdn.bootstrapcdn.com/bootstrap/4.5.2/css/bootstrap.min.css">
        <script src="https://ajax.googleapis.com/ajax/libs/jquery/3.5.1/jquery.min.js"></script>
        <script src="https://cdnjs.cloudflare.com/ajax/libs/popper.js/1.16.0/umd/popper.min.js"></script>
        <script src="https://maxcdn.bootstrapcdn.com/bootstrap/4.5.2/js/bootstrap.min.js"></script>
        <script>
        jQuery(document).ready(function($){
            $("#menu-toggle").click(function(e) {
            e.preventDefault();
            $("#wrapper").toggleClass("toggled");
            });
        })
        </script>
        <style>
            body {
        overflow-x: hidden;
        }

        #sidebar-wrapper {
        min-height: 100vh;
        margin-left: -15rem;
        -webkit-transition: margin .25s ease-out;
        -moz-transition: margin .25s ease-out;
        -o-transition: margin .25s ease-out;
        transition: margin .25s ease-out;
        }

        #sidebar-wrapper .sidebar-heading {
        padding: 0.875rem 1.25rem;
        font-size: 1.2rem;
        }

        #sidebar-wrapper .list-group {
        width: 15rem;
        }

        #page-content-wrapper {
        min-width: 100vw;
        }

        #wrapper.toggled #sidebar-wrapper {
        margin-left: 0;
        }

        @media (min-width: 768px) {
        #sidebar-wrapper {
            margin-left: 0;
        }

        #page-content-wrapper {
            min-width: 0;
            width: 100%;
        }

        #wrapper.toggled #sidebar-wrapper {
            margin-left: -15rem;
        }
        }
        </style>
    </head>
    <body>
        <div class="d-flex" id="wrapper">

        <!-- Sidebar -->
        <div class="bg-light border-right" id="sidebar-wrapper">
        <div class="sidebar-heading">Therichpost </div>
        <div class="list-group list-group-flush">
            <a href="#" class="list-group-item list-group-item-action bg-light">Dashboard</a>
            <a href="#" class="list-group-item list-group-item-action bg-light">Shortcuts</a>
            <a href="#" class="list-group-item list-group-item-action bg-light">Overview</a>
            <a href="#" class="list-group-item list-group-item-action bg-light">Events</a>
            <a href="#" class="list-group-item list-group-item-action bg-light">Profile</a>
            <a href="#" class="list-group-item list-group-item-action bg-light">Status</a>
        </div>
        </div>
        <!-- /#sidebar-wrapper -->

        <!-- Page Content -->
        <div id="page-content-wrapper">

        <nav class="navbar navbar-expand-lg navbar-light bg-light border-bottom">
            <button class="btn btn-primary" id="menu-toggle">Toggle Menu</button>

            <button class="navbar-toggler" type="button" data-toggle="collapse" data-target="#navbarSupportedContent" aria-controls="navbarSupportedContent" aria-expanded="false" aria-label="Toggle navigation">
            <span class="navbar-toggler-icon"></span>
            </button>

            <div class="collapse navbar-collapse" id="navbarSupportedContent">
            <ul class="navbar-nav ml-auto mt-2 mt-lg-0">
                <li class="nav-item active">
                <a class="nav-link" href="#">Home <span class="sr-only">(current)</span></a>
                </li>
                <li class="nav-item">
                <a class="nav-link" href="#">Link</a>
                </li>
                <li class="nav-item dropdown">
                <a class="nav-link dropdown-toggle" href="#" id="navbarDropdown" role="button" data-toggle="dropdown" aria-haspopup="true" aria-expanded="false">
                    Dropdown
                </a>
                <div class="dropdown-menu dropdown-menu-right" aria-labelledby="navbarDropdown">
                    <a class="dropdown-item" href="#">Action</a>
                    <a class="dropdown-item" href="#">Another action</a>
                    <div class="dropdown-divider"></div>
                    <a class="dropdown-item" href="#">Something else here</a>
                </div>
                </li>
            </ul>
            </div>
        </nav>

        <div class="container-fluid">
            <h1 class="mt-4">laravel 8 Simple Sidebar Template</h1>
            <p>The starting state of the menu will appear collapsed on smaller screens, and will appear non-collapsed on larger screens. When toggled using the button below, the menu will change.</p>
            <p>Make sure to keep all page content within the <code>#page-content-wrapper</code>. The top navbar is optional, and just for demonstration. Just create an element with the <code>#menu-toggle</code> ID which will toggle the menu when clicked.</p>
        </div>
        </div>
        <!-- /#page-content-wrapper -->

        </div>
        <!-- /#wrapper -->
    </body>
</html>
Now we are done friends. If you have any kind of query, suggestion and new requirement then feel free to comment below.
Note: Friends, In this post, I just tell the basic setup and things, you can change the code according to your requirements. For better live working experience, please check the video on the top.
I will appreciate that if you will tell your views for this post. Nothing matters if your views will be good or bad because with your views, I will make my next posts more good and helpful.
Jassa
Thanks

Leave a Reply
You must be logged in to post a comment.