Hello my friends, welcome back to my blog and today in this blog post, I am going to tell you, Ionic 5 Angular 12 Services User Registration with PHP MySQL.
Guys with this post we will do below things:
- Ionic 5 with Angular 12.
- Add Bootstrap 5 in Ionic 5.
- Create services in Ionic 5.
- Ionic 5 Reactive forms validation.
- Open Ionic 5 modal pop after form submission.
Guys here you can see working video:

Guys please check the below links for more Ionic 5 and Angular 12 tutorials:
Friends here is the working code snippet and please use this carefully:
1. Firstly friends we need fresh IONIC 5 and ANGULAR 12 setup and for this we need to run below commands and during installation please select angular. Secondly we should also have latest node version installed on our system:
I am using blank template for easy understanding:
npm install -g @ionic/cli

ionic start myApp blank

cd myApp

npm i bootstrap

ng g service crud
2. Guy’s now we need to add below code inside myApp/angular.json file:
"styles": [
          ...
          "node_modules/bootstrap/dist/css/bootstrap.min.css"],
3. Guy’s now we need to add below code inside myApp/src/app/app.module.ts file:
...
import { HttpClientModule } from '@angular/common/http';

@NgModule({
 ...
  imports: [
         ...
         HttpClientModule],
  ...
})
export class AppModule {}
4. Guy’s now we need to add below code inside myApp/src/app/crud.service.ts file:
...
import { HttpClient } from '@angular/common/http';
@Injectable({
  providedIn: 'root'
})
export class CrudService {
  userData:any;
  constructor(private http:HttpClient) { }


  //add new user
  public adduser(userData)
  {
    return this.http.post('http://localhost/users.php/'
  , userData).subscribe((res: Response) => {

  });
  }

}
5. Guy’s now we need to add below code inside myApp/src/app/home/home.module.ts file:
...

import { ReactiveFormsModule } from '@angular/forms';
import { HttpClientModule } from '@angular/common/http';


@NgModule({
  imports: [
  ...
    ReactiveFormsModule,
    HttpClientModule

  ],
  declarations: [HomePage]
})
export class HomePageModule {}
6. Guy’s now we need to add below code inside myApp/src/app/home/home.page.ts file:
import { Component } from '@angular/core';
import { FormBuilder, FormGroup, Validators } from '@angular/forms';
import { CrudService } from '../crud.service';
import { AlertController } from '@ionic/angular';

@Component({
  selector: 'app-home',
  templateUrl: 'home.page.html',
  styleUrls: ['home.page.scss'],
})
export class HomePage {

  registerForm: FormGroup;
  submitted = false;
  constructor( private crudservice: CrudService, private formBuilder: FormBuilder, public alertController: AlertController){}
  //Add user form actions
  async presentAlert() {
    const alert = await this.alertController.create({
      header: 'Great!!',
      message: 'User has been registered.',
      buttons: ['OK']
    });

    await alert.present();


  }
  get f() { return this.registerForm.controls; }
  onSubmit() {

     this.submitted = true;
    // stop here if form is invalid
    if (this.registerForm.invalid) {
        return;
    }
    //True if all the fields are filled
    if(this.submitted)
    {

      // Initialize Params Object
      var myFormData = new FormData();

    // Begin assigning parameters

        myFormData.append('myUsername', this.registerForm.value.firstname);
        myFormData.append('myEmail', this.registerForm.value.email);
        myFormData.append('myPass', this.registerForm.value.password);

        this.crudservice.adduser(myFormData); //caaling add user service
        this.presentAlert();

    }

  }
    ngOnInit() {
      //Add User form validations
      this.registerForm = this.formBuilder.group({
      email: ['', [Validators.required, Validators.email]],

      firstname: ['', [Validators.required]],
      password: ['', [Validators.required]]
      });
    }


}
7. Guy’s now we need to add below code inside myApp/src/app/home/home.page.html file:
<ion-content [fullscreen]="true">
<div class="page-holder align-items-center py-4 bg-gray-100 vh-100">
<div class="container">
<div class="row align-items-center">
<!-- register -->
<div class="col-lg-6 px-lg-4">
<div class="card">
<div class="card-header px-lg-5">
<div class="card-heading text-primary">Jassa Register</div>
</div>
<div class="card-body p-lg-5">
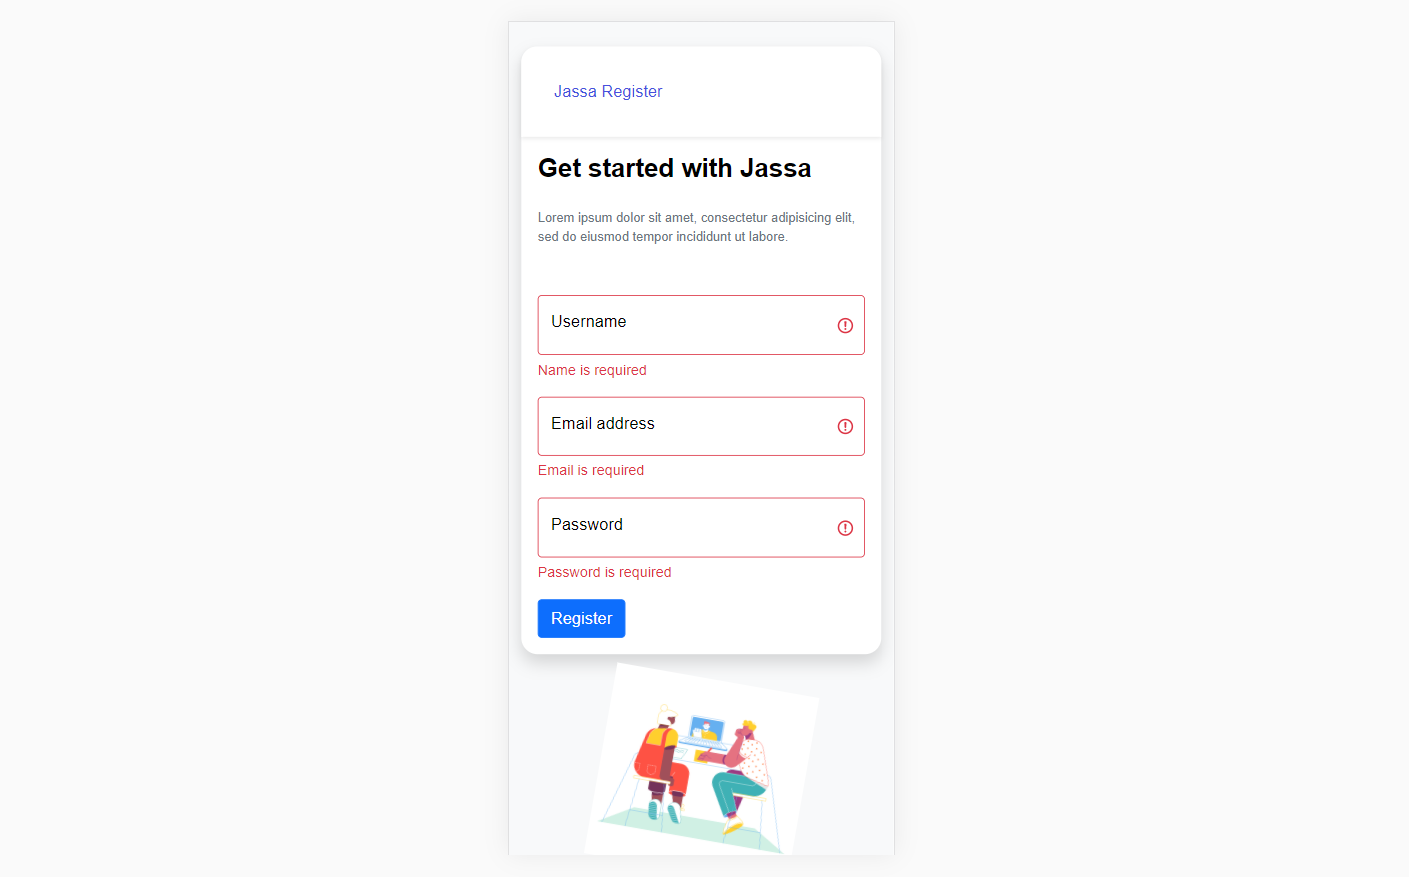
<h3 class="mb-4">Get started with Jassa</h3>
<p class="text-muted text-sm mb-5">Lorem ipsum dolor sit amet, consectetur adipisicing elit, sed do eiusmod tempor incididunt ut labore.</p>
<form [formGroup]="registerForm" (ngSubmit)="onSubmit()">
<div class="form-floating mb-3">
<input id="username" type="text" placeholder="Username" formControlName="firstname" class="form-control" [ngClass]="{ 'is-invalid': submitted && f.firstname.errors }" />
<div *ngIf="submitted && f.firstname.errors" class="invalid-feedback">
<div *ngIf="f.firstname.errors.required">Name is required</div>
</div>
<label for="username">Username</label>
</div>
<div class="form-floating mb-3">
<input id="floatingInput" type="text" placeholder="name@example.com" formControlName="email" class="form-control" [ngClass]="{ 'is-invalid': submitted && f.email.errors }" />
<div *ngIf="submitted && f.email.errors" class="invalid-feedback">
<div *ngIf="f.email.errors.required">Email is required</div>
<div *ngIf="f.email.errors.email">Email must be a valid email address</div>
</div>
<label for="floatingInput">Email address</label>
</div>
<div class="form-floating mb-3">
<input id="floatingPassword" type="password" placeholder="Password" formControlName="password" class="form-control" [ngClass]="{ 'is-invalid': submitted && f.password.errors }" />
<div *ngIf="submitted && f.password.errors" class="invalid-feedback">
<div *ngIf="f.password.errors.required">Password is required</div>
</div>
<label for="floatingPassword">Password</label>
</div>
<div class="form-group">
<button class="btn btn-primary" id="regidter" type="submit" name="registerSubmit">Register</button>
</div>
</form>
</div>
</div>
</div>
<div class="col-lg-6 col-xl-5 ms-xl-auto px-lg-4 text-center text-primary"><img class="img-fluid mb-4 mt-4" width="200" src="https://therichpost.com/wp-content/uploads/2021/06/login_page_image.png" alt="" style="transform: rotate(10deg)">
<h1 class="mb-4">Therichpost.com <br class="d-none d-lg-inline">free code snippets.</h1>
<p class="lead text-muted">Lorem ipsum dolor sit amet, consectetur adipisicing elit, sed do eiusmod tempor incididunt ut labore.</p>
</div>
</div>
</div>
</div>
</ion-content>
8. Guy’s now we need to add below code inside myApp/src/app/home/home.page.scss file:
@import url("https://fonts.googleapis.com/css2?family=Poppins:wght@300;400;500;700&display=swap");
.card-header:first-child {
    border-radius: calc(1rem - 1px) calc(1rem - 1px) 0 0;
    }
    .card-header {
    position: relative;
    padding: 2rem 2rem;
    border-bottom: none;
    background-color: white;
    box-shadow: 0 0.125rem 0.25rem rgb(0 0 0 / 8%);
    z-index: 2;
    }
    .card {
    position: relative;
    display: flex;
    flex-direction: column;
    min-width: 0;
    word-wrap: break-word;
    background-color: #fff;
    background-clip: border-box;
    border: none;
    box-shadow: 0 0.5rem 1rem rgb(0 0 0 / 15%);
    border-radius: 1rem;
    }
    .bg-gray-100 {
    background-color: #f8f9fa !important;
    }
    body{
    font-family: 'Poppins'!important;
    }
    .text-primary {
    color: #4650dd !important;
    }
    h1, .h1, h2, .h2, h3, .h3, h4, .h4, h5, .h5, h6, .h6 {

    font-weight: 700;
    line-height: 1.2;
    }
    .text-muted {
    color: #6c757d !important;
    }
    .lead {
    font-size: 1.125rem;
    font-weight: 300;
    }
    .text-sm {
    font-size: .7875rem !important;
    }
    h3, .h3 {
    font-size: 1.575rem;
    }
    .page-holder {
    display: flex;
    overflow-x: hidden;
    width: 100%;
    min-height: calc(100vh - 72px);

    flex-wrap: wrap;
    }
    a {
    color: #4650dd!important;
    text-decoration: underline!important;
    cursor: pointer;
    }
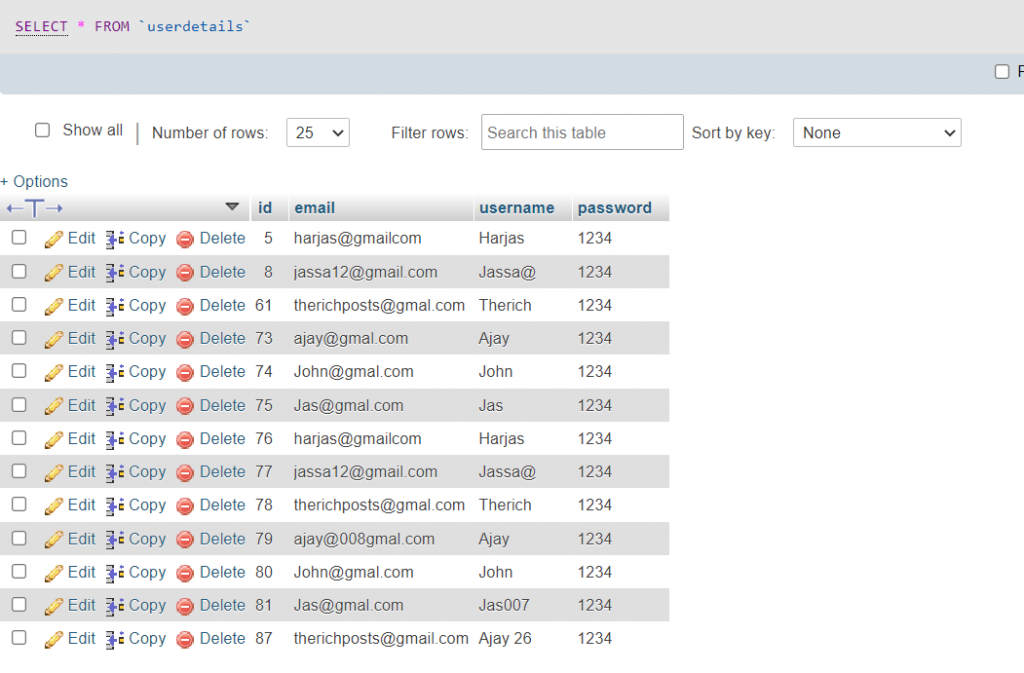
9. Now guys, now we need to create file users.php inside our xampp/htdocs folder and add below code inside users.php file:
Please create users database inside phpmysql admin and create userdetails tabel and create id, email, username, password fields.
<?php header('Access-Control-Allow-Origin: *');
header('Access-Control-Allow-Credentials: true');
header('Access-Control-Allow-Methods:POST,GET,PUT,DELETE');
header('Access-Control-Allow-Headers: content-type or other');
header('Content-Type: application/json');

//Please create users database inside phpmysql admin and create userdetails tabel and create id, email and username fields

$servername = "localhost";
$username   = "root";
$password   = "";
$dbname     = "users";
// Create connection
$conn = new mysqli($servername, $username, $password, $dbname);
// Check connection
if ($conn->connect_error) {
    die("Connection failed: " . $conn->connect_error);
}

//Add user
if(isset($_POST['myEmail']))
{
    $sql = "INSERT INTO userdetails (email, username)
        VALUES ('".$_POST['myEmail']."', '".$_POST['myUsername']."')";
    if (mysqli_query($conn,$sql)) {
    $data = array("data" => "You Data added successfully");
        echo json_encode($data);
    } else {
        $data = array("data" => "Error: " . $sql . "<br>" . $conn->error);
        echo json_encode($data);

    }
}

die();
Now in the end please run ionic serve command to check the out on browser(localhost:8100) and also please start your xampp server as well for php mysql.
Guy’s next I will do the crud and if you have any kind of query then please comment below.
Jassa
Thanks
Very good tutorias. I was stuck uploading mutiple parameters from ionic to php. I was already using that a kind of that method. But urs is do easy to apply. I recommend…:)
Thank you so much 🙂
Waiting for you next post 🔥
Keep it up 💯
Yes sure and thanks 🙂
Could this work with Ionic 6.20.1 and angular v14?
Yes