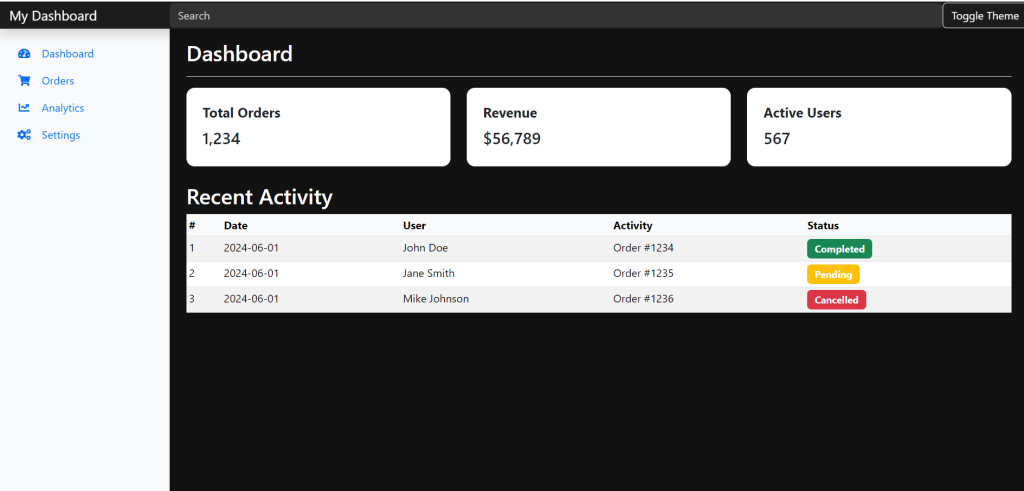
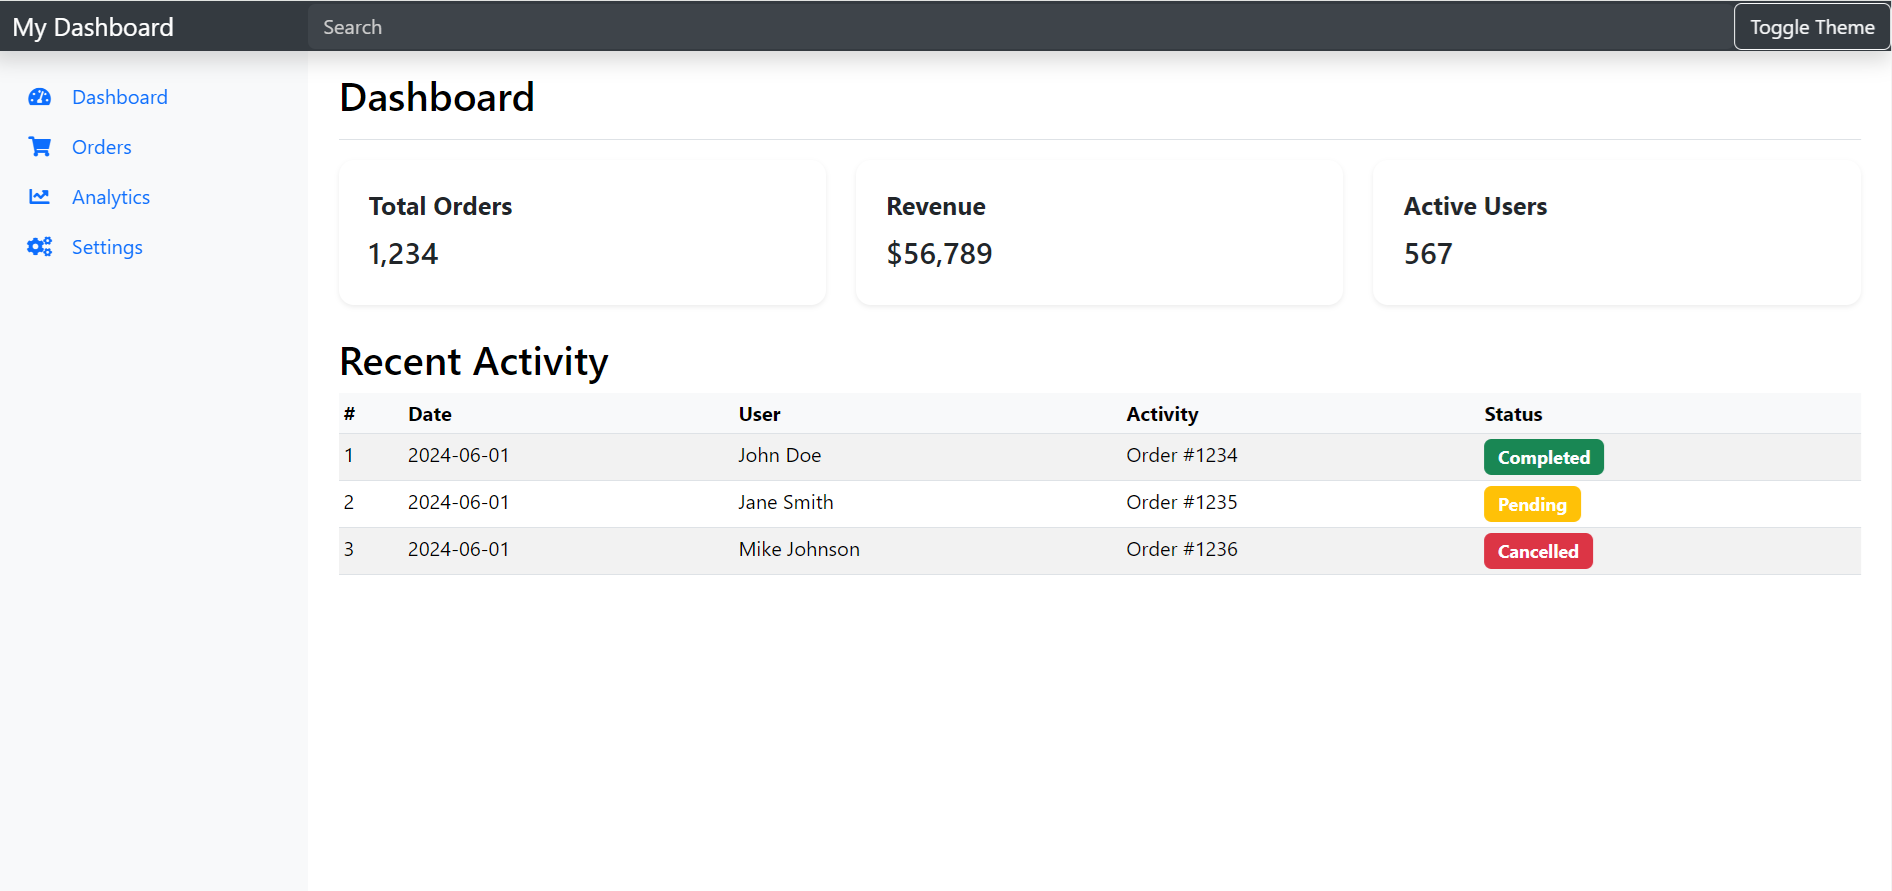
Hello to all, welcome to therichpost.com. In this post, I will tell you, Creating light and dark mode Dashboard with Sidebar menu using Angular 18 Bootstrap 5.
Guy’s Angular 18 came and if you are new in Angular 18 then please check below links:
Here is the working code snippet and please follow carefully:
Creating a light and dark mode dashboard with a sidebar menu using Angular 18 and Bootstrap involves several steps. Here’s a detailed guide to help you achieve this:
1. Set Up Your Angular Project
First, create a new Angular project if you don’t already have one:
ng new dashboard-project
cd dashboard-project
2. Install Bootstrap
Install Bootstrap by running the following command:
npm install bootstrap
Then, add Bootstrap to your angular.json file:
"styles": [
  "node_modules/bootstrap/dist/css/bootstrap.min.css",
  "src/styles.css"
],
"scripts": [
  "node_modules/bootstrap/dist/js/bootstrap.min.js"
]
In the sidebar.component.html, create your sidebar structure:
3. Create Dashboard Component
Generate a dashboard component:
ng generate component dashboard
In the dashboard.component.html, create your dashboard structure:
<div class="container-fluid">
  <div class="row">
    <nav id="sidebarMenu" class="col-md-3 col-lg-2 d-md-block bg-light sidebar collapse">
      <div class="position-sticky pt-3">
        <ul class="nav flex-column">
          <li class="nav-item">
            <a class="nav-link active" aria-current="page" href="#">
              <i class="fas fa-tachometer-alt fa-fw me-3"></i><span>Dashboard</span>
            </a>
          </li>
          <li class="nav-item">
            <a class="nav-link" href="#">
              <i class="fas fa-shopping-cart fa-fw me-3"></i><span>Orders</span>
            </a>
          </li>
          <li class="nav-item">
            <a class="nav-link" href="#">
              <i class="fas fa-chart-line fa-fw me-3"></i><span>Analytics</span>
            </a>
          </li>
          <li class="nav-item">
            <a class="nav-link" href="#">
              <i class="fas fa-cogs fa-fw me-3"></i><span>Settings</span>
            </a>
          </li>
        </ul>
      </div>
    </nav>
    <main class="col-md-9 ms-sm-auto col-lg-10 px-md-4">
      <div class="d-flex justify-content-between flex-wrap flex-md-nowrap align-items-center pt-3 pb-2 mb-3 border-bottom">
        <h1 class="h2">Dashboard</h1>
      </div>
      <div class="content">
        <!-- Your dashboard content here -->
        <div class="row">
          <div class="col-md-4">
            <div class="card mb-4 shadow-sm">
              <div class="card-body">
                <h5 class="card-title">Total Orders</h5>
                <p class="card-text">1,234</p>
              </div>
            </div>
          </div>
          <div class="col-md-4">
            <div class="card mb-4 shadow-sm">
              <div class="card-body">
                <h5 class="card-title">Revenue</h5>
                <p class="card-text">$56,789</p>
              </div>
            </div>
          </div>
          <div class="col-md-4">
            <div class="card mb-4 shadow-sm">
              <div class="card-body">
                <h5 class="card-title">Active Users</h5>
                <p class="card-text">567</p>
              </div>
            </div>
          </div>
        </div>
        <!-- Table Section -->
      <h2>Recent Activity</h2>
      <div class="table-responsive">
        <table class="table table-striped table-sm">
          <thead>
            <tr>
              <th>#</th>
              <th>Date</th>
              <th>User</th>
              <th>Activity</th>
              <th>Status</th>
            </tr>
          </thead>
          <tbody>
            <tr>
              <td>1</td>
              <td>2024-06-01</td>
              <td>John Doe</td>
              <td>Order #1234</td>
              <td><span class="badge bg-success">Completed</span></td>
            </tr>
            <tr>
              <td>2</td>
              <td>2024-06-01</td>
              <td>Jane Smith</td>
              <td>Order #1235</td>
              <td><span class="badge bg-warning">Pending</span></td>
            </tr>
            <tr>
              <td>3</td>
              <td>2024-06-01</td>
              <td>Mike Johnson</td>
              <td>Order #1236</td>
              <td><span class="badge bg-danger">Cancelled</span></td>
            </tr>
          </tbody>
        </table>
      </div>
      </div>
    </main>
  </div>
</div>
In the dashboard.component.css, create your custom styles:
/* dashboard.component.css */
.card {
    border: none;
    border-radius: 0.75rem;
  }

  .card-body {
    padding: 1.5rem;
  }

  .card-title {
    font-size: 1.25rem;
    font-weight: bold;
  }

  .card-text {
    font-size: 1.5rem;
    font-weight: 500;
  }

  .table thead th {
    font-weight: bold;
    background-color: #f8f9fa;
  }

  .table tbody tr {
    transition: background-color 0.3s;
  }

  .table tbody tr:hover {
    background-color: #e9ecef;
  }

  .badge {
    padding: 0.5em 0.75em;
    font-size: 0.9em;
  }
4. Implement Light and Dark Mode
Add a toggle for light and dark mode in your app.component.html:
<header class="navbar navbar-dark sticky-top bg-dark flex-md-nowrap p-0 shadow">
  <a class="navbar-brand col-md-3 col-lg-2 me-0 px-3" href="#">My Dashboard</a>
  <button class="navbar-toggler position-absolute d-md-none collapsed" type="button" data-bs-toggle="collapse" data-bs-target="#sidebarMenu" aria-controls="sidebarMenu" aria-expanded="false" aria-label="Toggle navigation">
    <span class="navbar-toggler-icon"></span>
  </button>
  <input class="form-control form-control-dark w-100" type="text" placeholder="Search" aria-label="Search">
  <div class="navbar-nav">
    <div class="nav-item text-nowrap">
      <button class="btn btn-outline-light" id="themeToggleBtn">Toggle Theme</button>
    </div>
  </div>
</header>
<app-dashboard></app-dashboard>
In your app.component.ts, implement the theme toggle logic:
import { Component, Renderer2, OnInit } from '@angular/core';
import { CommonModule } from '@angular/common';
import { RouterOutlet } from '@angular/router';
import { DashboardComponent } from "./dashboard/dashboard.component";

@Component({
    selector: 'app-root',
    standalone: true,
    templateUrl: './app.component.html',
    styleUrl: './app.component.css',
    imports: [CommonModule, RouterOutlet, DashboardComponent]
})
export class AppComponent implements OnInit {
  constructor(private renderer: Renderer2) {}

  toggleTheme() {
    const theme = document.body.classList.toggle('dark-mode') ? 'dark' : 'light';
    localStorage.setItem('theme', theme);
  }

  ngOnInit() {
    const theme = localStorage.getItem('theme') || 'light';
    if (theme === 'dark') {
      this.renderer.addClass(document.body, 'dark-mode');
    }
    document.getElementById('themeToggleBtn')?.addEventListener('click', () => this.toggleTheme());
  }
}
Add the styles for light and dark modes in styles.css:
body {
    background-color: #fff;
    color: #000;
  }

  header.navbar {
    background-color: #343a40 !important;
  }

  header.navbar .form-control-dark {
    background-color: #3e444a;
    border: none;
    color: #fff;
  }

  header.navbar .form-control-dark::placeholder {
    color: #ccc;
  }

  .navbar-toggler {
    border: none;
  }

  #sidebarMenu {
    min-height: 100vh;
    transition: all 0.3s;
    background-color: #f8f9fa;
  }

  #sidebarMenu .position-sticky {
    position: -webkit-sticky;
    position: sticky;
    top: 0;
    z-index: 100;
    padding-top: 1rem;
    padding-bottom: 1rem;
  }

  #sidebarMenu .list-group-item {
    border: none;
    padding: 0.75rem 1.25rem;
  }

  #sidebarMenu .list-group-item:hover {
    background-color: #e9ecef;
  }

  #sidebarMenu .list-group-item.active {
    background-color: #007bff;
    color: white;
  }

  #sidebarMenu .list-group-item .fas {
    margin-right: 0.5rem;
  }

  /* Dark mode styles */
  body.dark-mode {
    background-color: #121212;
    color: #ffffff;
  }

  body.dark-mode header.navbar {
    background-color: #1c1c1c !important;
  }

  body.dark-mode header.navbar .form-control-dark {
    background-color: #333;
    color: #ccc;
  }

  body.dark-mode #sidebarMenu {
    background-color: #2c2c2c;
  }

  body.dark-mode #sidebarMenu .list-group-item {
    color: #cfd8dc;
    background-color: #2c2c2c;
  }

  body.dark-mode #sidebarMenu .list-group-item:hover {
    background-color: #495057;
    color: #fff;
  }

  body.dark-mode #sidebarMenu .list-group-item.active {
    background-color: #007bff;
    border-color: #007bff;
  }
5. Run Your Project
Run your Angular project to see the dashboard with the sidebar and theme switcher:
ng serve

This setup provides a basic structure for a light and dark mode dashboard with a sidebar menu using Angular 18 and Bootstrap. You can further customize the styles and functionality as per your requirements.
Note: Friends, I just tell the basic setup and things, you can change the code according to your requirements. For better understanding please watch the above video.
I will appreciate that if you will tell your views for this post. Nothing matters if your views will be good or bad.
Jassa
Thank you.

Leave a Reply
You must be logged in to post a comment.