Hello to all, welcome to therichpost.com. In this post, I are Creating a CRUD application using Angular 18 with a JSON server.
Guy’s Angular 18 came and if you are new in Angular 18 then please check below links:
Here is the working code snippet and please follow carefully:
This tutorial will cover the setup, creating components, services, and the JSON server.
Prerequisites
- Node.js and npm installed
- Angular CLI installed
Step 1: Setting Up the Angular Project
- Open your terminal and create a new Angular project and add bootstrap 5:
   ng new angular-crud
   cd angular-crud
   npm i bootstrap
- Serve the application to make sure everything is working:
ng serve --open
Step 2: Setting Up JSON Server
- Install JSON server globally:
npm install -g json-server
- Create a
db.jsonfile in the root of your project with some initial data:
   {
     "items": [
       { "id": 1, "name": "Item 1" },
       { "id": 2, "name": "Item 2" }
     ]
   }
- Start the JSON server:
json-server --watch db.json
The server will run at http://localhost:3000.
Step 3: Creating Angular Components
- Generate the components needed for CRUD operations:
   ng generate component components/item-list
   ng generate component components/item-form
Step 4: Creating the Service to Interact with JSON Server
- Generate a new service:
ng generate service services/item
- Implement the CRUD methods in
item.service.ts:
  import { Injectable } from '@angular/core';
import { HttpClient } from '@angular/common/http';
import { Observable } from 'rxjs';

@Injectable({
  providedIn: 'root'
})
export class ItemService {
  private apiUrl = 'http://localhost:3000/items';

  constructor(private http: HttpClient) { }

  getItems(): Observable<any[]> {
    return this.http.get<any[]>(this.apiUrl);
  }

  getItem(id: number): Observable<any> {
    return this.http.get<any>(`${this.apiUrl}/${id}`);
  }

  createItem(item: any): Observable<any> {
    return this.http.post<any>(this.apiUrl, item);
  }

  updateItem(id: number, item: any): Observable<any> {
    return this.http.put<any>(`${this.apiUrl}/${id}`, item);
  }

  deleteItem(id: number): Observable<any> {
    return this.http.delete<any>(`${this.apiUrl}/${id}`);
  }
}
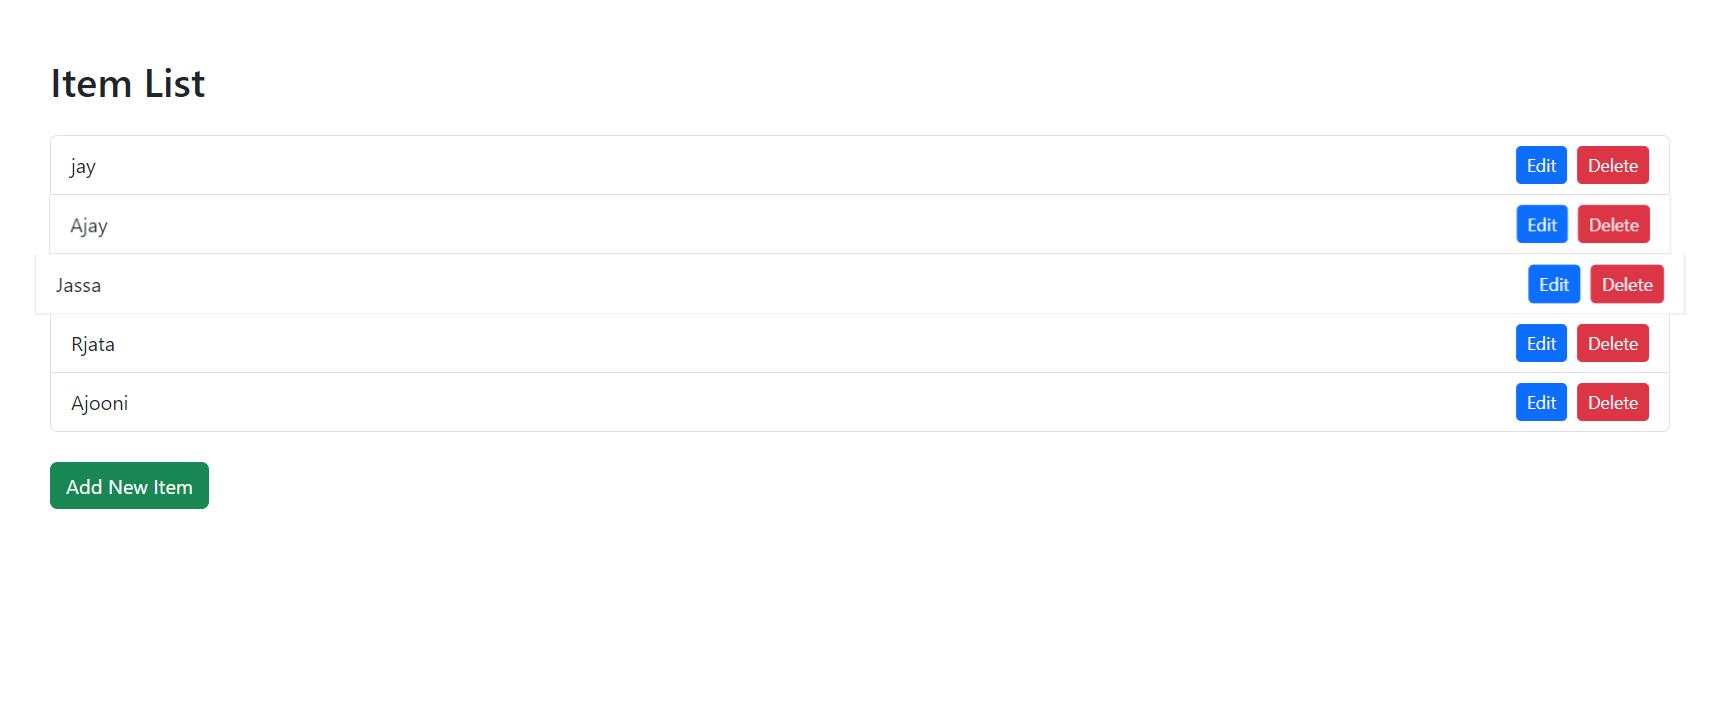
Step 5: Displaying the List of Items
- Update
item-list.component.tsto fetch and display the items:
   import { Component, OnInit } from '@angular/core';
import { HttpClientModule } from '@angular/common/http';
import { CommonModule } from '@angular/common';
import { ItemService } from '../../services/item.service';
import { NgModule } from '@angular/core';
import { RouterLink } from '@angular/router';
@Component({
  selector: 'app-item-list',
  templateUrl: './item-list.component.html',
  styleUrls: ['./item-list.component.css'],
  standalone: true,
  imports: [HttpClientModule, CommonModule, RouterLink]
})
export class ItemListComponent implements OnInit {
  items: any[] = [];

  constructor(private itemService: ItemService) { }

  ngOnInit(): void {
    this.itemService.getItems().subscribe(data => {
      this.items = data;
    });
  }

  deleteItem(id: number): void {
    this.itemService.deleteItem(id).subscribe(() => {
      this.items = this.items.filter(item => item.id !== id);
    });
  }
}
- Update
item-list.component.htmlto display the items:
   <div class="container mt-5">
    <h2 class="mb-4">Item List</h2>
    <div class="list-group">
      <div class="list-group-item" *ngFor="let item of items">
        <div class="d-flex justify-content-between align-items-center">
          <span>{{ item.name }}</span>
          <div>
            <button class="btn btn-primary btn-sm me-2" [routerLink]="['/edit', item.id]">Edit</button>
            <button class="btn btn-danger btn-sm" (click)="deleteItem(item.id)">Delete</button>
          </div>
        </div>
      </div>
    </div>
    <div class="mt-4">
      <button class="btn btn-success" [routerLink]="['/add']">Add New Item</button>
    </div>
  </div>
Step 6: Adding and Editing Items
- Update
item-form.component.tsto handle adding and editing items:
   import { Component, OnInit } from '@angular/core';
import { HttpClientModule } from '@angular/common/http';
import { FormsModule } from '@angular/forms';
import { ActivatedRoute, Router } from '@angular/router';
import { ItemService } from '../../services/item.service';
import { NgModule } from '@angular/core';
import { CommonModule } from '@angular/common';
import { RouterLink } from '@angular/router';
@Component({
  selector: 'app-item-form',
  templateUrl: './item-form.component.html',
  styleUrls: ['./item-form.component.css'],
  standalone: true,
  imports: [HttpClientModule, FormsModule, CommonModule, RouterLink]
})
export class ItemFormComponent implements OnInit {
  item: any = { name: '' };
  id: number | null = null;

  constructor(
    private itemService: ItemService,
    private route: ActivatedRoute,
    private router: Router
  ) { }

  ngOnInit(): void {
    this.id = +this.route.snapshot.paramMap.get('id')!;
    if (this.id) {
      this.itemService.getItem(this.id).subscribe(data => {
        this.item = data;
      });
    }
  }

  saveItem(): void {
    if (this.id) {
      this.itemService.updateItem(this.id, this.item).subscribe(() => {
        this.router.navigate(['/']);
      });
    } else {
      this.itemService.createItem(this.item).subscribe(() => {
        this.router.navigate(['/']);
      });
    }
  }
}
- Update
item-form.component.htmlto provide the form:
  <div class="container mt-5">
  <h2 class="mb-4">{{ id ? 'Edit' : 'Add' }} Item</h2>
  <form (ngSubmit)="saveItem()" class="needs-validation" novalidate>
    <div class="mb-3">
      <label for="name" class="form-label">Name:</label>
      <input type="text" id="name" [(ngModel)]="item.name" name="name" class="form-control" required>
      <div class="invalid-feedback">Please enter a name.</div>
    </div>
    <button type="submit" class="btn btn-primary">{{ id ? 'Update' : 'Save' }}</button>
    <button type="button" class="btn btn-secondary ms-2" [routerLink]="['/']">Cancel</button>
  </form>
</div>
Step 7: Configuring Routing
- Update
app-routing.module.tsto set up routes:
  import { Routes } from '@angular/router';
import { ItemListComponent } from './components/item-list/item-list.component';
import { ItemFormComponent } from './components/item-form/item-form.component';
export const routes: Routes = [
    { path: '', component: ItemListComponent },
    { path: 'add', component: ItemFormComponent },
    { path: 'edit/:id', component: ItemFormComponent }
];
Step 8: Finalizing the App
- Update
app.component.tsto import necessary modules:
   import { Component } from '@angular/core';
import { RouterModule } from '@angular/router';
import { ItemListComponent } from './components/item-list/item-list.component';
import { ItemFormComponent } from './components/item-form/item-form.component';
import { HttpClientModule } from '@angular/common/http';

@Component({
  selector: 'app-root',
  template: `
    <router-outlet></router-outlet>
  `,
  standalone: true,
  imports: [RouterModule, HttpClientModule, ItemListComponent, ItemFormComponent]
})
export class AppComponent {}
2. Update app.component.html to import necessary modules:
<router-outlet></router-outlet>
3. Update main.ts to import necessary modules:
import { bootstrapApplication } from '@angular/platform-browser';
import { provideRouter } from '@angular/router';
import { AppComponent } from './app/app.component';
import { routes } from './app/app.routes';
import {provideHttpClient} from '@angular/common/http';
bootstrapApplication(AppComponent, {
  providers: [
    provideHttpClient(),
    provideRouter(routes)
  ]
});
4. Add the Bootstrap CSS file to the styles array in angular.json:
{
  ...
  "projects": {
    "your-project-name": {
      ...
      "architect": {
        "build": {
          ...
          "options": {
            ...
            "styles": [
              "node_modules/bootstrap/dist/css/bootstrap.min.css",
              "src/styles.css"
            ]
            ...
          }
        }
      }
    }
  }
}
item-list.component.css
.list-group-item {
  transition: transform 0.2s ease-in-out;
}

.list-group-item:hover {
  transform: scale(1.02);
}
item-form.component.css
.needs-validation .ng-invalid.ng-touched {
  border-color: #dc3545;
}

.needs-validation .ng-valid.ng-touched {
  border-color: #198754;
}
Serve the application to make sure everything is working:
ng serve --open

With these steps, you have a basic CRUD application using Angular 18 and JSON Server. You can now start the Angular app using ng serve and interact with the JSON server for your CRUD operations.
Note: Friends, I just tell the basic setup and things, you can change the code according to your requirements. For better understanding please watch the above video.
I will appreciate that if you will share your views for this post. Nothing matters if your views will be good or bad.
Jassa
Thank you.
Leave a Reply
You must be logged in to post a comment.