Hello guys how are you? Welcome back to my blog. Today in this blog post we will Create Management System Dashboard in Next.js using Tailwind CSS.
For react js new comers, please check the below links:
Guys here is the code snippet and please use carefully:
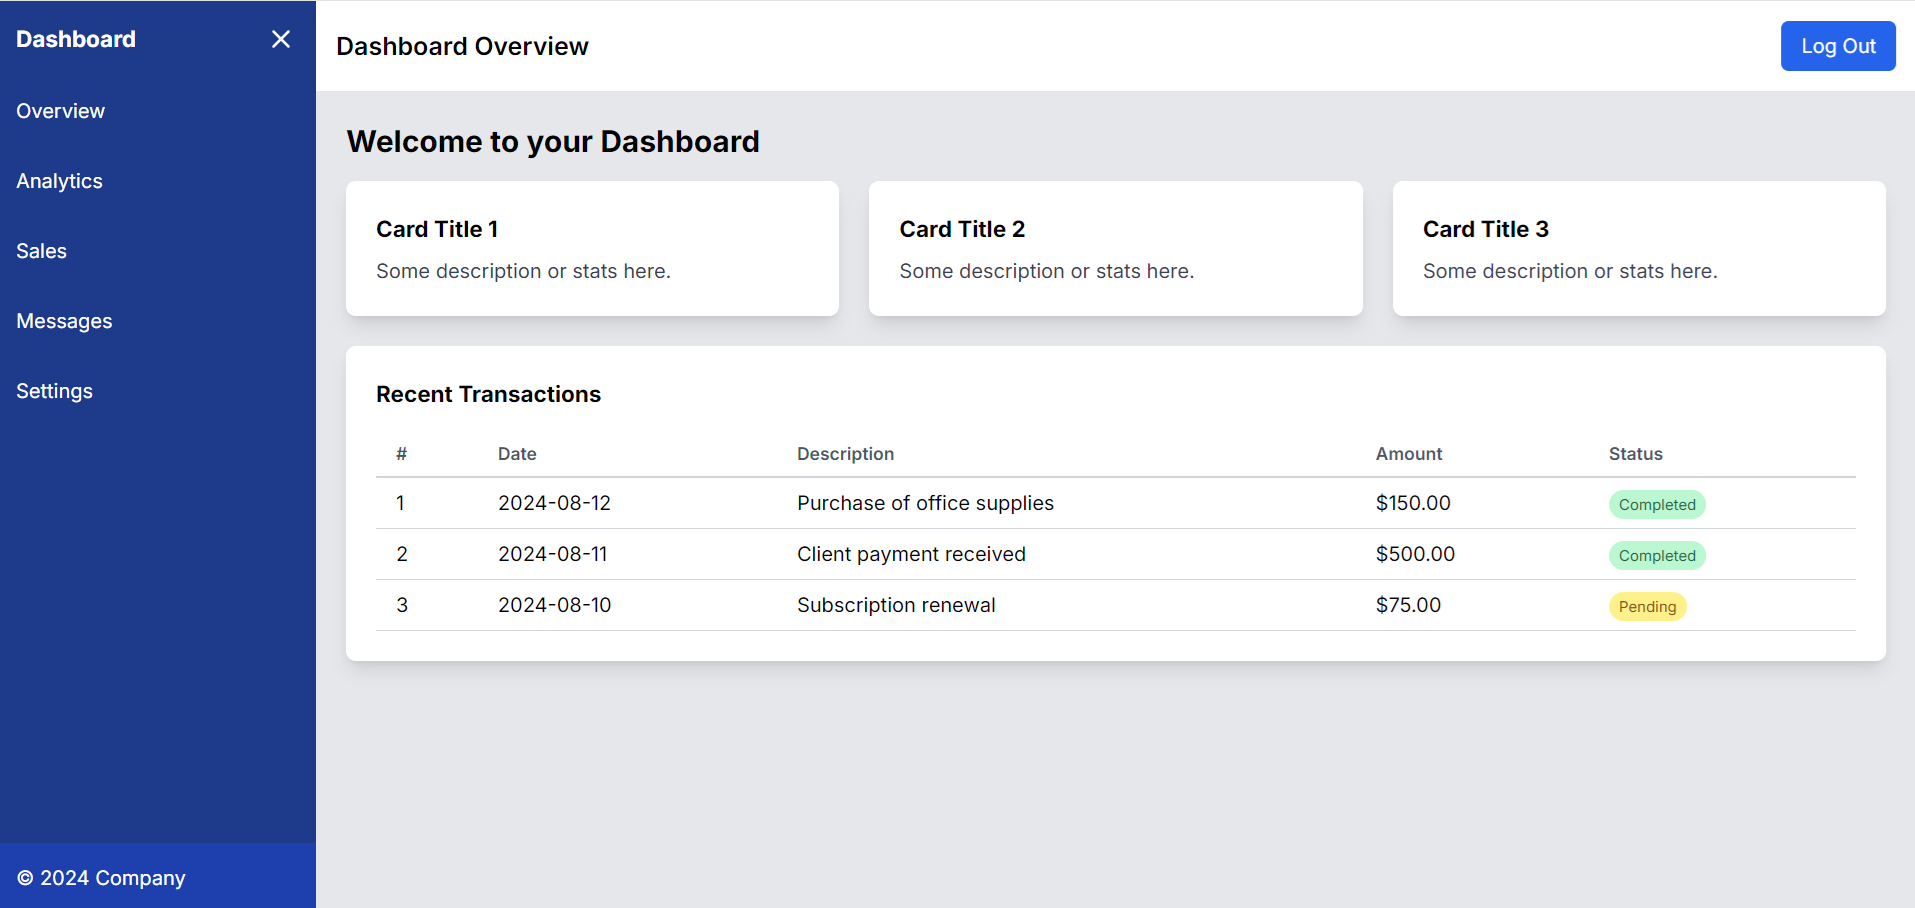
To create a management system dashboard page in Next.js using Tailwind CSS, you can follow the steps below. This example includes a basic layout with a sidebar, a top navigation bar, and a main content area that you can customize further according to your needs.
Step 1: Setup Next.js and Tailwind CSS
If you haven’t set up a Next.js project with Tailwind CSS, you can do so with the following steps:
- Create a new Next.js project:
   npx create-next-app@latest management-dashboard
   cd management-dashboard
- Install Tailwind CSS:
   npm install -D tailwindcss postcss autoprefixer
   npx tailwindcss init -p
- Configure Tailwind CSS:
Update thetailwind.config.jsfile with the following content:
   /** @type {import('tailwindcss').Config} */
module.exports = {
  content: [
    "./src/pages/**/*.{js,ts,jsx,tsx,mdx}",
    "./src/components/**/*.{js,ts,jsx,tsx,mdx}",
    "./src/app/**/*.{js,ts,jsx,tsx,mdx}",
  ],
  theme: {
    extend: {
      backgroundImage: {
        "gradient-radial": "radial-gradient(var(--tw-gradient-stops))",
        "gradient-conic":
          "conic-gradient(from 180deg at 50% 50%, var(--tw-gradient-stops))",
      },
    },
  },
  plugins: [],
};
- Add Tailwind CSS to your CSS file:
Replace the contents ofglobals.csswith:
   @tailwind base;
@tailwind components;
@tailwind utilities;

:root {
  --foreground-rgb: 0, 0, 0;
  --background-start-rgb: 214, 219, 220;
  --background-end-rgb: 255, 255, 255;
}

@media (prefers-color-scheme: dark) {
  :root {
    --foreground-rgb: 255, 255, 255;
    --background-start-rgb: 0, 0, 0;
    --background-end-rgb: 0, 0, 0;
  }
}

body {
  color: rgb(var(--foreground-rgb));
  background: linear-gradient(
      to bottom,
      transparent,
      rgb(var(--background-end-rgb))
    )
    rgb(var(--background-start-rgb));
}

@layer utilities {
  .text-balance {
    text-wrap: balance;
  }
}
Step 2: Create the Dashboard Page
Now, create the dashboard page within the pages directory. Let’s assume you want to keep it as the main index page (page.js).
- Create the Dashboard Layout:
Insrc/app/page.js, create a basic layout with a sidebar, top navigation, and content area.
   "use client"
import React, { useState } from 'react';
export default function Home() {
  // State to manage the sidebar's visibility
  const [isSidebarOpen, setIsSidebarOpen] = useState(true);

  // Function to toggle the sidebar
  const toggleSidebar = () => {
    setIsSidebarOpen(!isSidebarOpen);
  };
  return (
    <div className="flex h-screen bg-gray-100">
      {/* Sidebar */}
      <div
        className={`${
          isSidebarOpen ? 'w-64' : 'w-16'
        } bg-blue-900 text-white flex flex-col transition-all duration-300`}
      >
        <div className="p-4 flex justify-between items-center">
          <span className="font-bold text-lg">
            {isSidebarOpen ? 'Dashboard' : 'DB'}
          </span>
          <button onClick={toggleSidebar} className="focus:outline-none">
            <svg
              className="w-6 h-6"
              fill="none"
              stroke="currentColor"
              viewBox="0 0 24 24"
              xmlns="http://www.w3.org/2000/svg"
            >
              <path
                strokeLinecap="round"
                strokeLinejoin="round"
                strokeWidth={2}
                d={`${
                  isSidebarOpen
                    ? 'M6 18L18 6M6 6l12 12'
                    : 'M4 6h16M4 12h16M4 18h16'
                }`}
              />
            </svg>
          </button>
        </div>
        <ul className="flex-grow">
          <li
            className={`p-4 hover:bg-blue-700 cursor-pointer ${
              !isSidebarOpen && 'text-center'
            }`}
          >
            {isSidebarOpen ? 'Overview' : 'O'}
          </li>
          <li
            className={`p-4 hover:bg-blue-700 cursor-pointer ${
              !isSidebarOpen && 'text-center'
            }`}
          >
            {isSidebarOpen ? 'Analytics' : 'A'}
          </li>
          <li
            className={`p-4 hover:bg-blue-700 cursor-pointer ${
              !isSidebarOpen && 'text-center'
            }`}
          >
            {isSidebarOpen ? 'Sales' : 'S'}
          </li>
          <li
            className={`p-4 hover:bg-blue-700 cursor-pointer ${
              !isSidebarOpen && 'text-center'
            }`}
          >
            {isSidebarOpen ? 'Messages' : 'M'}
          </li>
          <li
            className={`p-4 hover:bg-blue-700 cursor-pointer ${
              !isSidebarOpen && 'text-center'
            }`}
          >
            {isSidebarOpen ? 'Settings' : 'S'}
          </li>
        </ul>
        {isSidebarOpen && (
          <div className="p-4 bg-blue-800">© 2024 Company</div>
        )}
      </div>

      {/* Main Content Area */}
      <div className="flex flex-col flex-grow">
        {/* Header */}
        <div className="bg-white p-4 shadow-md">
          <div className="flex justify-between items-center">
            <div className="text-xl font-semibold">Dashboard Overview</div>
            <div>
              <button className="bg-blue-600 text-white px-4 py-2 rounded-md">
                Log Out
              </button>
            </div>
          </div>
        </div>

        {/* Content Area */}
        <div className="flex-grow p-6 bg-gray-200">
          <h2 className="text-2xl font-bold mb-4">Welcome to your Dashboard</h2>

          {/* Cards */}
          <div className="grid grid-cols-1 md:grid-cols-2 lg:grid-cols-3 gap-6 mb-6">
            <div className="bg-white p-6 rounded-lg shadow-lg">
              <h3 className="text-lg font-bold mb-2">Card Title 1</h3>
              <p className="text-gray-700">Some description or stats here.</p>
            </div>
            <div className="bg-white p-6 rounded-lg shadow-lg">
              <h3 className="text-lg font-bold mb-2">Card Title 2</h3>
              <p className="text-gray-700">Some description or stats here.</p>
            </div>
            <div className="bg-white p-6 rounded-lg shadow-lg">
              <h3 className="text-lg font-bold mb-2">Card Title 3</h3>
              <p className="text-gray-700">Some description or stats here.</p>
            </div>
          </div>

          {/* Table */}
          <div className="bg-white p-6 rounded-lg shadow-lg">
            <h3 className="text-lg font-bold mb-4">Recent Transactions</h3>
            <div className="overflow-x-auto">
              <table className="min-w-full bg-white">
                <thead>
                  <tr>
                    <th className="py-2 px-4 border-b-2 border-gray-300 text-left text-sm font-semibold text-gray-600">#</th>
                    <th className="py-2 px-4 border-b-2 border-gray-300 text-left text-sm font-semibold text-gray-600">Date</th>
                    <th className="py-2 px-4 border-b-2 border-gray-300 text-left text-sm font-semibold text-gray-600">Description</th>
                    <th className="py-2 px-4 border-b-2 border-gray-300 text-left text-sm font-semibold text-gray-600">Amount</th>
                    <th className="py-2 px-4 border-b-2 border-gray-300 text-left text-sm font-semibold text-gray-600">Status</th>
                  </tr>
                </thead>
                <tbody>
                  <tr>
                    <td className="py-2 px-4 border-b border-gray-300">1</td>
                    <td className="py-2 px-4 border-b border-gray-300">2024-08-12</td>
                    <td className="py-2 px-4 border-b border-gray-300">Purchase of office supplies</td>
                    <td className="py-2 px-4 border-b border-gray-300">$150.00</td>
                    <td className="py-2 px-4 border-b border-gray-300">
                      <span className="bg-green-200 text-green-800 px-2 py-1 rounded-full text-xs">Completed</span>
                    </td>
                  </tr>
                  <tr>
                    <td className="py-2 px-4 border-b border-gray-300">2</td>
                    <td className="py-2 px-4 border-b border-gray-300">2024-08-11</td>
                    <td className="py-2 px-4 border-b border-gray-300">Client payment received</td>
                    <td className="py-2 px-4 border-b border-gray-300">$500.00</td>
                    <td className="py-2 px-4 border-b border-gray-300">
                      <span className="bg-green-200 text-green-800 px-2 py-1 rounded-full text-xs">Completed</span>
                    </td>
                  </tr>
                  <tr>
                    <td className="py-2 px-4 border-b border-gray-300">3</td>
                    <td className="py-2 px-4 border-b border-gray-300">2024-08-10</td>
                    <td className="py-2 px-4 border-b border-gray-300">Subscription renewal</td>
                    <td className="py-2 px-4 border-b border-gray-300">$75.00</td>
                    <td className="py-2 px-4 border-b border-gray-300">
                      <span className="bg-yellow-200 text-yellow-800 px-2 py-1 rounded-full text-xs">Pending</span>
                    </td>
                  </tr>
                </tbody>
              </table>
            </div>
          </div>
        </div>
      </div>
    </div>
  );
}
- Customize Tailwind Classes:
You can further customize the dashboard by tweaking the Tailwind CSS classes or adding more sections and components as needed.
Step 3: Run the Project
After setting up your dashboard, run the Next.js project to see the result:
npm run dev
Visit http://localhost:3000 to view your management system dashboard page.

This setup provides a basic, responsive dashboard layout that you can expand upon by adding charts, tables, modals, and other interactive components.
This is it guys and if you will have any kind of query, suggestion or requirement then feel free to comment below.
Thanks
Ajay
Leave a Reply
You must be logged in to post a comment.