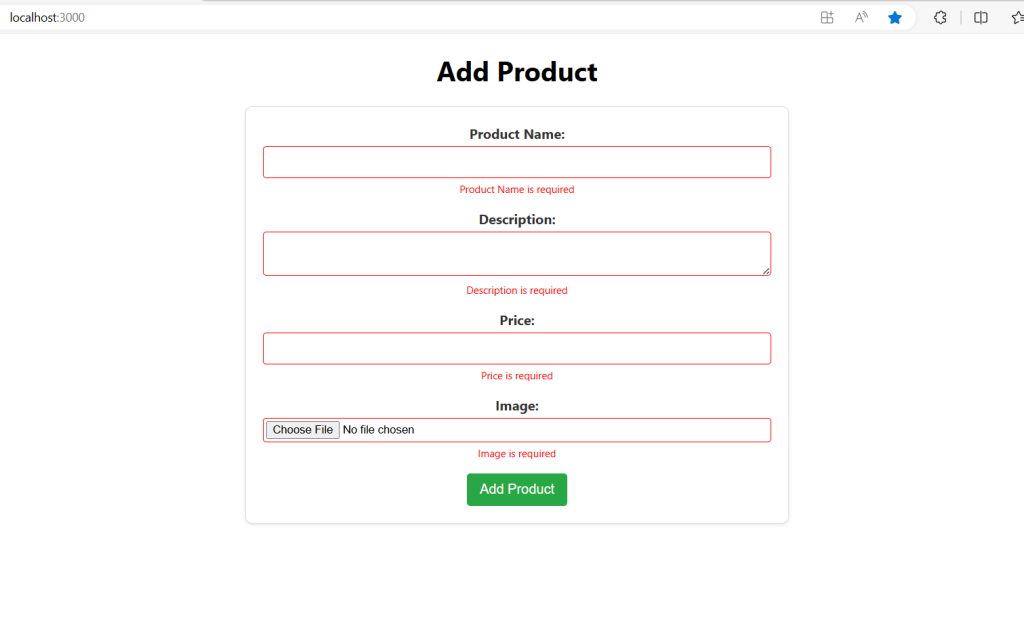
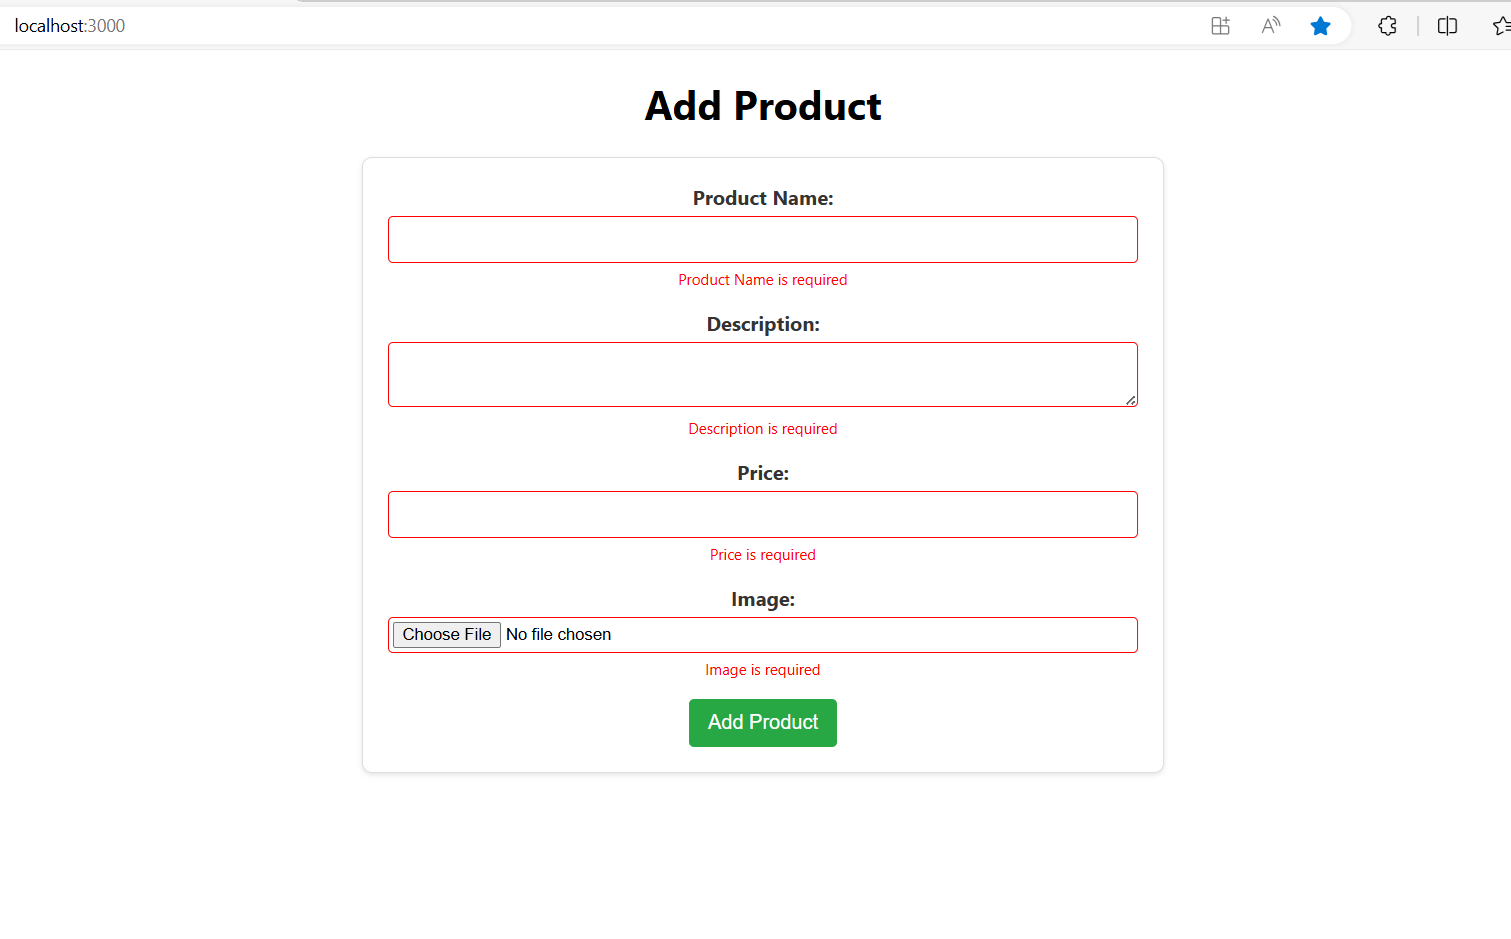
Hello guys how are you? Welcome back to my blog. Today in this blog post we are Create an Ecommerce Add Product form using ReactJS for the frontend and PHP with MySQL.
Key Features:
- React
- Ecommerce
- Add Product Form
- Axios
- Form validation
- Php
- MySQL

For react js new comers, please check the below links:
Guys here is the complete code snippet and please do carefully to avoid the mistakes:
To create an e-commerce add product form using ReactJS for the frontend and PHP with MySQL for the backend, you’ll need to follow these steps:
Frontend (ReactJS)
- Create a React project:
   npx create-react-app ecommerce-app
   cd ecommerce-app
- Set up the form component:
Create a file namedAddProductForm.jsin thesrcdirectory.
   import React, { useState } from 'react';
import axios from 'axios';
import './AddProductForm.css';

const AddProductForm = () => {
  const [productName, setProductName] = useState('');
  const [description, setDescription] = useState('');
  const [price, setPrice] = useState('');
  const [image, setImage] = useState(null);
  const [errors, setErrors] = useState({});

  const validateForm = () => {
    const newErrors = {};
    if (!productName) newErrors.productName = 'Product Name is required';
    if (!description) newErrors.description = 'Description is required';
    if (!price) newErrors.price = 'Price is required';
    if (!image) newErrors.image = 'Image is required';
    return newErrors;
  };

  const handleSubmit = (e) => {
    e.preventDefault();
    const formErrors = validateForm();
    if (Object.keys(formErrors).length === 0) {
      const formData = new FormData();
      formData.append('productName', productName);
      formData.append('description', description);
      formData.append('price', price);
      formData.append('image', image);

      axios.post('http://localhost/ecommerce-api/addProduct.php', formData)
        .then(response => {
          console.log(response.data);
        })
        .catch(error => {
          console.error('There was an error adding the product!', error);
        });
    } else {
      setErrors(formErrors);
    }
  };

  return (
    <form onSubmit={handleSubmit}>
      <div>
        <label>Product Name:</label>
        <input
          type="text"
          value={productName}
          onChange={(e) => setProductName(e.target.value)}
          className={errors.productName ? 'error' : ''}
        />
        {errors.productName && <span className="error-message">{errors.productName}</span>}
      </div>
      <div>
        <label>Description:</label>
        <textarea
          value={description}
          onChange={(e) => setDescription(e.target.value)}
          className={errors.description ? 'error' : ''}
        />
        {errors.description && <span className="error-message">{errors.description}</span>}
      </div>
      <div>
        <label>Price:</label>
        <input
          type="number"
          value={price}
          onChange={(e) => setPrice(e.target.value)}
          className={errors.price ? 'error' : ''}
        />
        {errors.price && <span className="error-message">{errors.price}</span>}
      </div>
      <div>
        <label>Image:</label>
        <input
          type="file"
          onChange={(e) => setImage(e.target.files[0])}
          className={errors.image ? 'error' : ''}
        />
        {errors.image && <span className="error-message">{errors.image}</span>}
      </div>
      <button type="submit">Add Product</button>
    </form>
  );
};

export default AddProductForm;
- Add the form component to your main app:
UpdateApp.jsto include theAddProductForm.
   import React from 'react';
   import './App.css';
   import AddProductForm from './AddProductForm';

   function App() {
     return (
       <div className="App">
         <h1>Add Product</h1>
         <AddProductForm />
       </div>
     );
   }

   export default App;
4. Create a CSS file: Create a file named AddProductForm.css in the src directory.
/* AddProductForm.css */

form {
    max-width: 600px;
    margin: 0 auto;
    padding: 20px;
    border: 1px solid #ddd;
    border-radius: 8px;
    box-shadow: 0 2px 4px rgba(0, 0, 0, 0.1);
    background-color: #fff;
  }

  form div {
    margin-bottom: 15px;
  }

  label {
    display: block;
    font-weight: bold;
    margin-bottom: 5px;
    color: #333;
  }

  input[type="text"],
  input[type="number"],
  input[type="file"],
  textarea {
    width: 100%;
    padding: 10px;
    border: 1px solid #ccc;
    border-radius: 4px;
    box-sizing: border-box;
  }

  input[type="file"] {
    padding: 3px;
  }

  input.error,
  textarea.error {
    border: 1px solid red;
  }

  button {
    padding: 10px 15px;
    background-color: #28a745;
    color: #fff;
    border: none;
    border-radius: 4px;
    cursor: pointer;
    font-size: 16px;
  }

  button:hover {
    background-color: #218838;
  }

  .error-message {
    color: red;
    font-size: 12px;
    margin-top: 5px;
  }
Backend (PHP & MySQL)
- Set up your database:
Create a MySQL database and table to store your products.
   CREATE DATABASE ecommerce;
   USE ecommerce;

   CREATE TABLE products (
     id INT AUTO_INCREMENT PRIMARY KEY,
     name VARCHAR(255) NOT NULL,
     description TEXT,
     price DECIMAL(10, 2) NOT NULL,
     image VARCHAR(255)
   );
- Create the PHP script to handle the form submission:
Create a file namedaddProduct.phpin your server directory.
   <?php
   $servername = "localhost";
   $username = "yourusername";
   $password = "yourpassword";
   $dbname = "ecommerce";

   // Create connection
   $conn = new mysqli($servername, $username, $password, $dbname);

   // Check connection
   if ($conn->connect_error) {
     die("Connection failed: " . $conn->connect_error);
   }

   if ($_SERVER['REQUEST_METHOD'] === 'POST') {
     $productName = $_POST['productName'];
     $description = $_POST['description'];
     $price = $_POST['price'];
     $image = '';

     if (isset($_FILES['image']) && $_FILES['image']['error'] === UPLOAD_ERR_OK) {
       $imageTmpPath = $_FILES['image']['tmp_name'];
       $imageName = $_FILES['image']['name'];
       $imageSize = $_FILES['image']['size'];
       $imageType = $_FILES['image']['type'];
       $imageExtension = pathinfo($imageName, PATHINFO_EXTENSION);
       $newImageName = md5(time() . $imageName) . '.' . $imageExtension;
       $uploadFileDir = './uploads/';
       $dest_path = $uploadFileDir . $newImageName;

       if (move_uploaded_file($imageTmpPath, $dest_path)) {
         $image = $newImageName;
       }
     }

     $sql = "INSERT INTO products (name, description, price, image) VALUES ('$productName', '$description', '$price', '$image')";

     if ($conn->query($sql) === TRUE) {
       echo "New product added successfully";
     } else {
       echo "Error: " . $sql . "<br>" . $conn->error;
     }
   }

   $conn->close();
   ?>
- Ensure the server is running:
Make sure your PHP server is running. If you’re using XAMPP, MAMP, or similar, place youraddProduct.phpfile in the appropriate directory (e.g.,htdocsfor XAMPP). - Test the form:
Start your React app:
npm start
Navigate to the URL where your PHP server is running (e.g., http://localhost/ecommerce-api/addProduct.php), and you should be able to submit the form and add products to your MySQL database.
Additional Considerations
- Validation: Add validation to the form inputs.
- Security: Ensure that the backend script sanitizes inputs to prevent SQL injection.
- Feedback: Provide user feedback on successful/failed form submissions.
- Styling: Add CSS to style the form and make it user-friendly.
By following these steps, you should have a basic e-commerce product form that communicates between a ReactJS frontend and a PHP/MySQL backend.
This is it guys and if you will have any kind of query, suggestion or requirement then feel free to comment below.
Thanks
Ajay

Leave a Reply
You must be logged in to post a comment.