Hello guys how are you? Welcome back to my blog. Today in this post I will show you Creating an eCommerce application in Ionic Angular 18 with Bootstrap 5.
Angular 18, IONIC 8 came. If you are new then you must check below two links:
Now guys here is the complete code snippet and please follow carefully:
Creating an eCommerce application in Ionic Angular 18 with Bootstrap 5 involves several steps. Below is a basic outline of the process:
- Setup Ionic and Angular Project: First, make sure you have Node.js and npm installed. Then install the Ionic CLI if you haven’t already:
npm install -g @ionic/cli
Create a new Ionic Angular project:
ionic start ecommerceApp blank --type=angular cd ecommerceApp
- Install Bootstrap 5: Install Bootstrap 5 using npm:
npm install bootstrap
Include Bootstrap in your angular.json
file:
"styles": [ "node_modules/bootstrap/dist/css/bootstrap.min.css", "src/global.scss" ],
- Setup Routing: Generate the necessary pages for your eCommerce app:
ionic generate page home ionic generate page product-details
Configure the routes in src/app/app.routes.ts
:
import { Routes } from '@angular/router'; export const routes: Routes = [ { path: 'home', loadComponent: () => import('./home/home.page').then((m) => m.HomePage), }, { path: '', redirectTo: 'home', pathMatch: 'full', }, { path: 'product-details/:id', loadComponent: () => import('./product-details/product-details.page').then( m => m.ProductDetailsPage) }, ];
- Create Services for Data Handling: Generate a service to handle product data:
ionic generate service services/product
Example service (src/app/services/product.service.ts
):
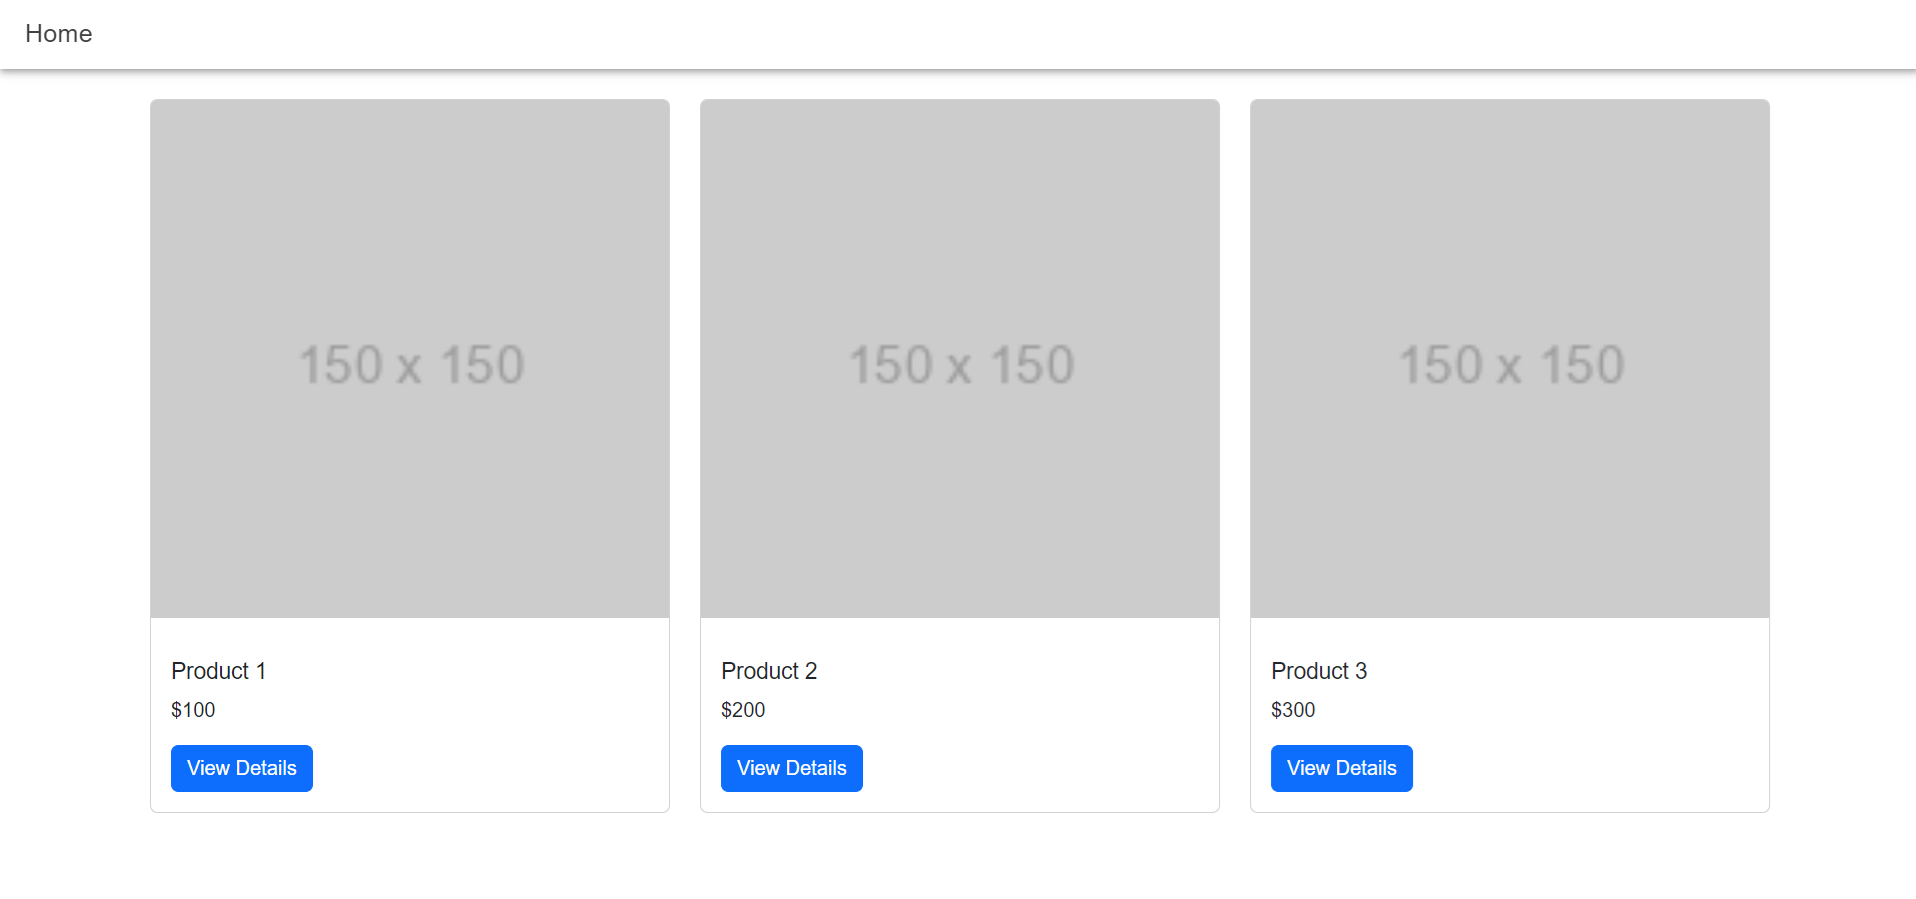
import { Injectable } from '@angular/core'; @Injectable({ providedIn: 'root' }) export class ProductService { constructor() { } getProducts() { return [ { id: 1, name: 'Product 1', price: 100 }, { id: 2, name: 'Product 2', price: 200 }, { id: 3, name: 'Product 3', price: 300 }, ]; } getProductById(id: number) { return this.getProducts().find(product => product.id === id); } }
- Design Pages with Bootstrap: Use Bootstrap classes to design your pages. For example, the
home.page.html, product-details.html
might look like this:
<ion-header> <ion-toolbar> <ion-title>Home</ion-title> </ion-toolbar> </ion-header> <ion-content> <div class="container mt-4"> <div class="row"> <div class="col-md-4" *ngFor="let product of products"> <div class="card"> <img src="https://via.placeholder.com/150" class="card-img-top" alt="{{product.name}}"> <div class="card-body"> <h5 class="card-title">{{product.name}}</h5> <p class="card-text">${{product.price}}</p> <a [routerLink]="['/product-details', product.id]" class="btn btn-primary">View Details</a> </div> </div> </div> </div> </div> </ion-content>
In home.page.ts
:
import { Component } from '@angular/core'; import { IonHeader, IonToolbar, IonTitle, IonContent } from '@ionic/angular/standalone'; import { ProductService } from '../services/product.service'; import { CommonModule } from '@angular/common'; import { RouterLink } from '@angular/router'; @Component({ selector: 'app-home', templateUrl: 'home.page.html', styleUrls: ['home.page.scss'], standalone: true, imports: [IonHeader, IonToolbar, IonTitle, IonContent, CommonModule, RouterLink], }) export class HomePage { products:any; constructor(private productService: ProductService) { } ngOnInit() { this.products = this.productService.getProducts(); } }
In home.page.scss file:
#container { text-align: center; position: absolute; left: 0; right: 0; top: 50%; transform: translateY(-50%); } #container strong { font-size: 20px; line-height: 26px; } #container p { font-size: 16px; line-height: 22px; color: #8c8c8c; margin: 0; } #container a { text-decoration: none; }
In product-details.page.html file:
<ion-header> <ion-toolbar> <ion-buttons slot="start"> <ion-back-button defaultHref="/home"></ion-back-button> </ion-buttons> <ion-title>Product Details</ion-title> </ion-toolbar> </ion-header> <ion-content> <div class="container mt-4" *ngIf="product"> <div class="card"> <img src="https://via.placeholder.com/300" class="card-img-top" alt="{{product.name}}"> <div class="card-body"> <h5 class="card-title">{{product.name}}</h5> <p class="card-text">${{product.price}}</p> <p class="card-text">Description of {{product.name}}</p> <a [routerLink]="['/home']" class="btn btn-secondary mt-3">Back to Home</a> </div> </div> </div> </ion-content> 9876088799 pabjeet
In product-details.page.ts file:
import { Component, OnInit } from '@angular/core'; import { CommonModule } from '@angular/common'; import { FormsModule } from '@angular/forms'; import { IonContent, IonHeader, IonTitle, IonToolbar, IonBackButton, IonButtons } from '@ionic/angular/standalone'; import { ActivatedRoute,RouterLink } from '@angular/router'; import { ProductService } from '../services/product.service'; @Component({ selector: 'app-product-details', templateUrl: './product-details.page.html', styleUrls: ['./product-details.page.scss'], standalone: true, imports: [IonContent, IonHeader, IonTitle, IonToolbar, IonBackButton, CommonModule, FormsModule, RouterLink, IonButtons] }) export class ProductDetailsPage implements OnInit { product: any; productId:any; constructor( private route: ActivatedRoute, private productService: ProductService ) { } ngOnInit() { this.productId = this.route.snapshot.paramMap.get('id'); this.product = this.productService.getProductById(+this.productId); } }
- Run the Application: Start your Ionic application:
ionic serve
By following these steps, you will have a basic eCommerce application using Ionic Angular 18 and Bootstrap 5. You can expand upon this foundation by adding more features such as user authentication, payment integration, and more.
I will appreciate that if you will tell your views for this post. Nothing matters if your views will be good or bad because with your views, I will make my next posts more good and helpful.
Jassa
Thanks