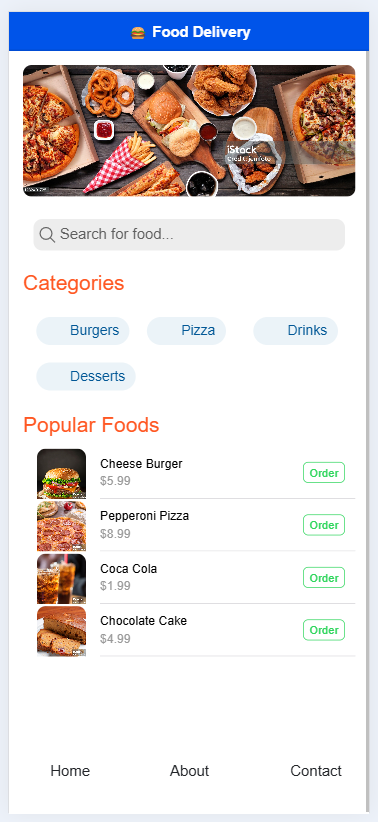
Hello guys how are you? Welcome back on my blog Therichpost. Today in this post I am going to Build Food Delivery App Demo in Angular + Ionic.
Ionic is the most popular choice for building mobile apps with Angular. It allows you to create cross-platform apps (iOS, Android, Web) using a single codebase.
Angular 19 came. If you are new then you must check below two links:
Now guys here is the complete code snippet and please follow carefully:
- Steps to Build a Mobile App with Angular & Ionic:
(a) Install Ionic and Create a Project

npm install -g @ionic/cli
ionic start myApp blank --type=angular
cd myApp
ionic serve
- Create few new pages:
ng generate page contact
ng generate page about
Now guys lets do the coding :
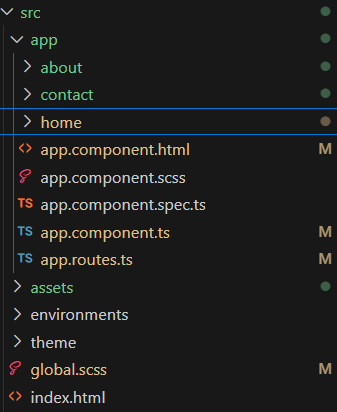
- Very first guys we need to add below code inside src/app/home.page.ts:
import { Component } from '@angular/core';
import {  IonContent, IonHeader, IonToolbar, IonTitle, IonGrid, IonList, IonRow, IonCol, IonChip, IonIcon, IonLabel, IonItem, IonThumbnail, IonButton, IonSearchbar } from '@ionic/angular/standalone';
import { CommonModule } from '@angular/common';

@Component({
  selector: 'app-home',
  templateUrl: 'home.page.html',
  styleUrls: ['home.page.scss'],
  imports: [IonContent, IonHeader, IonToolbar, IonTitle, CommonModule, IonGrid, IonList, IonRow, IonCol, IonChip, IonIcon, IonLabel, IonItem, IonThumbnail, IonButton, IonSearchbar],
})
export class HomePage {
  categories = [
    { name: 'Burgers', icon: 'fast-food' },
    { name: 'Pizza', icon: 'pizza' },
    { name: 'Drinks', icon: 'wine' },
    { name: 'Desserts', icon: 'ice-cream' }
  ];

  popularFoods = [
    { name: 'Cheese Burger', price: 5.99, image: 'assets/burger.jpg' },
    { name: 'Pepperoni Pizza', price: 8.99, image: 'assets/pizza.jpg' },
    { name: 'Coca Cola', price: 1.99, image: 'assets/coke.jpg' },
    { name: 'Chocolate Cake', price: 4.99, image: 'assets/cake.jpg' }
  ];
  constructor() {}
}
- Now guys we need to add below code inside src/app/home.page.ts:
<ion-header>
  <ion-toolbar color="primary">
    <ion-title>🍔 Food Delivery</ion-title>
  </ion-toolbar>
</ion-header>

<ion-content class="ion-padding">
  <!-- Banner Image -->
  <div class="banner">
    <img src="assets/banner.jpg" alt="Food Banner" />
  </div>

  <!-- Search Bar -->
  <ion-searchbar placeholder="Search for food..."></ion-searchbar>

  <!-- Food Categories -->
  <h2>Categories</h2>
  <ion-grid>
    <ion-row>
      <ion-col *ngFor="let category of categories">
        <ion-chip color="secondary">
          <ion-icon [name]="category.icon"></ion-icon>
          <ion-label>{{ category.name }}</ion-label>
        </ion-chip>
      </ion-col>
    </ion-row>
  </ion-grid>

  <!-- Popular Food Items -->
  <h2>Popular Foods</h2>
  <ion-list>
    <ion-item *ngFor="let food of popularFoods">
      <ion-thumbnail slot="start">
        <img [src]="food.image" />
      </ion-thumbnail>
      <ion-label>
        <h3>{{ food.name }}</h3>
        <p>${{ food.price }}</p>
      </ion-label>
      <ion-button fill="outline" slot="end" color="success">
        Order
      </ion-button>
    </ion-item>
  </ion-list>
</ion-content>
- Now guys we need to add below code inside src/app/home.page.scss:
.banner img {
    width: 100%;
    height: 150px;
    object-fit: cover;
    border-radius: 10px;
  }

  ion-searchbar {
    margin: 10px 0;
  }

  h2 {
    margin: 10px 0;
    color: #ff5722;
  }

  ion-chip {
    font-size: 16px;
    margin: 5px;
  }

  ion-thumbnail img {
    width: 80px;
    height: 80px;
    object-fit: cover;
    border-radius: 10px;
  }

  ion-item {
    --inner-padding-end: 10px;
  }
- Now guys we need to add below code inside src/app/contact.page.html:
<ion-header>
  <ion-toolbar color="secondary">
    <ion-title>Contact</ion-title>
  </ion-toolbar>
</ion-header>

<ion-content>
  <p>Welcome to the Contact page!</p>
</ion-content>
- Now guys we need to add below code inside src/app/about.page.html:
<ion-header>
  <ion-toolbar color="secondary">
    <ion-title>About</ion-title>
  </ion-toolbar>
</ion-header>

<ion-content>
  <p>Welcome to the About page!</p>
</ion-content>
- Now guys for routing we need to add below code inside src/app/app.routes.ts file:
import { Routes } from '@angular/router';
import { HomePage } from './home/home.page';
import { AboutPage } from './about/about.page';
import { ContactPage } from './contact/contact.page';

export const routes: Routes = [
  { path: '', redirectTo: 'home', pathMatch: 'full' },
  { path: 'home', component: HomePage },
  { path: 'about', component: AboutPage },
  { path: 'contact', component: ContactPage },
  {
    path: 'contact',
    loadComponent: () => import('./contact/contact.page').then( m => m.ContactPage)
  },
  {
    path: 'about',
    loadComponent: () => import('./about/about.page').then( m => m.AboutPage)
  },
];
- Now guys for final output we need to add below code inside app.component.html file:
<ion-app>
  <ion-router-outlet></ion-router-outlet>
</ion-app>
<!-- Navigation Buttons -->
<ion-footer class="app-footer">
  <ion-row class="nav-row">
    <ion-col size="4">
      <ion-button fill="clear" color="dark"  [routerLink]="['/home']">
        <ion-icon name="home-outline"></ion-icon>
        <p>Home</p>
      </ion-button>
    </ion-col>
    <ion-col size="4">
      <ion-button fill="clear" color="dark"  [routerLink]="['/about']">
        <ion-icon name="information-circle-outline"></ion-icon>
        <p>About</p>
      </ion-button>
    </ion-col>
    <ion-col size="4">
      <ion-button fill="clear" color="dark"  [routerLink]="['/contact']">
        <ion-icon name="call-outline"></ion-icon>
        <p>Contact</p>
      </ion-button>
    </ion-col>
  </ion-row>
</ion-footer>
- Guys for style we need to add below code into global.scss file:
.app-footer {
    left: 0;
    bottom: 0;
    position: absolute;
    z-index: 10;
    display: block;
    width: 100%;
  }
This is it guys and for images you can download from github link and link is below and place inside src/assets folder.
Guys for more information feel free to comment below.
Ajay
Thanks