Author: therichpost

  • Angular 8 bootstrap tooltip working example

    Angular 8 bootstrap tooltip working example

    Hello to all, welcome to therichpost.com. In this post, I will tell you, Angular 8 bootstrap tooltiop working example.

    Here is the updated Angular 12 Bootstrap 5 Tooltip working code snippet link : Angular 12 Bootstrap 5 Tooltip

    Here you can check Angular 11 Bootstrap 4 Tooltip Working Demo with Code Snippet:

    Angular 8 bootstrap tooltip working example
    Angular 8 bootstrap tooltip working example

    Angular and bootstrap combination is amazing. This will be also use in Angular 7 and Angular 8.

    Here are the complete working steps and please follow carefully:

    1. Here are the basics commands to install angular 8 on your system:

    npm install -g @angular/cli 
    
    ng new angularpopup //Create new Angular Project
    
    $ cd angularpopup // Go inside the Angular Project Folder
    
    ng serve --open // Run and Open the Angular Project
    
    http://localhost:4200/ // Working Angular Project Url

    2. After done with above, you need to run below commands to set bootstrap environment into your angular 8 application:

    npm install --save bootstrap
    
    npm install jquery --save
    
    npm install --save @types/jquery
    
    npm install popper.js --save

    3. Now you need to add below code into your angular.json file:

    ...
    "styles": [
                  "src/styles.css",
                  "node_modules/bootstrap/dist/css/bootstrap.min.css"
              ],
    "scripts": ["node_modules/jquery/dist/jquery.min.js", 
                  "node_modules/popper.js/dist/umd/popper.min.js", 
                  "node_modules/bootstrap/dist/js/bootstrap.min.js"
               ]
    ...

    4. Now you need to add below code into your src/app/app.component.ts file:

    import { Component } from '@angular/core';
    declare var $:any;
    @Component({
      selector: 'app-root',
      templateUrl: './app.component.html',
      styleUrls: ['./app.component.css']
    })
    export class AppComponent {
      ngOnInit() {
          $('[data-toggle="tooltip"]').tooltip();
      }
    }

    5. Now you need to add below code into src/app/app.component.html file:

    <a href="#" data-toggle="tooltip" title="Hooray!">Hover over me</a>

    In the end, don’t forgot to run ng serve command. If you have any query then do comment below.

    Jassa

    Thank you.

  • How to install apache, mysql, php on ubuntu?

    How to install apache, mysql, php on ubuntu?

    Hello to all, welcome to therichpost.com. In this post, I will tell you, How to install apache, mysql, php on ubuntu?

    Here are the steps to install apache, mysql, php on ubuntu:

    //install apache
    sudo apt-get install apache2
    
    sudo service apache2 restart
    
    sudo systemctl status apache2
    
    
    // install php
    sudo add-apt-repository ppa:ondrej/php -- set php dependencies
    
    sudo apt-get update
    
    sudo apt-get install php7.2
    
    //php libraries
    sudo apt-get install php7.2-curl php7.2-gd php7.2-json php7.2-mbstring php7.2-intl php7.2-mysql php7.2-xml php7.2-zip
    
    sudo service apache2 restart
    
    //install phpyadmin
    sudo apt-get install -y phpmyadmin
    
    //install mysql
    sudo apt-get update
    sudo apt-get install mysql-server
    sudo mysql_secure_installation utility
    sudo ufw enable
    sudo ufw allow mysql
    sudo systemctl start mysql
    sudo systemctl enable mysql
    sudo systemctl restart mysql
    
    //go to mysqlshell...
    /usr/bin/mysql -u root -p


    If you have any query then please let me know.

    Jassa

    Thank you

  • Angular 8 bootstrap popover working example

    Angular 8 bootstrap popover working example

    Hello to all, welcome to therichpost.com. In this post, I will tell you, Angular 8 bootstrap popover working example.

    Guy’s here is the updated version of this post for Angular 12 Bootstrap 5 Popover Working.

    Angular 8 bootstrap popover working example
    Angular 8 bootstrap popover working example

    Angular and bootstrap combination is amazing.

    Guys if you are new in angular 12 then please check this: Angular 12 Tutorials

    Here are the complete working steps and please follow carefully:

    1. Here are the basics commands to install angular 8 on your system:

    npm install -g @angular/cli 
    
    ng new angularpopup //Create new Angular Project
    
    $ cd angularpopup // Go inside the Angular Project Folder
    
    ng serve --open // Run and Open the Angular Project
    
    http://localhost:4200/ // Working Angular Project Url

    2. After done with above, you need to run below commands to set bootstrap environment into your angular 8 application:

    npm install --save bootstrap
    
    npm install jquery --save
    
    npm install --save @types/jquery
    
    npm install popper.js --save

    3. Now you need to add below code into your angular.json file:

    ...
    "styles": [
                  "src/styles.css",
                  "node_modules/bootstrap/dist/css/bootstrap.min.css"
              ],
    "scripts": ["node_modules/jquery/dist/jquery.min.js", 
                  "node_modules/popper.js/dist/umd/popper.min.js", 
                  "node_modules/bootstrap/dist/js/bootstrap.min.js"
               ]
    ...

    4. Now you need to add below code into your src/app/app.component.ts file:

    import { Component } from '@angular/core';
    declare var $:any;
    @Component({
      selector: 'app-root',
      templateUrl: './app.component.html',
      styleUrls: ['./app.component.css']
    })
    export class AppComponent {
      ngOnInit() {
          $('[data-toggle="popover"]').popover();
      }
    }

    5. Now you need to add below code into src/app/app.component.html file:

    <a href="#" data-toggle="popover" title="Popover Header" data-content="Some content inside the popover">Toggle popover</a>

    In the end, don’t forgot to run ng serve command.

    Now we are done friends. If you have any kind of query, suggestion and new requirement then feel free to comment below.

    Note: Friends, In this post, I just tell the basic setup and things, you can change the code according to your requirements.

    I will appreciate that if you will tell your views for this post. Nothing matters if your views will be good or bad because with your views, I will make my next posts more good and helpful.

    Jassa

    Thank you.

  • Angular 8 bootstrap popup register form

    Angular 8 bootstrap popup register form

    Hello to all, welcome to therichpost.com. In this post, I will tell you, Angular 8 bootstrap popup register form.

    Angular and bootstrap combination is amazing, fast and user attractive. Previously I shared, Angular Bootstrap login form.

    Also guy’s here is the updated version of this post: Angular 12 Bootstrap 5 Modal Popup Forms.

    Angular 8 bootstrap popup register form
    Angular 8 bootstrap popup register form

    Guy’s Angular 12 and if you are new in Angular then please below links:

    1. Angular 12 Tutorials
    2. Angular 12 Free Templates

    Here are the complete steps and please follow carefully:

    1. Here are the basics commands to install angular 8 on your system:

    npm install -g @angular/cli 
    
    ng new angularpopup //Create new Angular Project
    
    $ cd angularpopup // Go inside the Angular Project Folder
    
    ng serve --open // Run and Open the Angular Project
    
    http://localhost:4200/ // Working Angular Project Url


    2. After done with above, you need to run below commands to set bootstrap environment into your angular 8 application:

    npm install --save bootstrap
    
    npm i @popperjs/core

    3. Now you need to add below code into your angular.json file:

    ...
    "styles": [
                  "src/styles.css",
                  "node_modules/bootstrap/dist/css/bootstrap.min.css"
              ],
    "scripts": ["node_modules/bootstrap/dist/js/bootstrap.bundle.min.js"]
    ...


    4. Now you need to add below code into your src/app/app.module.ts file:

    import { BrowserModule } from '@angular/platform-browser';
    import { NgModule } from '@angular/core';
    import { AppComponent } from './app.component';
    import { ReactiveFormsModule } from '@angular/forms';
    @NgModule({
      declarations: [
        AppComponent
      ],
      imports: [
        BrowserModule,
        ReactiveFormsModule
      ],
      providers: [],
      bootstrap: [AppComponent]
    })
    export class AppModule { }
    5. Now you need to add below code into your src/app/app.component.ts file:
    import { Component } from '@angular/core';
    import { FormBuilder, FormGroup, Validators } from '@angular/forms';
    @Component({
      selector: 'app-root',
      templateUrl: './app.component.html',
      styleUrls: ['./app.component.css']
    })
    export class AppComponent {
      title = 'angularpopup';
      showModal: boolean;
      registerForm: FormGroup;
      submitted = false;
      constructor(private formBuilder: FormBuilder) { }
      show()
      {
        this.showModal = true; // Show-Hide Modal Check
        
      }
      //Bootstrap Modal Close event
      hide()
      {
        this.showModal = false;
      }
    
      ngOnInit() {
        this.registerForm = this.formBuilder.group({
            email: ['', [Validators.required, Validators.email]],
            password: ['', [Validators.required, Validators.minLength(6)]],
            firstname: ['', [Validators.required, Validators.minLength(6)]],
            mobile: ['', [Validators.required, Validators.pattern(/^-?(0|[1-9]\d*)?$/), Validators.minLength(10)]]
        });
    }
    // convenience getter for easy access to form fields
    get f() { return this.registerForm.controls; }
    onSubmit() {
        this.submitted = true;
        // stop here if form is invalid
        if (this.registerForm.invalid) {
            return;
        }
        if(this.submitted)
        {
          this.showModal = false;
        }
       
    }
      
    }

    6. Now you need to add below code into src/app/app.component.html file:

    <div class="container">
          <h1 class="text-center">Register with bootstrap popup</h1>
          <button type="button" class="btn btn-primary" (click) = "show()">Register</button>
           </div>
        <!-- Creates the bootstrap modal where the image will appear -->
        <div [style.display]="showModal ? 'block' : 'none'" class="modal" id="imagemodal" tabindex="-1" role="dialog" aria-labelledby="myModalLabel" aria-hidden="true">
        <div class="modal-dialog">
          <div class="modal-content">
            <div class="modal-header">
              <h4 class="modal-title" id="myModalLabel">Register</h4>
            </div>
            <div class="modal-body">
                      <form [formGroup]="registerForm" (ngSubmit)="onSubmit()">
                            <div class="row">
                               <div class="col-sm-6">
                                  <div class="form-group">
                                        <label>FirstName</label>
                                        <input type="text" formControlName="firstname" class="form-control" [ngClass]="{ 'is-invalid': submitted && f.firstname.errors }" />
                                        <div *ngIf="submitted && f.firstname.errors" class="invalid-feedback">
                                              <div *ngIf="f.firstname.errors.required">FirstName is required</div>
                                        </div>
                                     </div>
                               </div> 
                               <div class="col-sm-6">
                                  <div class="form-group">
                                     <label>Email</label>
                                     <input type="text" formControlName="email" class="form-control" [ngClass]="{ 'is-invalid': submitted && f.email.errors }" />
                                     <div *ngIf="submitted && f.email.errors" class="invalid-feedback">
                                        <div *ngIf="f.email.errors.required">Email is required</div>
                                        <div *ngIf="f.email.errors.email">Email must be a valid email address</div>
                                     </div>
                                  </div>
                               </div>
                               <div class="col-sm-6">
                                     <div class="form-group">
                                        <label>Mobile</label>
                                        <input type="text" formControlName="mobile" class="form-control" [ngClass]="{ 'is-invalid': submitted && f.mobile.errors }" />
                                        <div *ngIf="submitted && f.mobile.errors" class="invalid-feedback">
                                           <div *ngIf="f.mobile.errors">Mobile must be Valid and at least 10 digits</div>
                                          
                                        </div>
                                     </div>
                                  </div>
                               <div class="col-sm-6">
                                  <div class="form-group">
                                     <label>Password</label>
                                     <input type="password" formControlName="password" class="form-control" [ngClass]="{ 'is-invalid': submitted && f.password.errors }" />
                                     <div *ngIf="submitted && f.password.errors" class="invalid-feedback">
                                        <div *ngIf="f.password.errors.required">Password is required</div>
                                        <div *ngIf="f.password.errors.minlength">Password must be at least 6 characters</div>
                                     </div>
                                  </div>
                               </div>
                   </div>
                   <button type="submit" class="btn btn-primary">Submit</button>
                      </form>
           
          
       </div>
            <div class="modal-footer">
                <button type="button" class="btn btn-dark" data-dismiss="modal" (click) = "hide()">Close</button>
            
            </div>
          </div>
        </div>
        </div>


    In the end, don’t forgot to run ng serve command. If you have any query then do comment below.

    Note: Friends, I just tell the basic setup and things, you can change the code according to your requirements.

    I will appreciate that if you will tell your views for this post. Nothing matters if your views will be good or bad.

    Jassa

    Thank you.

  • Angular 8 dynamic routing working example

    Angular 8 dynamic routing working example

    Hello to all, welcome to therichpost.com. In this post, I will tell you, Angular 8 dynamic routing working example.

    Black Friday Gift

    In this post, I have made user component and in user component, I have many users with with dynamic urls with ids and that urls bring us to users information page.


    Here are the complete steps and please follow them carefully:

    1. Here are the basics commands to install angular 8 on your system:

    npm install -g @angular/cli 
    
    ng new angulardynamicid //Create new Angular Project
    
    $ cd angulardynamicid // Go inside the Angular Project Folder
    
    ng serve --open // Run and Open the Angular Project
    
    http://localhost:4200/ // Working Angular Project Url


    2. Now you need to run below commands to generate components users and userdetails:

    ng g component users
    
    ng g component userdetails

    3. Now you need to add below code into your src/app/app.module.ts file:

    import { BrowserModule } from '@angular/platform-browser';
    import { NgModule } from '@angular/core';
    
    import { AppComponent } from './app.component';
    import { UsersComponent } from './users/users.component';
    
    import { BrowserAnimationsModule } from '@angular/platform-browser/animations';
    import { Routes, RouterModule } from '@angular/router';
    import { UserdetailsComponent } from './userdetails/userdetails.component';
    
    const appRoutes: Routes = [
      { path: 'user', component: UsersComponent },
      { path: 'user-detail/:id', component: UserdetailsComponent },
     
    
    ];
    @NgModule({
      declarations: [
        AppComponent,
        UsersComponent,
        UserdetailsComponent
      ],
      imports: [
        BrowserModule,
        BrowserAnimationsModule, 
        RouterModule.forRoot(
          appRoutes,
          { enableTracing: true } // <-- debugging purposes only
        )
      ],
      providers: [],
      bootstrap: [AppComponent]
    })
    export class AppModule { }


    4. Now you need to add below code into src/app/app.component.html file:


    <link rel="stylesheet" href="https://maxcdn.bootstrapcdn.com/bootstrap/4.3.1/css/bootstrap.min.css">
    <!-- <div class="jumbotron text-center">
      <h1>Angular 6 Routing Example</h1>
    </div> -->
    <nav class="navbar navbar-expand-sm bg-light">
      <ul class="nav nav-pills">
        <li class="nav-item"><a class="nav-link" routerLink="/">Home</a></li>
        <li class="nav-item"><a class="nav-link" routerLink="/user">users</a></li>
      </ul>
    </nav>
    <br>
    
    <div class="container-fluid">
    <h3><router-outlet></router-outlet></h3>
    </div>


    For bootstrap styling, I have directly added bootstrap cdn but we can add it right also and for that you can follow this :- Add Bootstrap in Angular

    5. Now you need to add below code into src/app/users/users.component.html file:

    <h1>Users</h1>
    <ul class="nav nav-pills">
      <li class="nav-item"><a class="nav-link" routerLink="/user-detail/1">user1</a></li>
      <li class="nav-item"><a class="nav-link" routerLink="/user-detail/2">user2</a></li>
    </ul>


    6. Now you need to add below code into src/app/userdetails/userdetails.component.html file:

    <h2> User No: {{id}}</h2>


    7. Now you need to add below code into src/app/userdetails/userdetails.component.ts file:

    import { Component, OnInit } from '@angular/core';
    import {Router, ActivatedRoute, Params} from '@angular/router';
    @Component({
      selector: 'app-userdetails',
      templateUrl: './userdetails.component.html',
      styleUrls: ['./userdetails.component.css']
    })
    export class UserdetailsComponent implements OnInit {
    
      constructor(private activatedRoute: ActivatedRoute) {}
      public id: string;
      ngOnInit() {
    
         // Note: Below 'queryParams' can be replaced with 'params' depending on your requirements
         this.id = this.activatedRoute.snapshot.paramMap.get('id');
         console.log(this.id);
      
        
      }
    
    }


    This is it and if you have any query related to this post then please do comment below.

    Jassa

    Thank you

  • Angular 8 date input binding date value

    Angular 8 date input binding date value

    Hello to all, welcome to therichpost.com. In this post, I will tell you, Angular 8 date input binding date value.


    Angular 8 date input binding date value
    Angular 8 date input binding date value

    In reactive form, I am binding form date input field with today date. I have used Angular 8 and Bootstrap 4.

    Guys Angular 11 came and also angular 12 will come soon and here are some important posts related to angular 11: Angular 11 Tutorials

    Here are the complete steps, please follow carefully:

    1. Here are the basics commands to install angular 8 on your system:

    npm install -g @angular/cli 
    
    ng new angulardate //Create new Angular Project
    
    cd angulardate // Go inside the Angular Project Folder
    
    ng serve --open // Run and Open the Angular Project
    
    http://localhost:4200/ // Working Angular Project Url


    2. After done with above, you need to run below commands to set bootstrap environment into your angular 8 application:

    npm install --save bootstrap


    3. Now you need to add below code into your angular.json file:

    ...
    "styles": [
                  "src/styles.css",
            "node_modules/bootstrap/dist/css/bootstrap.min.css"
                ],
                "scripts": ["node_modules/bootstrap/dist/js/bootstrap.min.js"]
    ...


    4. Now you need to add below code into your src/app/app.module.ts file:

    import { BrowserModule } from '@angular/platform-browser';
    import { NgModule } from '@angular/core';
    import { AppComponent } from './app.component';
    import { ReactiveFormsModule, FormsModule } from '@angular/forms';
    @NgModule({
      declarations: [
        AppComponent
      ],
      imports: [
        BrowserModule,
        ReactiveFormsModule,
        FormsModule
      ],
      providers: [],
      bootstrap: [AppComponent]
    })
    export class AppModule { }


    5. Now you need to add below code into your src/app/app.component.ts file:

    import { Component } from '@angular/core';
    import { FormBuilder, FormGroup, FormsModule } from '@angular/forms';
    @Component({
    selector: 'app-root',
    templateUrl: './app.component.html',
    styleUrls: ['./app.component.css']
    })
    export class AppComponent {
      BirthDate:Date;
      constructor(private formBuilder: FormBuilder) {}
    
      ngOnInit() {
        this.BirthDate = new Date();
        this.registerForm = this.formBuilder.group({
        BirthDate : ''
        });
      }
    
    }


    6. Now you need to add below code into src/app/app.component.html file:

    <div class="container">
      <h1 class="text-center">Angular 8 get dynamic today date in date field:</h1>
      <form [formGroup]="registerForm" (ngSubmit)="onSubmit()">
        <div class="form-group">
          <label>Date:</label>
          <div class="input-group">
            <input type="date" class="form-control" id="BirthDate" name="BirthDate"
            [ngModel]="BirthDate | date:'yyyy-MM-dd'"  formControlName="BirthDate">
          </div>
        </div>
      </form>
    </div>


    In the end, don’t forgot to run ng serve command. If you have any query then do comment below.

    Note: Friends, I just tell the basic setup and things, you can change the code according to your requirements.

    I will appreciate that if you will tell your views for this post. Nothing matters if your views will be good or bad.

    Jassa

    Thanks

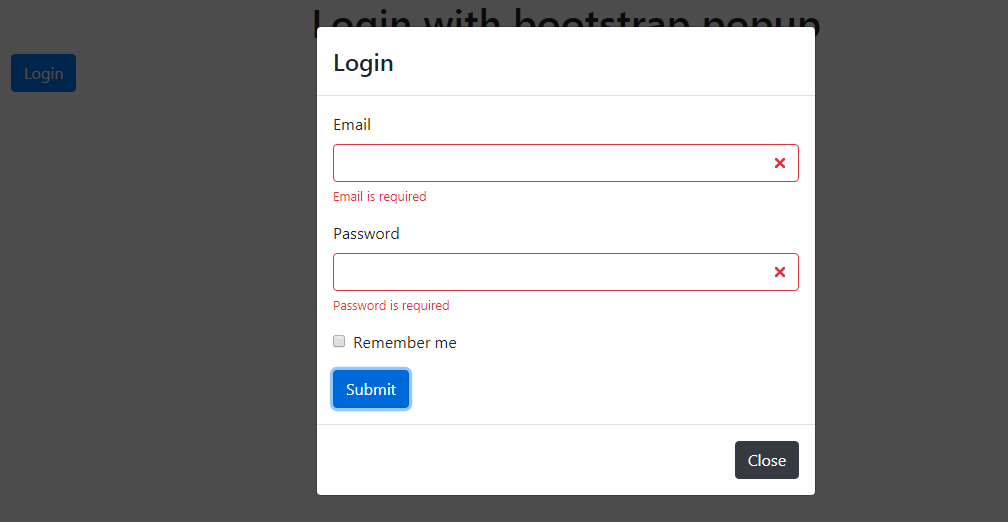
  • Angular 8  bootstrap popup login form

    Angular 8 bootstrap popup login form

    Hello to all, welcome to therichpost.com. In this post, I will tell you, Angular 8 bootstrap popup login form.

    Angular 8 bootstrap popup login form

    Angular and Bootstrap combination is amazing, fast and user friendly. Also I shared, Angular Bootstrap register form.

    Here are the complete steps and please do follow carefully:


    1. Here are the basics commands to install angular 8 on your system:

    npm install -g @angular/cli 
    
    ng new angularpopup //Create new Angular Project
    
    $ cd angularpopup // Go inside the Angular Project Folder
    
    ng serve --open // Run and Open the Angular Project
    
    http://localhost:4200/ // Working Angular Project Url

    2. After done with above, you need to run below commands to set bootstrap environment into your angular 8 application:

    npm install --save bootstrap

    3. Now you need to add below code into your angular.json file:

    ...
    "styles": [
                  "src/styles.css",
            "node_modules/bootstrap/dist/css/bootstrap.min.css"
                ],
                "scripts": ["node_modules/bootstrap/dist/js/bootstrap.min.js"]
    ...

    4. Now you need to add below code into your src/app/app.module.ts file:

    import { BrowserModule } from '@angular/platform-browser';
    import { NgModule } from '@angular/core';
    import { AppComponent } from './app.component';
    import { ReactiveFormsModule } from '@angular/forms';
    @NgModule({
      declarations: [
        AppComponent
      ],
      imports: [
        BrowserModule,
        ReactiveFormsModule
      ],
      providers: [],
      bootstrap: [AppComponent]
    })
    export class AppModule { }
    

    5. Now you need to add below code into your src/app/app.component.ts file:

    import { Component } from '@angular/core';
    import { FormBuilder, FormGroup, Validators } from '@angular/forms';
    @Component({
      selector: 'app-root',
      templateUrl: './app.component.html',
      styleUrls: ['./app.component.css']
    })
    export class AppComponent {
      title = 'angulartoastr';
      showModal: boolean;
      registerForm: FormGroup;
      submitted = false;
      constructor(private formBuilder: FormBuilder) { }
      show()
      {
        this.showModal = true; // Show-Hide Modal Check
        
      }
      //Bootstrap Modal Close event
      hide()
      {
        this.showModal = false;
      }
    
      ngOnInit() {
        this.registerForm = this.formBuilder.group({
            email: ['', [Validators.required, Validators.email]],
            password: ['', [Validators.required, Validators.minLength(6)]]
        });
    }
    // convenience getter for easy access to form fields
    get f() { return this.registerForm.controls; }
    onSubmit() {
        this.submitted = true;
        // stop here if form is invalid
        if (this.registerForm.invalid) {
            return;
        }
        if(this.submitted)
        {
          this.showModal = false;
        }
       
    }
      
    }

    6. Now you need to add below code into src/app/app.component.html file:

      <div class="container">
      <h1 class="text-center">Login with bootstrap popup</h1>
      <button type="button" class="btn btn-primary" (click) = "show()">Login</button>
       </div>
    <!-- Creates the bootstrap modal where the image will appear -->
    <div [style.display]="showModal ? 'block' : 'none'" class="modal" id="imagemodal" tabindex="-1" role="dialog" aria-labelledby="myModalLabel" aria-hidden="true">
    <div class="modal-dialog">
      <div class="modal-content">
        <div class="modal-header">
          <h4 class="modal-title" id="myModalLabel">Login</h4>
        </div>
        <div class="modal-body">
            <form [formGroup]="registerForm" (ngSubmit)="onSubmit()">
                <div class="form-group">
                    <label>Email</label>
                    <input type="text" formControlName="email" class="form-control" [ngClass]="{ 'is-invalid': submitted && f.email.errors }" />
                    <div *ngIf="submitted && f.email.errors" class="invalid-feedback">
                        <div *ngIf="f.email.errors.required">Email is required</div>
                        <div *ngIf="f.email.errors.email">Email must be a valid email address</div>
                    </div>
                </div>
                <div class="form-group">
                    <label>Password</label>
                    <input type="password" formControlName="password" class="form-control" [ngClass]="{ 'is-invalid': submitted && f.password.errors }" />
                    <div *ngIf="submitted && f.password.errors" class="invalid-feedback">
                        <div *ngIf="f.password.errors.required">Password is required</div>
                        <div *ngIf="f.password.errors.minlength">Password must be at least 6 characters</div>
                    </div>
                  </div>
              <div class="form-group form-check">
                <label class="form-check-label">
                  <input class="form-check-input" type="checkbox" name="remember"> Remember me
                </label>
              </div>
              <button type="submit" class="btn btn-primary">Submit</button>
            </form>
        </div>
        <div class="modal-footer">
            <button type="button" class="btn btn-dark" data-dismiss="modal" (click) = "hide()">Close</button>
        
        </div>
      </div>
    </div>
    </div>

    In the end, don’t forgot to run ng serve command. If you have any query then do comment below.

    Jassa

    Thank you.

  • How to connect aws instance files with filezilla?

    How to connect aws instance files with filezilla?

    Hello to all, welcome to therichpost.com. In this post, I will tell you, How to connect aws instance files with filezilla?

    In this post, I will tell you, how to get files with help of filezilla from aws instance and private key.

    Here are the complete steps and please follow carefully:

    1. Very first, you need to add, your aws instance host(ec2-**-***-***-***.compute-1.amazonaws.com) in filezilla host and aws instance username(ec2-user) in filezilla username. 

    2. Second go to filezilla setting, please check below image:

    filezilla settings
    filezilla settings

    3. After click on settings after set SFTP and ADD KEY section:

    filezilla SFTP
    filezilla SFTP

    4. Add private key(Private Key Generated Via .pem file with putty)  after click on Add key file.

    5. After Press Add Key File button and adding you Private key, click on Quickconnect button and you will get all the files from AWS server.

    This is it and if you have any query then please do comment below.

    Jassa

    Thank you

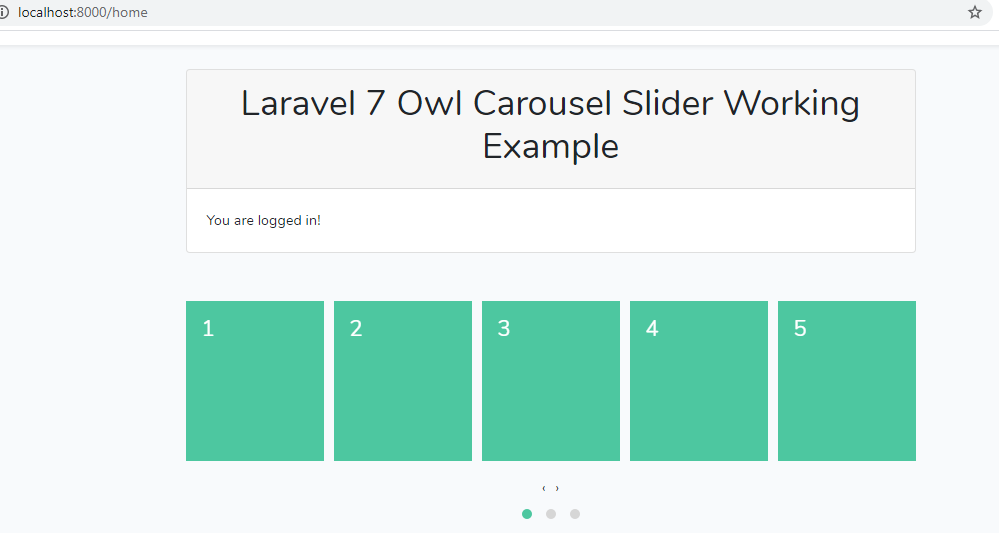
  • Bootstrap carousel slider in Angular

    Bootstrap carousel slider in Angular

    Hello to all, welcome to therichpost.com. In this post, I will tell you, Bootstrap carousel slider in Angular.

    I am adding Bootstrap carousel slider in Angular 8 version.

    Bootstrap carousel slider in Angular 8

    Here is the complete implementation steps and please follow them carefully:

    1. Here are the basics commands to install angular 8 on your system:

    npm install -g @angular/cli 
    
    ng new angularslider //Create new Angular Project
    
    $ cd angularslider // Go inside the Angular Project Folder
    
    ng serve --open // Run and Open the Angular Project
    
    http://localhost:4200/ // Working Angular Project Url


    2. After done with above, you need to run below commands to set bootstrap carousel environment into your angular 8 application:

    ng add ngx-bootstrap  --component carousel


    3. Now you need to add below code into your src/app/app.module.ts file:

    import { BrowserModule } from '@angular/platform-browser';
    import { NgModule } from '@angular/core';
    import { AppComponent } from './app.component';
    import { CarouselModule } from 'ngx-bootstrap/carousel';
    @NgModule({
      declarations: [
        AppComponent
      ],
      imports: [
        BrowserModule,
        CarouselModule.forRoot()
      ],
      providers: [],
      bootstrap: [AppComponent]
    })
    export class AppModule { }


    4. Now you need to add below code into your src/app/app.component.ts file:

    import { Component } from '@angular/core';
    import { CarouselConfig } from 'ngx-bootstrap/carousel';
    @Component({
      selector: 'app-root',
      templateUrl: './app.component.html',
      styleUrls: ['./app.component.css'],
      providers: [
        { provide: CarouselConfig, useValue: { interval: 1500, noPause: true, showIndicators: true } }
      ]
    })
    export class AppComponent {
      title = 'testfunctions';
      
    }


    5. Now you need to add below code into src/app/app.component.html file:

    <carousel>
      <slide>
        <img src="image1.jpg" alt="first slide" style="display: block; width: 100%;">
        <div class="carousel-caption d-none d-md-block">
          <h3>First slide label</h3>
          <p>Nulla vitae elit libero, a pharetra augue mollis interdum.</p>
        </div>
      </slide>
      <slide>
        <img src="image2.jpg" alt="second slide" style="display: block; width: 100%;">
        <div class="carousel-caption d-none d-md-block">
          <h3>Second slide label</h3>
          <p>Lorem ipsum dolor sit amet, consectetur adipiscing elit.</p>
        </div>
      </slide>
      <slide>
        <img src="image3.jpg" alt="third slide" style="display: block; width: 100%;">
        <div class="carousel-caption d-none d-md-block">
          <h3>Third slide label</h3>
          <p>Praesent commodo cursus magna, vel scelerisque nisl consectetur.</p>
        </div>
      </slide>
    </carousel>


    This is it and don’t forgot to run ng serve command. if you have any query then please do comment below.

    Jassa

    Thank you

  • Angular 8 enlarge image in custom bootstrap modal

    Angular 8 enlarge image in custom bootstrap modal

    Hello to all, welcome again on therichpost.com. In this post, I will tell you, Angular 8 enlarge image in custom bootstrap modal.

    This example is with my own thought and may be it will be helpful to someone.

    Angular 8 enlarge image in custom bootstrap modal
    Angular 8 enlarge image in custom bootstrap modal

    Here is the complete working steps and please do it very carefully:

    1. Here are the basics commands to install angular 8 on your system:

    npm install -g @angular/cli 
    
    ng new angularpopup //Create new Angular Project
    
    $ cd angularpopup // Go inside the Angular Project Folder
    
    ng serve --open // Run and Open the Angular Project
    
    http://localhost:4200/ // Working Angular Project Url


    2. After done with above, you need to run below commands to set bootstrap environment into your angular 8 application:

    npm install --save bootstrap


    3. Now you need to add below code into your angular.json file:

    ...
    "styles": [
                  "src/styles.css",
            "node_modules/bootstrap/dist/css/bootstrap.min.css"
                ],
                "scripts": ["node_modules/bootstrap/dist/js/bootstrap.min.js"]
    ...


    4. Now you need to add below code into your src/app/app.component.ts file:

    import { Component } from '@angular/core';
    @Component({
      selector: 'app-root',
      templateUrl: './app.component.html',
      styleUrls: ['./app.component.css']
    })
    export class AppComponent {
      title = 'angulartoastr';
      showModal: boolean;
      show()
      {
        this.showModal = true; // Show-Hide Modal Check
        
      }
      //Bootstrap Modal Close event
      hide()
      {
        this.showModal = false;
      }
    
      
    }


    5. Now you need to add below code into src/app/app.component.html file:

    <a href="#" (click) = "show()">
      <img id="imageresource" src="https://therichpost.com/wp-content/uploads/2019/09/Angular-8-custom-accordion-working-example-364x225.png" style="width: 125px; height: 125px;">
      Click to Enlarge
    </a>
    <!-- Creates the bootstrap modal where the image will appear -->
    <div [style.display]="showModal ? 'block' : 'none'" class="modal" id="imagemodal" tabindex="-1" role="dialog" aria-labelledby="myModalLabel" aria-hidden="true">
    <div class="modal-dialog">
      <div class="modal-content">
        <div class="modal-header">
          <h4 class="modal-title" id="myModalLabel">Image preview</h4>
        </div>
        <div class="modal-body">
          <img src="https://therichpost.com/wp-content/uploads/2019/09/Angular-8-custom-accordion-working-example-364x225.png" id="imagepreview" style="width: 425px; height: 425px;" >
        </div>
        <div class="modal-footer">
          <button type="button" class="btn btn-default" data-dismiss="modal" (click) = "hide()">Close</button>
        </div>
      </div>
    </div>
    </div>


    In the end please run ng serve command to taste the output. If you have any query then please comment below.

    Jassa

    Thank you