
Hello to all welcome back on my blog therichpost.com. Today in this blog post, I am going to tell you Angular 12 Crud. Angular 12 Crud Tutorial with Services Part 1 – Add User & Get Users.
In this post, we will cover below things:
- Angular12 Crud with PHP MySQL backend.
- Angular 12 Crud with services.
- Angular 12 Reactive Forms.
- Bootstrap 5 in Angular 12.
Guys Angular 12 and if you are new in Angular 12 then please check below link:
Guys here is working code snippet and please follow carefully to avoid the mistakes:
1. Firstly friends we need fresh angular 12 setup and for this we need to run below commands but if you already have angular 12 setup then you can avoid below commands. Secondly we should also have latest node version(14.17.0) installed on our system:
npm install -g @angular/cli

ng new angularcrud //Create new Angular Project

cd angularcrud // Go inside the Angular Project Folder
2. Now friends, here we need to run below commands into our project terminal to install bootstrap 5 module for styling, into our angular application:
npm install bootstrap
3. Now friends, here we need to run below commands into our project terminal to create service file and user related components:
ng g service crud //create service file

ng g c users //create user component

ng g c adduser //create add user component
4. Now friends, now we need to add below code into our angularcrud/angular.json file to add bootstrap style:
...
 "styles": [
              "src/styles.css",
              "node_modules/bootstrap/dist/css/bootstrap.min.css",

            ],
5. Now friends, now we need to add below code into our angularcrud/src/app/app.module.ts file to import reactive form module and HTTPCLIENT module for api calling:
...

import { ReactiveFormsModule } from '@angular/forms';
import { HttpClientModule } from '@angular/common/http';

@NgModule({
  ...
  imports: [
   ...
    HttpClientModule,
    ReactiveFormsModule
  ]...
6. Now friends, now we need to add below code into our angularcrud/src/app/app-routing.module.ts file to make routes:
...
import { UsersComponent } from './users/users.component';
import { AdduserComponent } from './adduser/adduser.component';
const routes: Routes = [
  { path: '', component: UsersComponent },
  { path: 'users', component: UsersComponent },
  { path: 'adduser', component: AdduserComponent },
];
...
7. Now friends, now we need to add below code into our angularcrud/src/app/crud.service.ts file to create API services:
import { Injectable } from '@angular/core';
import { HttpClient } from '@angular/common/http';
@Injectable({
  providedIn: 'root'
})
export class CrudService {
  userData:any;
  constructor(private http:HttpClient) { }

  //get all users  details
  public getusers()
      {

          return this.http.get('http://localhost/users.php');
      }

  //add new user
  public adduser(userData)
  {
    return this.http.post('http://localhost/users.php/'
  , userData).subscribe((res: Response) => {
    this.getusers();
  });
  }

}
8. Now guys, now we need to add below code into our angularcrud/src/app/app.component.html file to set the angular frontend and call others components:
<nav class="navbar navbar-expand-lg navbar-light bg-light">
  <div class="container-fluid">
    <a class="navbar-brand" [routerLink]="['']">Therichpost</a>
    <button class="navbar-toggler" type="button" data-bs-toggle="collapse" data-bs-target="#navbarNav" aria-controls="navbarNav" aria-expanded="false" aria-label="Toggle navigation">
      <span class="navbar-toggler-icon"></span>
    </button>
    <div class="collapse navbar-collapse" id="navbarNav">
      <ul class="navbar-nav">
        <li class="nav-item">
          <a class="nav-link active" [routerLink]="['']" >Home</a>
        </li>
        <li class="nav-item">
          <a class="nav-link" [routerLink]="['/users']" >Users</a>
        </li>
        <li class="nav-item">
          <a class="nav-link" [routerLink]="['/adduser']" >Add User</a>
        </li>

      </ul>
    </div>
  </div>
</nav>
<router-outlet></router-outlet>
9. Now guys, now we need to add below code into our angularcrud/src/app/adduser/adduser.component.ts file to create add user functionality and reactive form validations:
import { Component, OnInit } from '@angular/core';
import { FormBuilder, FormGroup, Validators } from '@angular/forms';
import { CrudService } from '../crud.service';
import { Router } from '@angular/router';
@Component({
  selector: 'app-adduser',
  templateUrl: './adduser.component.html',
  styleUrls: ['./adduser.component.css']
})
export class AdduserComponent implements OnInit {

registerForm: FormGroup;
submitted = false;
constructor( private crudservice: CrudService, private formBuilder: FormBuilder, private router: Router){}
//Add user form actions
get f() { return this.registerForm.controls; }
onSubmit() {

  this.submitted = true;
  // stop here if form is invalid
  if (this.registerForm.invalid) {
      return;
  }
  //True if all the fields are filled
  if(this.submitted)
  {

    // Initialize Params Object
     var myFormData = new FormData();

   // Begin assigning parameters

      myFormData.append('myUsername', this.registerForm.value.firstname);
      myFormData.append('myEmail', this.registerForm.value.email);

      this.crudservice.adduser(myFormData); //caaling add user service
      this.router.navigate([`/users`]); //after form submit page will redirect to users page
  }

}
  ngOnInit() {
    //Add User form validations
    this.registerForm = this.formBuilder.group({
    email: ['', [Validators.required, Validators.email]],

    firstname: ['', [Validators.required]]
    });
  }

}
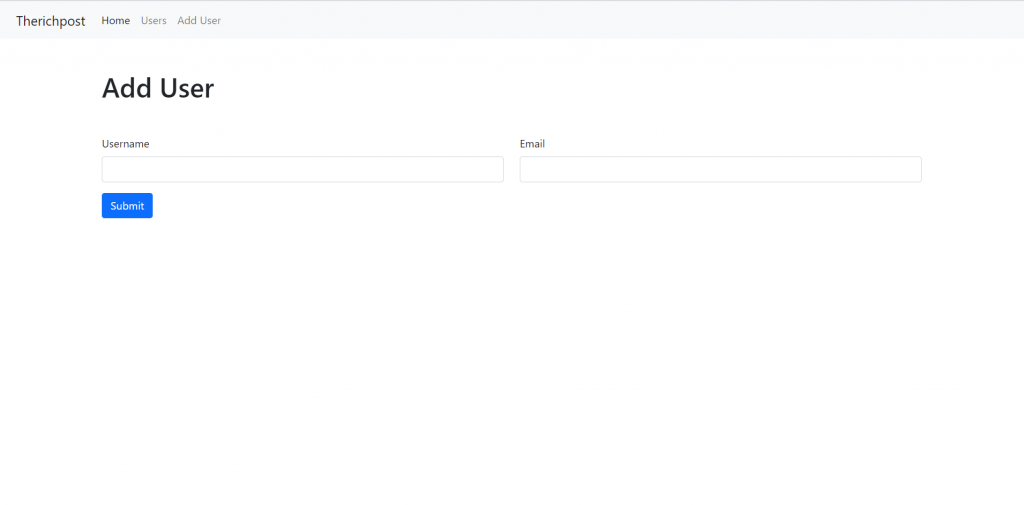
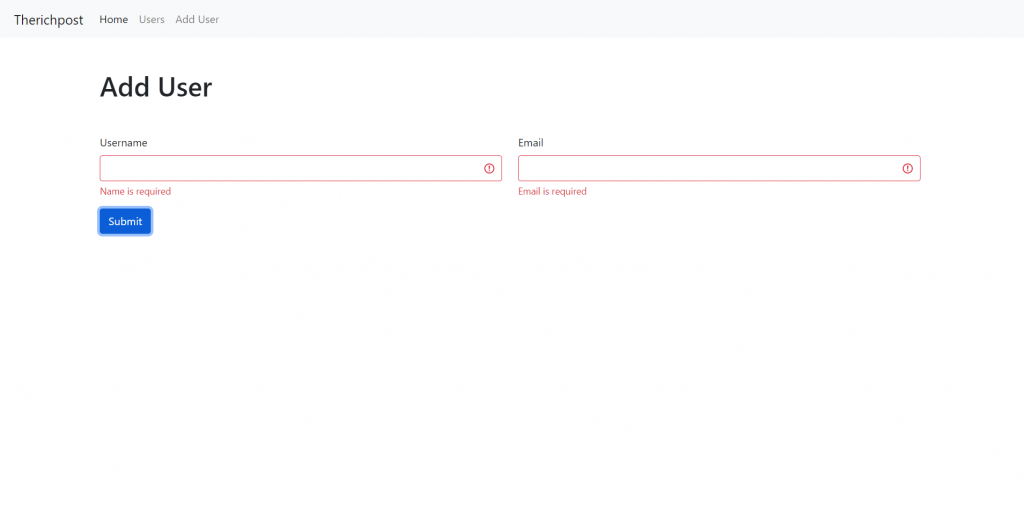
10. Now guys, now we need to add below code into our angularcrud/src/app/adduser/adduser.component.html file to create add user form:
<div class="container p-5">
    <h1 class="text-left mb-5">Add User</h1>
  <form [formGroup]="registerForm" (ngSubmit)="onSubmit()">
    <div class="row">
       <div class="col-sm-6">
          <div class="form-group">
                <label>Username</label>
                <input type="text" formControlName="firstname" class="form-control" [ngClass]="{ 'is-invalid': submitted && f.firstname.errors }" />
                <div *ngIf="submitted && f.firstname.errors" class="invalid-feedback">
                      <div *ngIf="f.firstname.errors.required">Name is required</div>
                </div>
             </div>
       </div>
       <div class="col-sm-6">
          <div class="form-group">
             <label>Email</label>
             <input type="text" formControlName="email" class="form-control" [ngClass]="{ 'is-invalid': submitted && f.email.errors }" />
             <div *ngIf="submitted && f.email.errors" class="invalid-feedback">
                <div *ngIf="f.email.errors.required">Email is required</div>
                <div *ngIf="f.email.errors.email">Email must be a valid email address</div>
             </div>
          </div>
       </div>


   </div>
   <button type="submit" class="btn btn-primary">Submit</button>
  </form>
  </div>
11. Now guys, now we need to add below code into our angularcrud/src/app/users/users.component.ts file to create get all users details functionality:
...
import { CrudService } from '../crud.service';
@Component({
  selector: 'app-users',
  templateUrl: './users.component.html',
  styleUrls: ['./users.component.css']
})
export class UsersComponent implements OnInit {
  data = [];
  constructor( private crudservice: CrudService){
    //Get all usera details
    this.crudservice.getusers().subscribe((res: any[])=>{

      this.data = res;
    });
  }

  ngOnInit(): void {
  }

}
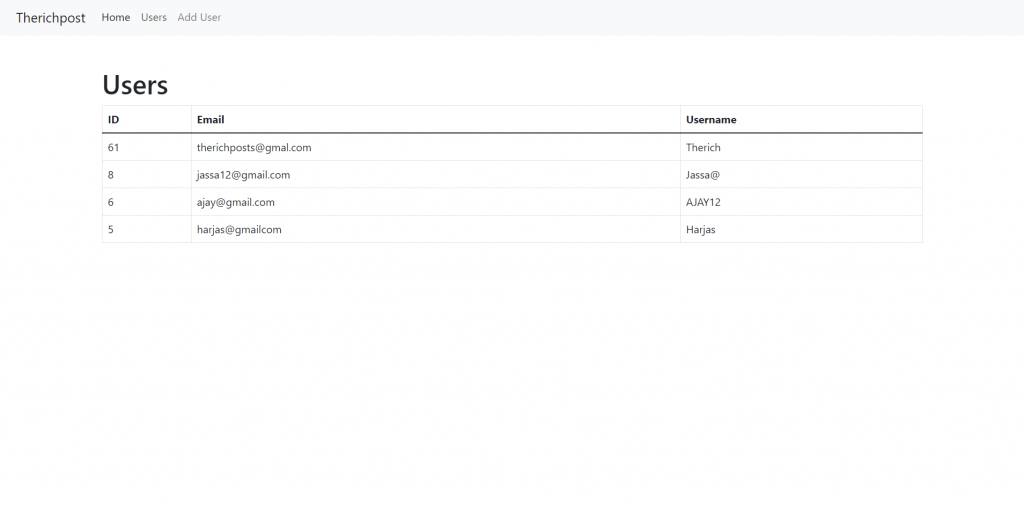
12. Now guys, now we need to add below code into our angularcrud/src/app/users/users.component.html file to create show users details table:
<div class="container p-5">
    <h1>Users</h1>
    <table class="table table-hover table-bordered">
        <thead>
          <tr>
            <th>ID</th>
            <th>Email</th>
            <th>Username</th>
          </tr>
        </thead>
        <tbody>


              <tr *ngFor="let group of data">
                <td>{{group.id}}</td>
                <td>{{group.email}}</td>
                <td>{{group.username}}</td>
              </tr>


        </tbody>
      </table>


</div>
13. Now guys, now we need to create file users.php inside our xampp/htdocs folder and add below code inside users.php file
Please create users database inside phpmysql admin and create userdetails tabel and create id, email and username fields
<?php header('Access-Control-Allow-Origin: *');
header('Access-Control-Allow-Credentials: true');
header('Access-Control-Allow-Methods:POST,GET,PUT,DELETE');
header('Access-Control-Allow-Headers: content-type or other');
header('Content-Type: application/json');

//Please create users database inside phpmysql admin and create userdetails tabel and create id, email and username fields

$servername = "localhost";
$username   = "root";
$password   = "";
$dbname     = "users";
// Create connection
$conn = new mysqli($servername, $username, $password, $dbname);
// Check connection
if ($conn->connect_error) {
    die("Connection failed: " . $conn->connect_error);
}

//Add user
if(isset($_POST['myEmail']))
{
    $sql = "INSERT INTO userdetails (email, username)
        VALUES ('".$_POST['myEmail']."', '".$_POST['myUsername']."')";
    if (mysqli_query($conn,$sql)) {
    $data = array("data" => "You Data added successfully");
        echo json_encode($data);
    } else {
        $data = array("data" => "Error: " . $sql . "<br>" . $conn->error);
        echo json_encode($data);

    }
}
else
{
    //get all users details
    $trp = mysqli_query($conn, "SELECT * from userdetails ORDER BY id DESC");
    $rows = array();
    while($r = mysqli_fetch_assoc($trp)) {
        $rows[] = $r;
    }


    print json_encode($rows);
}

die();
Now in the end please run ng serve command to check the out on browser(localhost:4200) and also please start your xampp.
After this post, I will do edit user and delete user also.
Guys if you will still have any kind of query, suggestions or requirement then please feel free to comment below.
I will appreciate that if you will tell your views for this post. Nothing matters if your views will be good or bad because with your views, I will make my next posts more good and helpful.
Jassa
Thanks
Hi ! I’ve tried the code, it’s works very well. Please, give us the second part of this tutorial about Update and Delete.
Next part will come tomorrow.
Thanks.
Please check this:
https://therichpost.com/angular-12-crud-tutorial-with-services-part-2-delete-user/
hey thanks for sharing thi tutorial ,bt I faced some Errors in it while running not at compiling time …Following is the error .plz post the solution for it.
“Access to XMLHttpRequest at ‘http://localhost/users.php’ from origin ‘http://localhost:4200’ has been blocked by CORS policy: No ‘Access-Control-Allow-Origin’ header is present on the requested resource.”
I also trying with removing the header in users.php file but still not working ,hope u may whats the problem.
Did you add this code inside you php file?:
header(‘Access-Control-Allow-Origin: *’);
header(‘Access-Control-Allow-Credentials: true’);
header(‘Access-Control-Allow-Methods:POST,GET,PUT,DELETE’);
header(‘Access-Control-Allow-Headers: content-type or other’);
header(‘Content-Type: application/json’);
Thanks for this post.
You are welcome George.