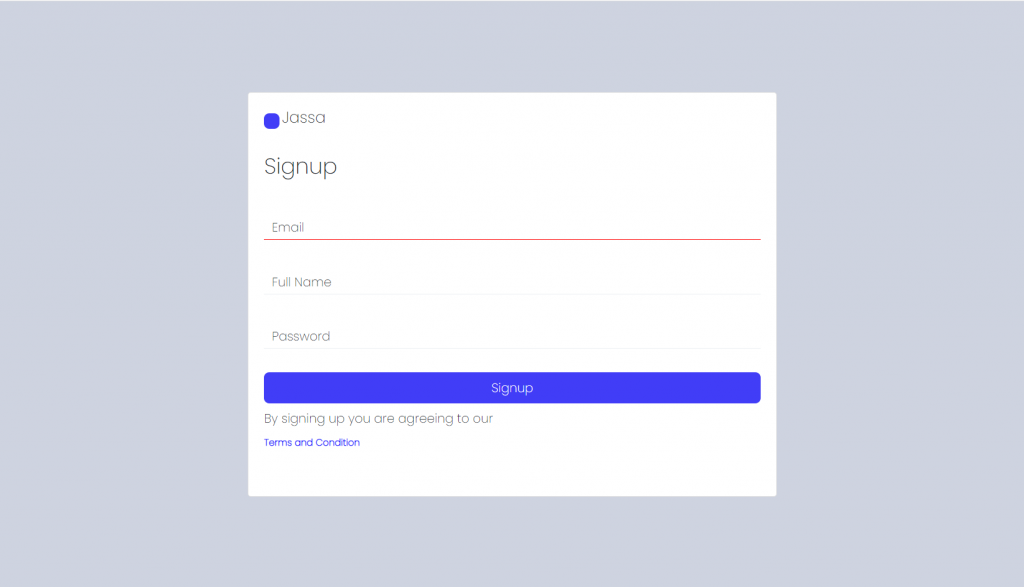
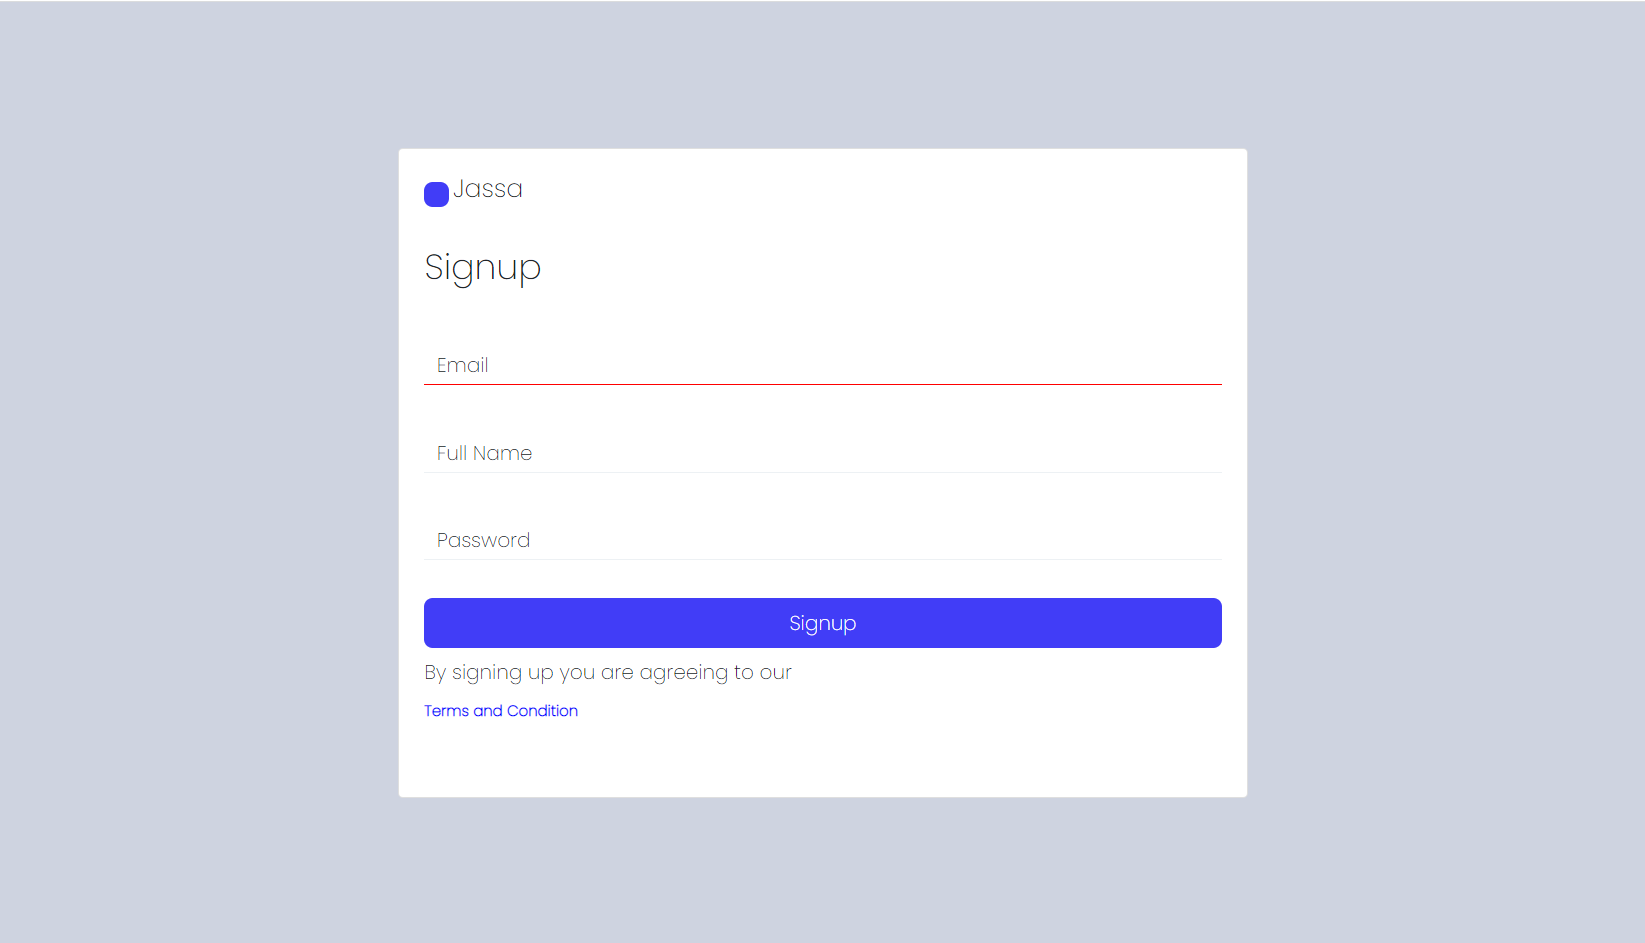
Hello friends, welcome back to my blog. Today in this blog post, I am going to show you, Reactjs Signup Form Add Custom Validations Using Hooks

For reactjs new comers, please check the below link:
Friends now I proceed onwards and here is the working code snippet and please use this carefully to avoid the mistakes:
1. Firstly, we need fresh reactjs setup and for that, we need to run below commands into out terminal and also we should have latest node version installed on our system:
npx create-react-app reactdemo

cd reactdemo

npm start
2. Finally for the main output, we need to add below code into our reactdemo/src/App.js file or if you have fresh setup then you can replace reactdemo/src/App.js file code with below code:
import React from 'react'
import "./App.css"
export default function App() {

    const Form=()=>{
        const{useState}=React;

        const[email,setemail]=useState("");
        const[name,setname]=useState("");
        const[password,setpassword]=useState("");


        const[eye,seteye]=useState(true);
        const[inputtext,set_inputtext]=useState("password");
        const[warning,setwarning]=useState(false);


        const[warning_email,set_warningemail]=useState(false);
        const[warning_name,set_warningname]=useState(false);
        const[warning_password,set_warningpassword]=useState(false);


        const input_email=(email_event)=>{
        setemail(email_event.target.value);
        }
        const input_name=(name_event)=>{
        setname(name_event.target.value);
        }
        const input_password=(password_event)=>{
        setpassword(password_event.target.value);
        }


        const Eye=()=>{
        if(inputtext=="password"){
        set_inputtext("text");
        seteye(false);
        setwarning(true);
        }
        else{
        set_inputtext("password");
        seteye(true);
        setwarning(false);
        }
        }

        const Started=()=>{
        set_warningemail(false);
        set_warningname(false);
        set_warningpassword(false);

        if(email==""){
        set_warningemail(true);
        }
        else if(name==""){
        set_warningname(true);
        }
        else if(password==""){
        set_warningpassword(true);
        }
        else{
        alert("form submitted");
        }
        }

        return(
        <>
            <div className="container">
                <div className="card">
                    <div className="top_div">
                        <div className="bric">
                            <span></span>
                            <h5>Jassa</h5>
                        </div>


                    </div>
                    <div className="text">
                        <h3>Signup</h3>

                    </div>
                    <div className="input_text">
                        <input type="text" className={`${warning_email ? "input_warning" : "" }`} value={email} onChange={input_email} required />
                        <label>Email</label>
                        <span>{warning_email}</span>
                    </div>
                    <div className="input_text">
                        <input type="text" className={`${warning_name ? "input_warning" : "" }`} value={name} onChange={input_name} required/>
                        <label>Full Name</label>
                        <span>{warning_name}</span>
                    </div>
                    <div className="input_text">
                        <input type={inputtext} className={`${warning ? "warning" : "" } ${warning_password ? "input_warning" : "" }`} value={password} onChange={input_password} required />
                        <label>Password</label>
                        <span>{warning_password}</span>
                        <i onClick={Eye} className={`fa ${eye ? "fa-eye-slash" : "fa-eye" }`}></i>
                    </div>
                    <div className="button">
                        <button onClick={Started}>Signup</button>
                        <h6>By signing up you are agreeing to our</h6>
                        <a href="#">Terms and Condition</a>
                    </div>
                </div>

            </div>
        </>
        );
        }
    return (
        <div>
            <Form />
        </div>
    )
}
3. Finally for the main output, we need to add below code into our reactdemo/src/App.css file:
@import url('https://fonts.googleapis.com/css2?family=Poppins:wght@200&display=swap');

* {
    margin: 0;
    padding: 0;
    box-sizing: border-box
}

.container {
    min-height: 100vh;
    display: flex;
    justify-content: center;
    align-items: center;
    background-color: #ced3e0
}

.card {
    height: 520px;
    width: 680px;
    border-radius: 12px;
    background-color: #fff;
    font-family: 'Poppins', sans-serif;
    padding: 20px
}

.top_div {
    display: flex;
    justify-content: space-between;
    align-items: center
}

.bric {
    display: flex;
    align-items: center;
    justify-content: center
}

.bric span {
    height: 20px;
    width: 20px;
    background-color: #413df7;
    border-radius: 7px;
    margin-right: 3px
}

.top_div p {
    font-size: 12px;
    font-weight: 600
}

.top_div p a {
    text-decoration: none;
    color: blue;
    margin-left: 2px
}

.text {
    margin-top: 25px
}

.text h6 {
    margin-top: 10px;
    color: #858d93
}

.input_text {
    position: relative;
    margin-top: 30px
}

input[type="text"] {
    width: 100%;
    height: 40px;
    border: none;
    border-bottom: 1px solid #edf1f4;
    font-size: 16px;
    padding: 0 10px;
    outline: 0;
    caret-color: #a19ffc;
    color: #a19ffc;
    background-color: white!important;
}

.input_text label {
    pointer-events: none;
    position: absolute;
    left: 0;
    top: 12px;
    font-size: 16px;
    padding: 0 10px;
    transition: all 0.5s
}

input[type="password"] {
    width: 100%;
    height: 40px;
    outline: 0;
    border: none;
    border-bottom: 1px solid #edf1f4;
    font-size: 12px;
    padding: 0 10px;
    padding-right: 30px;
    caret-color: #a19ffc;
    color: #a19ffc
}

.input_text input:focus~label,
.input_text input:valid~label {
    top: -13px;
    font-weight: 700;
    color: #a19ffc;
    left: -5px
}

.input_text i {
    position: absolute;
    right: 8px;
    top: 12px;
    cursor: pointer;
    transition: all 0.5s;
    color: #a19ffc
}

.input_warning {
    border-bottom: 1px solid red !important
}

.fa-eye {
    position: absolute;
    right: 8px;
    top: 12px;
    cursor: pointer;
    transition: all 0.5s;
    color: #a19ffc
}

.button {
    margin-top: 30px
}

.button button {
    width: 100%;
    height: 40px;
    border: none;
    border-radius: 7px;
    font-size: 16px;
    color: #fff;
    background-color: #413df7;
    transition: all 0.5s;
    cursor: pointer
}

.button button:hover {
    background-color: #0a078f
}

.button h6 {
    margin-top: 10px
}

.button a {
    text-decoration: none;
    font-size: 12px;
    font-weight: 700;
    color: blue
}

.warning {
    border-bottom: 1px solid red !important
}
Now we are done friends. If you have any kind of query or suggestion or any requirement then feel free to comment below.
Note: Friends, I just tell the basic setup and things, you can change the code according to your requirements.
I will appreciate that if you will tell your views for this post. Nothing matters if your views will be good or bad.
Jassa
Thanks

Leave a Reply
You must be logged in to post a comment.