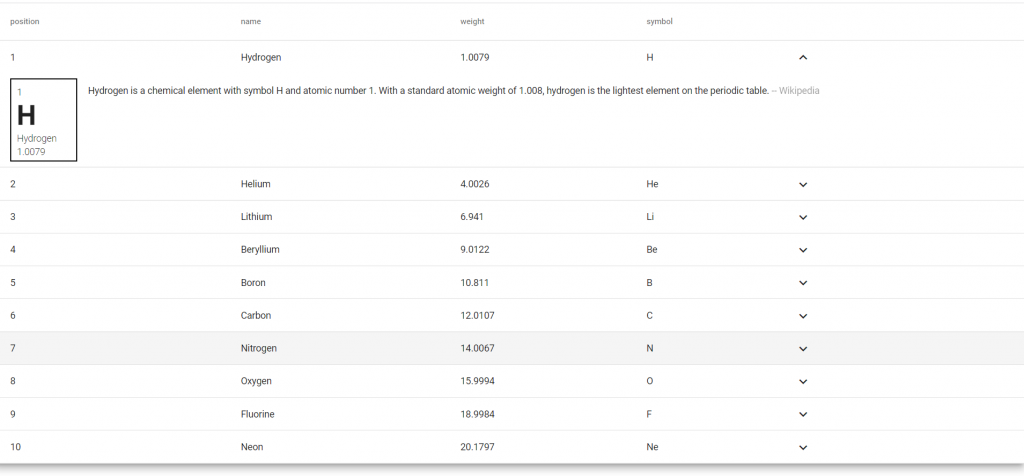
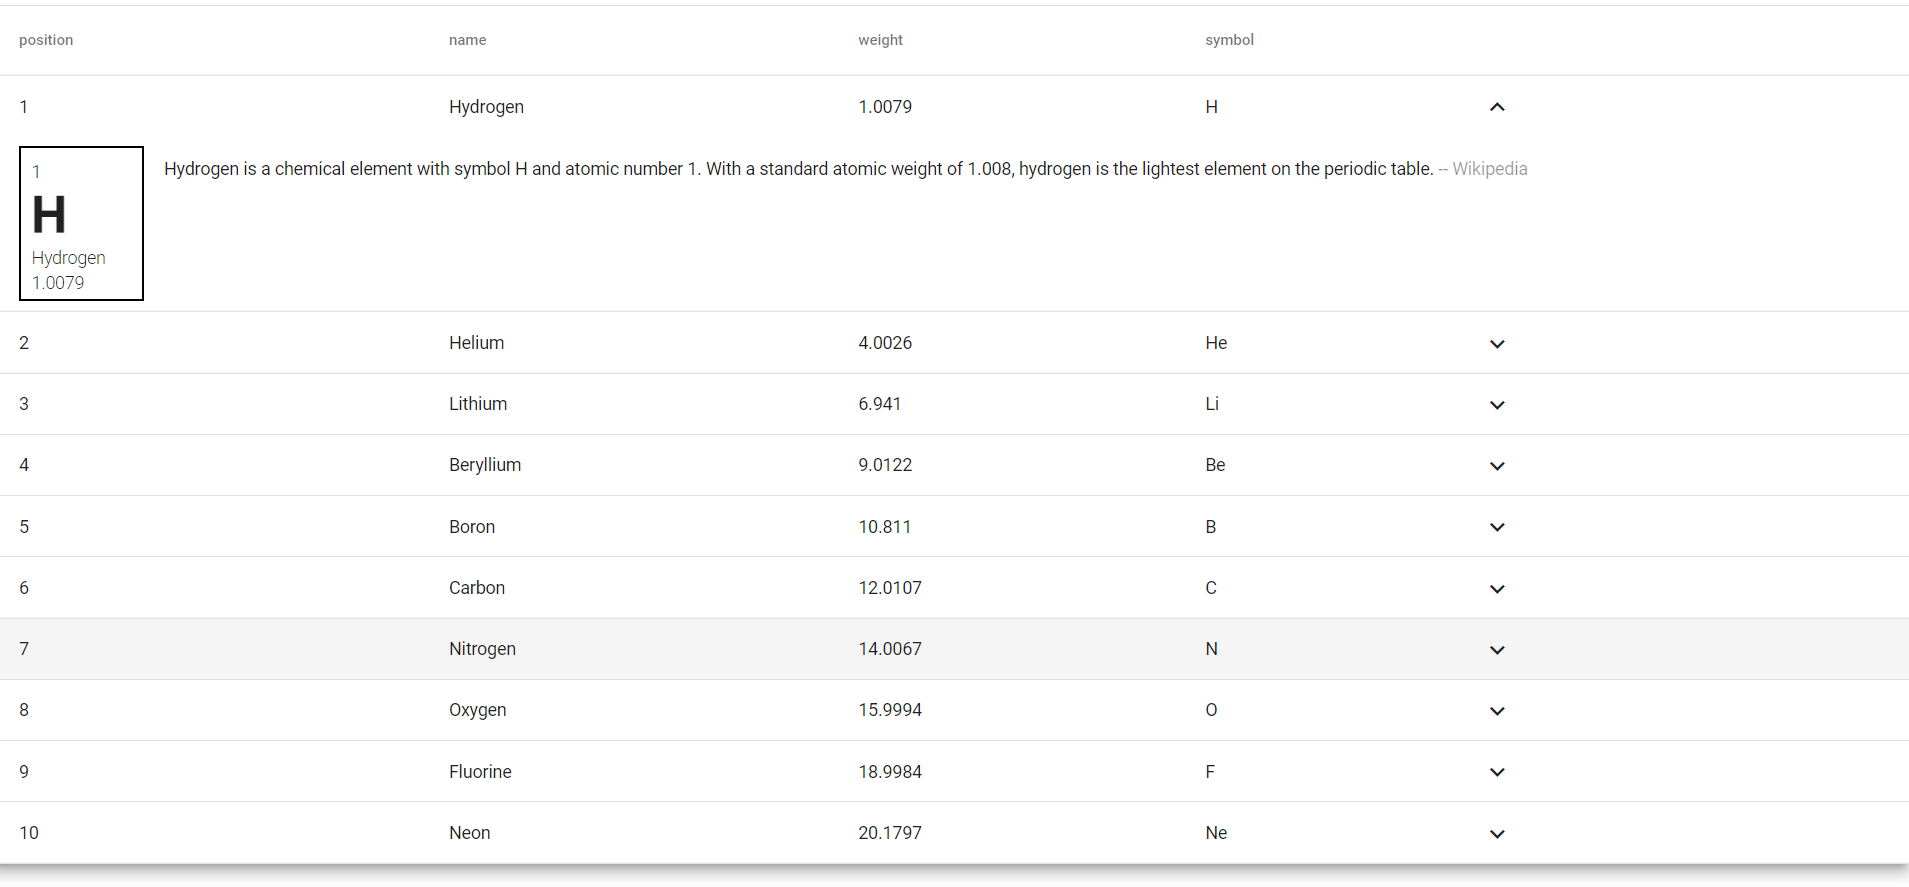
Hello my friends, welcome back to my blog. Today in this blog post, I am going to tell you, Angular 14 Material Table with Row Expand and Collapse Functionality.
Angular 14 came and if you are new then you must check below links:

Friends now I proceed onwards and here is the working code snippet for Angular 14 Material Table with Row Expand and Collapse Functionality and please use this code snippet carefully to avoid the mistakes:
1. Firstly friends we need fresh angular 14 setup and for this we need to run below commands but if you already have angular 14 setup then you can avoid below commands. Secondly we should also have latest node version installed on our system:
npm install -g @angular/cli

ng new angularmaterialtable // Set Angular 14 Application on your pc

cd angularmaterialtable // Go inside project folder

ng serve --o // Run project http://localhost:4200/  //Check working Local server
2. Now friends we need to run below command into our project terminal to get angular material modules:
ng add @angular/material

ng serve --o
3. Now friends we need to add below code inside our src/app/app.module.ts file:
import { NgModule } from '@angular/core';
import { BrowserModule } from '@angular/platform-browser';

import { AppRoutingModule } from './app-routing.module';
import { AppComponent } from './app.component';
import { BrowserAnimationsModule } from '@angular/platform-browser/animations';
import { MatIconModule } from '@angular/material/icon';
import {MatTableModule} from '@angular/material/table';
import {MatPaginatorModule} from '@angular/material/paginator';
import { MatButtonModule } from '@angular/material/button';
@NgModule({
  declarations: [
    AppComponent
  ],
  imports: [
    BrowserModule,
    AppRoutingModule,
    BrowserAnimationsModule,
    MatTableModule,
    MatPaginatorModule,
    MatIconModule,
    MatButtonModule
  ],
  providers: [],
  bootstrap: [AppComponent]
})
export class AppModule { }
4. Now friends we need to add below code inside our project/src/app/app.component.ts file to set angular material table data and other settings like row expand, pagination:
import { Component, ViewChild } from '@angular/core';
import {MatPaginator} from '@angular/material/paginator';
import {MatTableDataSource} from '@angular/material/table';
import {animate, state, style, transition, trigger} from '@angular/animations';
@Component({
  selector: 'app-root',
  templateUrl: './app.component.html',
  styleUrls: ['./app.component.css'],
  animations: [
    trigger('detailExpand', [
      state('collapsed', style({height: '0px', minHeight: '0'})),
      state('expanded', style({height: '*'})),
      transition('expanded <=> collapsed', animate('225ms cubic-bezier(0.4, 0.0, 0.2, 1)')),
    ]),
  ],
})
export class AppComponent {
  title = 'angularmaterial';
  //Columns names, table data from datasource, pagination and sorting
  columnsToDisplay: string[] = ['position', 'name', 'weight', 'symbol'];
  dataSource = new MatTableDataSource<PeriodicElement>(ELEMENT_DATA);
  @ViewChild(MatPaginator, {static: true}) paginator:any = MatPaginator;
  expandedElement: PeriodicElement | null | undefined;
  columnsToDisplayWithExpand = [...this.columnsToDisplay, 'expand'];
  ngOnInit() {
    this.dataSource.paginator = this.paginator;

  }
}
//Columns data types
export interface PeriodicElement {
  name: string;
  position: number;
  weight: number;
  symbol: string;
  description: string;
}

const ELEMENT_DATA: PeriodicElement[] = [
  {
    position: 1,
    name: 'Hydrogen',
    weight: 1.0079,
    symbol: 'H',
    description: `Hydrogen is a chemical element with symbol H and atomic number 1. With a standard
        atomic weight of 1.008, hydrogen is the lightest element on the periodic table.`
  }, {
    position: 2,
    name: 'Helium',
    weight: 4.0026,
    symbol: 'He',
    description: `Helium is a chemical element with symbol He and atomic number 2. It is a
        colorless, odorless, tasteless, non-toxic, inert, monatomic gas, the first in the noble gas
        group in the periodic table. Its boiling point is the lowest among all the elements.`
  }, {
    position: 3,
    name: 'Lithium',
    weight: 6.941,
    symbol: 'Li',
    description: `Lithium is a chemical element with symbol Li and atomic number 3. It is a soft,
        silvery-white alkali metal. Under standard conditions, it is the lightest metal and the
        lightest solid element.`
  }, {
    position: 4,
    name: 'Beryllium',
    weight: 9.0122,
    symbol: 'Be',
    description: `Beryllium is a chemical element with symbol Be and atomic number 4. It is a
        relatively rare element in the universe, usually occurring as a product of the spallation of
        larger atomic nuclei that have collided with cosmic rays.`
  }, {
    position: 5,
    name: 'Boron',
    weight: 10.811,
    symbol: 'B',
    description: `Boron is a chemical element with symbol B and atomic number 5. Produced entirely
        by cosmic ray spallation and supernovae and not by stellar nucleosynthesis, it is a
        low-abundance element in the Solar system and in the Earth's crust.`
  }, {
    position: 6,
    name: 'Carbon',
    weight: 12.0107,
    symbol: 'C',
    description: `Carbon is a chemical element with symbol C and atomic number 6. It is nonmetallic
        and tetravalent—making four electrons available to form covalent chemical bonds. It belongs
        to group 14 of the periodic table.`
  }, {
    position: 7,
    name: 'Nitrogen',
    weight: 14.0067,
    symbol: 'N',
    description: `Nitrogen is a chemical element with symbol N and atomic number 7. It was first
        discovered and isolated by Scottish physician Daniel Rutherford in 1772.`
  }, {
    position: 8,
    name: 'Oxygen',
    weight: 15.9994,
    symbol: 'O',
    description: `Oxygen is a chemical element with symbol O and atomic number 8. It is a member of
         the chalcogen group on the periodic table, a highly reactive nonmetal, and an oxidizing
         agent that readily forms oxides with most elements as well as with other compounds.`
  }, {
    position: 9,
    name: 'Fluorine',
    weight: 18.9984,
    symbol: 'F',
    description: `Fluorine is a chemical element with symbol F and atomic number 9. It is the
        lightest halogen and exists as a highly toxic pale yellow diatomic gas at standard
        conditions.`
  }, {
    position: 10,
    name: 'Neon',
    weight: 20.1797,
    symbol: 'Ne',
    description: `Neon is a chemical element with symbol Ne and atomic number 10. It is a noble gas.
        Neon is a colorless, odorless, inert monatomic gas under standard conditions, with about
        two-thirds the density of air.`
  },
];
5. Finally friends we need to add below code into our project/src/app/app.component.html file to get the final output on web browser:
<table mat-table
[dataSource]="dataSource" multiTemplateDataRows
class="mat-elevation-z8">
<ng-container matColumnDef="{{column}}" *ngFor="let column of columnsToDisplay">
<th mat-header-cell *matHeaderCellDef> {{column}} </th>
<td mat-cell *matCellDef="let element"> {{element[column]}} </td>
</ng-container>
<ng-container matColumnDef="expand">
<th mat-header-cell *matHeaderCellDef aria-label="row actions"> </th>
<td mat-cell *matCellDef="let element">
<button mat-icon-button aria-label="expand row" (click)="(expandedElement = expandedElement === element ? null : element); $event.stopPropagation()">
<mat-icon *ngIf="expandedElement !== element">keyboard_arrow_down</mat-icon>
<mat-icon *ngIf="expandedElement === element">keyboard_arrow_up</mat-icon>
</button>
</td>
</ng-container>
<!-- Expanded Content Column - The detail row is made up of this one column that spans across all columns -->
<ng-container matColumnDef="expandedDetail">
<td mat-cell *matCellDef="let element" [attr.colspan]="columnsToDisplayWithExpand.length">
<div class="example-element-detail"
[@detailExpand]="element == expandedElement ? 'expanded' : 'collapsed'">
<div class="example-element-diagram">
<div class="example-element-position"> {{element.position}} </div>
<div class="example-element-symbol"> {{element.symbol}} </div>
<div class="example-element-name"> {{element.name}} </div>
<div class="example-element-weight"> {{element.weight}} </div>
</div>
<div class="example-element-description">
{{element.description}}
<span class="example-element-description-attribution"> -- Wikipedia </span>
</div>
</div>
</td>
</ng-container>
<tr mat-header-row *matHeaderRowDef="columnsToDisplayWithExpand"></tr>
<tr mat-row *matRowDef="let element; columns: columnsToDisplayWithExpand;"
class="example-element-row"
[class.example-expanded-row]="expandedElement === element"
(click)="expandedElement = expandedElement === element ? null : element">
</tr>
<tr mat-row *matRowDef="let row; columns: ['expandedDetail']" class="example-detail-row"></tr>
</table>
6. In the end friends for angular material table styling, we just need to add below code into our project/src/app/app.component.css file:
table {
    width: 100%;
  }

  tr.example-detail-row {
    height: 0;
  }

  tr.example-element-row:not(.example-expanded-row):hover {
    background: whitesmoke;
  }

  tr.example-element-row:not(.example-expanded-row):active {
    background: #efefef;
  }

  .example-element-row td {
    border-bottom-width: 0;
  }

  .example-element-detail {
    overflow: hidden;
    display: flex;
  }

  .example-element-diagram {
    min-width: 80px;
    border: 2px solid black;
    padding: 8px;
    font-weight: lighter;
    margin: 8px 0;
    height: 104px;
  }

  .example-element-symbol {
    font-weight: bold;
    font-size: 40px;
    line-height: normal;
  }

  .example-element-description {
    padding: 16px;
  }

  .example-element-description-attribution {
    opacity: 0.5;
  }
Now we are done friends. If you have any kind of query, suggestion and new requirement then feel free to comment below.
Note: Friends, In this post, I just tell the basic setup and things, you can change the code according to your requirements. For better live working experience, please check the video on the top.
I will appreciate that if you will tell your views for this post. Nothing matters if your views will be good or bad because with your views, I will make my next posts more good and helpful.
Jassa
Developers King
Thanks

Leave a Reply
You must be logged in to post a comment.